This is a guide on how to add electricity to your own custom blueprints, keep in mind this is for blueprints that you don’t need the player to be able to place in the level or delete with the placement system. For blueprints like that you will need to follow the video linked below for adding new devices.
Component
Start by going to your blueprint and in the Components panel click the Add button and add the BP MasterPowerComponent.
Interfaces
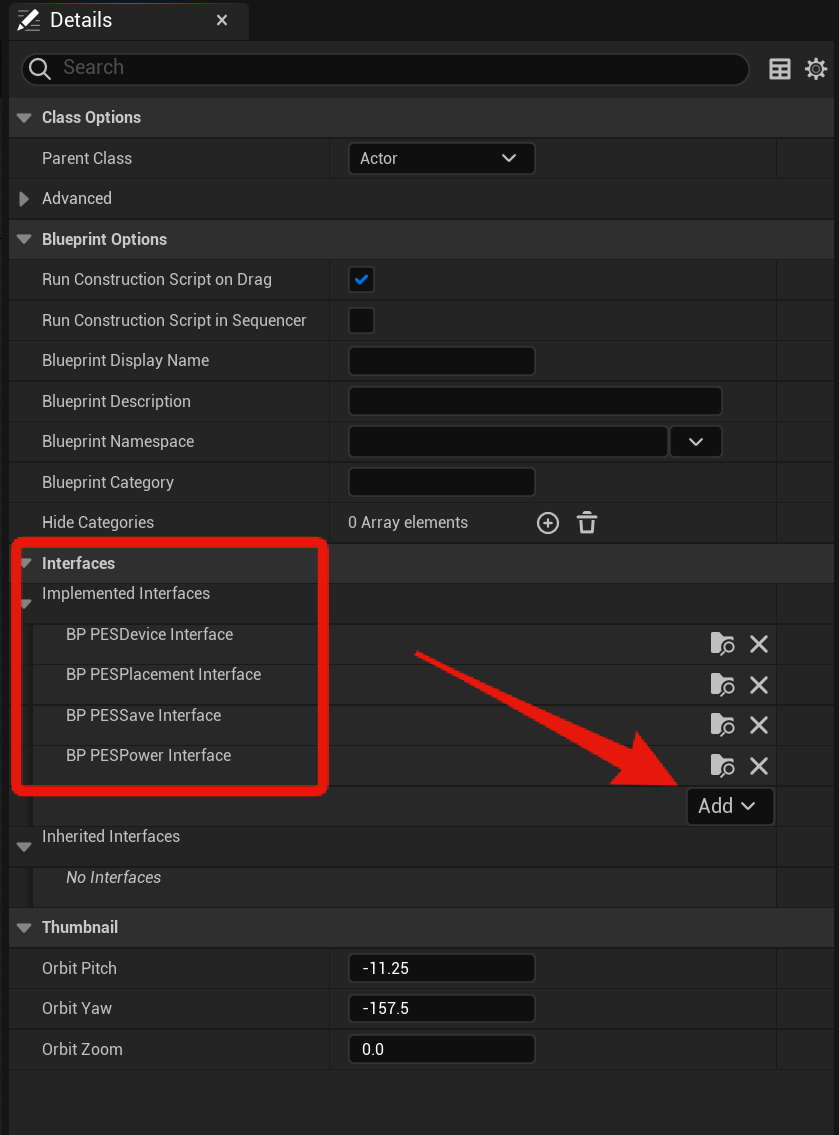
Then click the Class Settings and add the Interface blueprints shown in the image below, to add a new interface click the Add button and search for the interface name. Depending on your engine version the Add button may be under the Inherited Interfaces section, if it is then use that Add button.
Blueprints Code
Next create a new Boolean variable and call it LoadedBySave.
Next create a new Boolean variable and call it DestroyedBySaveLoad.
Next copy the images below,


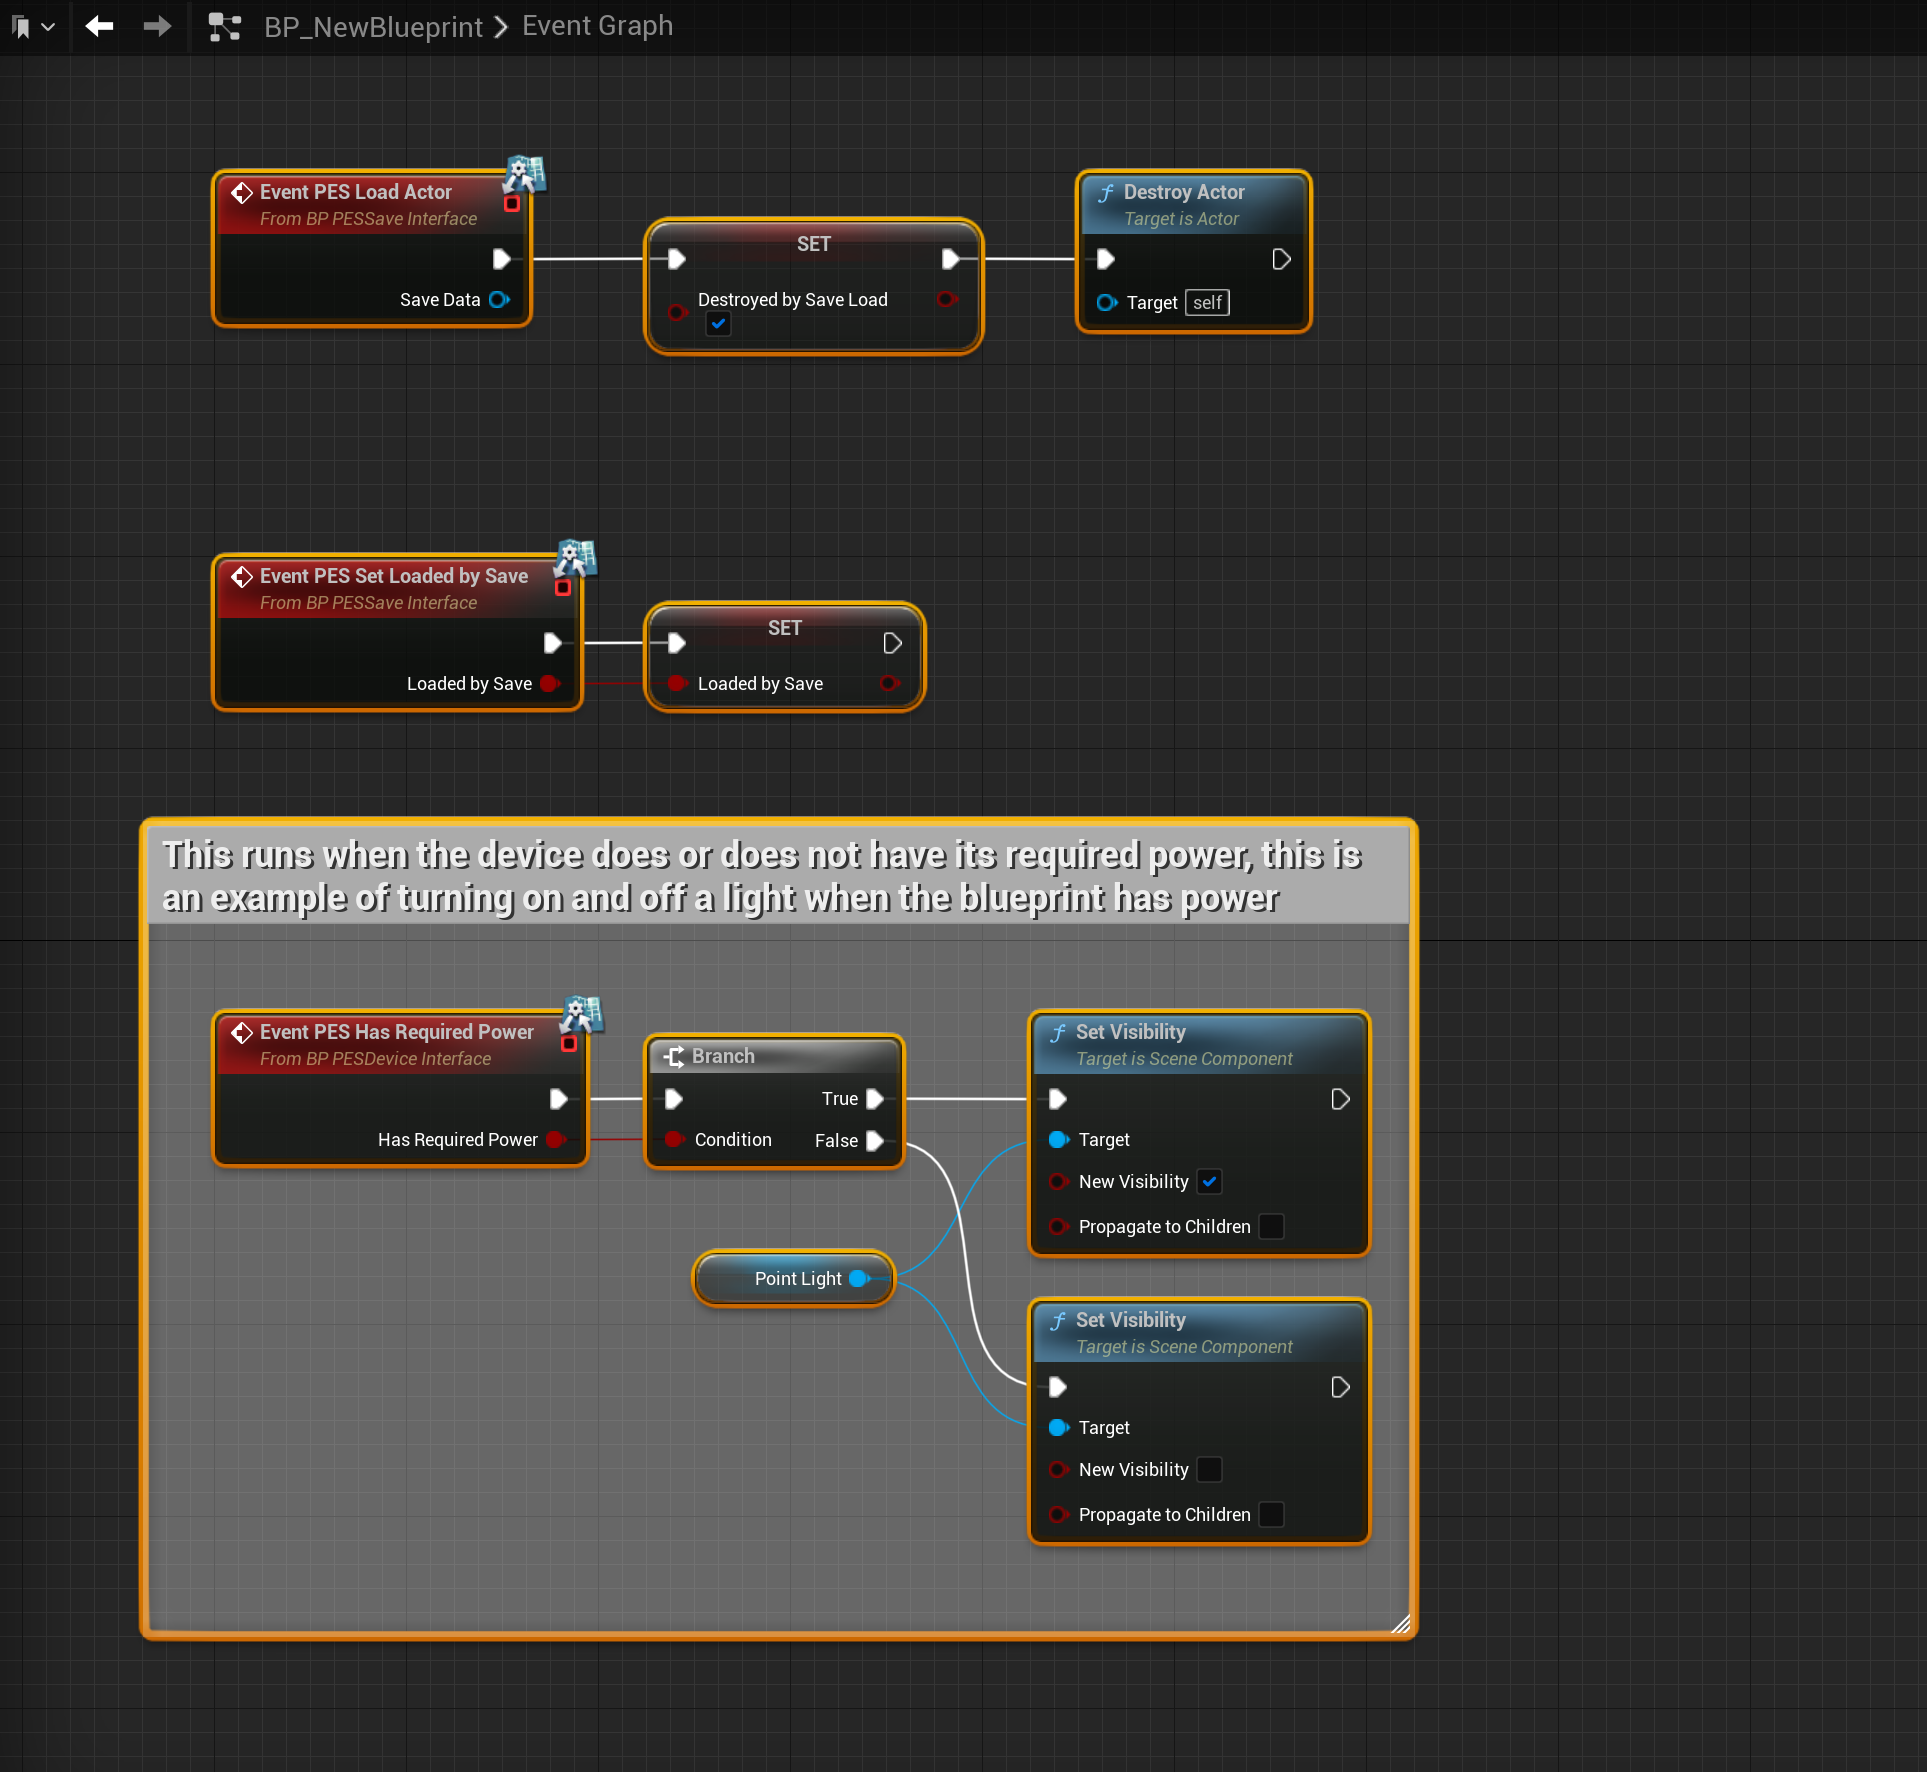
The PES Has Required Power event is run whenever the device does or does not have its required power, this can be used to run whatever code you need you blueprint to run when power is or isnt provided to it. The example in the image above turns on and off a light, the Point Light component also has its Visible setting turned off in its components settings so it starts off.

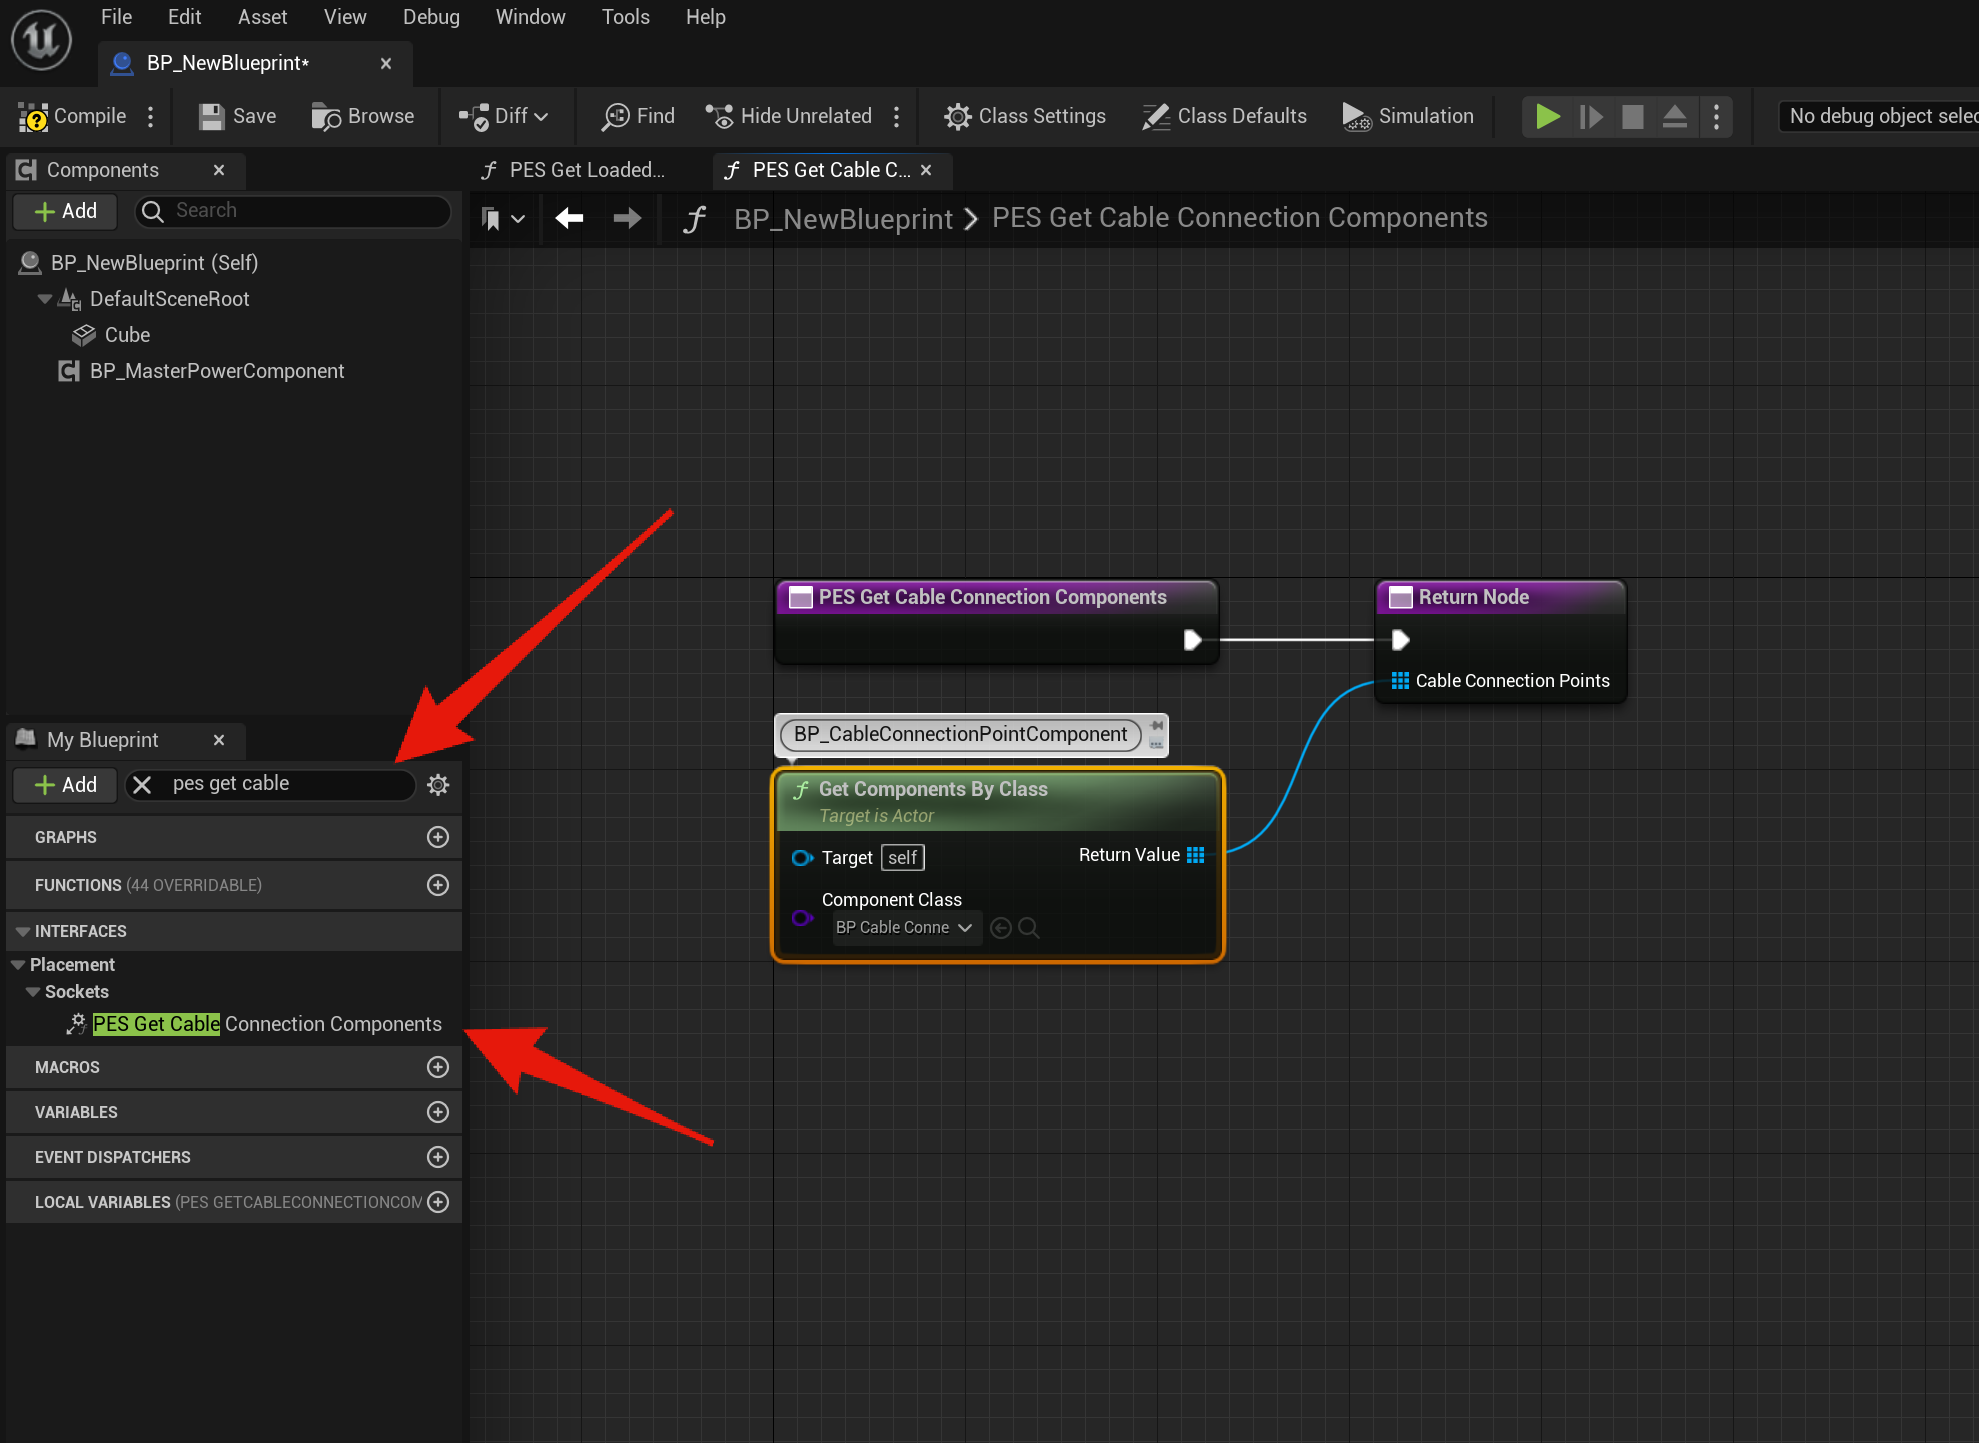
Cable Connection Points
Next you’ll need to add cable connection point components to the blueprint in its viewport for cables to connect to the blueprint, you will also need to set each connection point to either input or output and set its Display name, this is the name the player see when the look at the socket while using the cable tool.
Power Component Settings
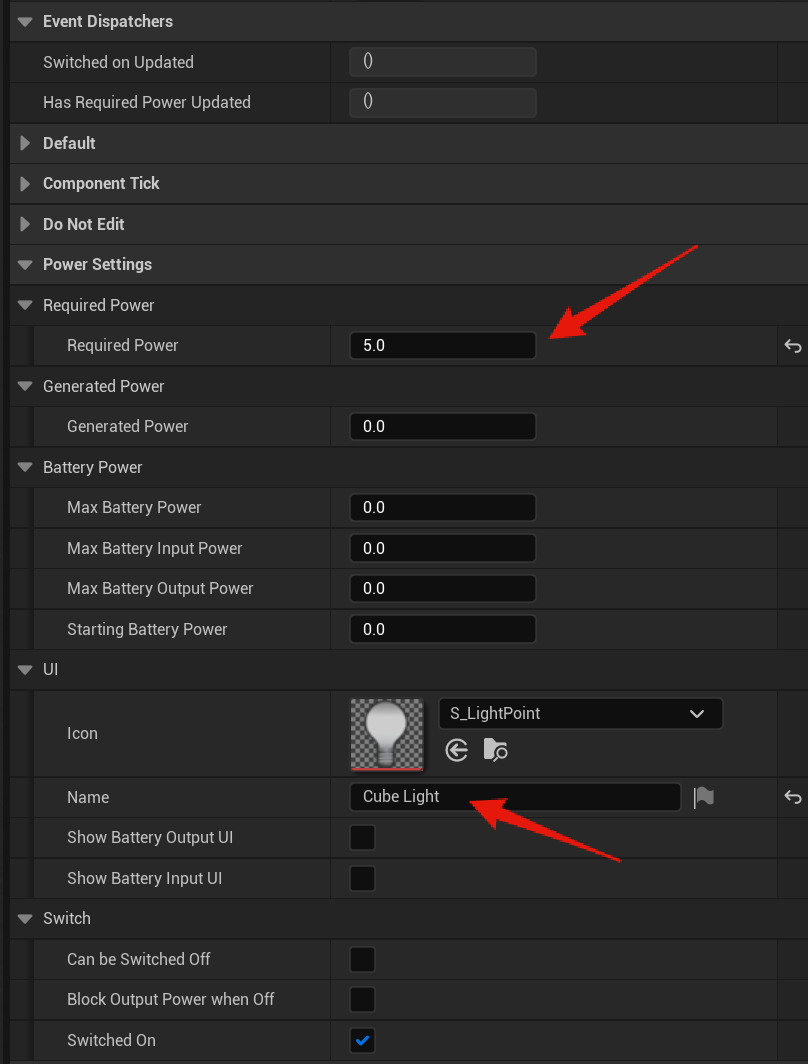
Next you’ll need to setup the settings for the BP_MasterPowerComponent, to do this select the BP_MasterPowerComponent in the Components panel and in the Details panel find the Power Settings category, here you can set your blueprints power settings.
You can find more info about these settings like the documentation in the Power Settings category linked below.
For this example I set my settings like the image below.
You can now drag you blueprint into the level and the player should be able to connect your blueprint to other devices to receive power.
Interaction
If you want the player to be able to interact with your blueprint to turn it on, off or run you own other code first go back to your blueprints Class Settings and then in the interfaces add the BP_PESInteractionInterface like the image below and then compile the blueprint.

Next copy the image below,

This code runs when the blueprint is interacted with and calls the Set Switched On variable in the power component.
Next you will need to modify the PES Has Required Power event’s code that we added before to check if when the device has power is it also turned on, if it is then in the example we turn on the light.

The PES Switched On event runs when the device is switched on or off, this gets run when the player interacts with the blueprint, this code then checks if the device is being turn on or off and if its being turned on it checks if the power component has its required power, if it does turns on the light if it doesn’t the light wont turn on.
You should now be able to interact with your blueprint to turn it on or off, keep in mind if the device doesn’t have its required power then it will not turn on.
There are several example of how you can use the PES Switch On and PES Has Required Power events to run custom code in a blueprint, like in the BP_FlameThrower, BP_LaserDetector or BP_ElectricDoor if you would like to see more examples of how these events can be setup.
