This is a guide on how to integrate Player Electricity System into Player Building System V2.
Make a backup of you project before following this guide.
Start by migrating the PlayerElectricitySystem folder from the Player Electricity System project to your Player Building System V2 project like the video below. Make sure the engine version of both projects is the same.
Collision
In the Player Building System V2 project go to the Project Settings then go to the Collision category and copy the video below.
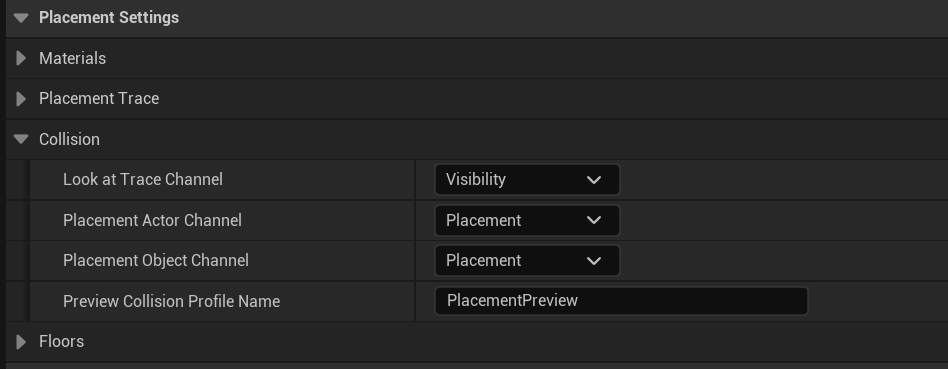
Next create the new Presets and copy the settings show in the images below.


Next edit the existing presets like shown in the video.
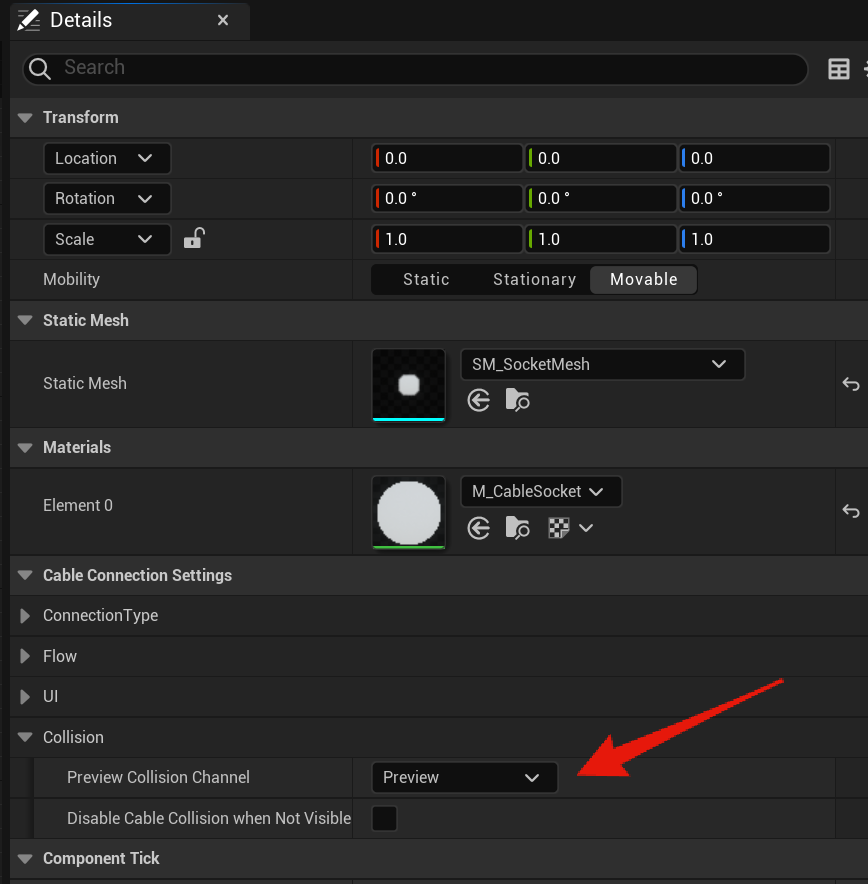
Next go to the BP_CableConnectionPointComponent and go to the Class Defaults then make sure the Preview Collision Channel is set to Preview.
Controller/Gamemode
Go to BP_PBSController and add the BP_PlayerPowerComponent using the add button in the Components panel. Then add the highlighted nodes shown in the image below. If your using your own player controller blueprint instead of the PBSController you will need to do this in there instead.

Next go BP_PBSGameMode and copy the video below, if your using your own game mode blueprint you will need to do this in there instead.
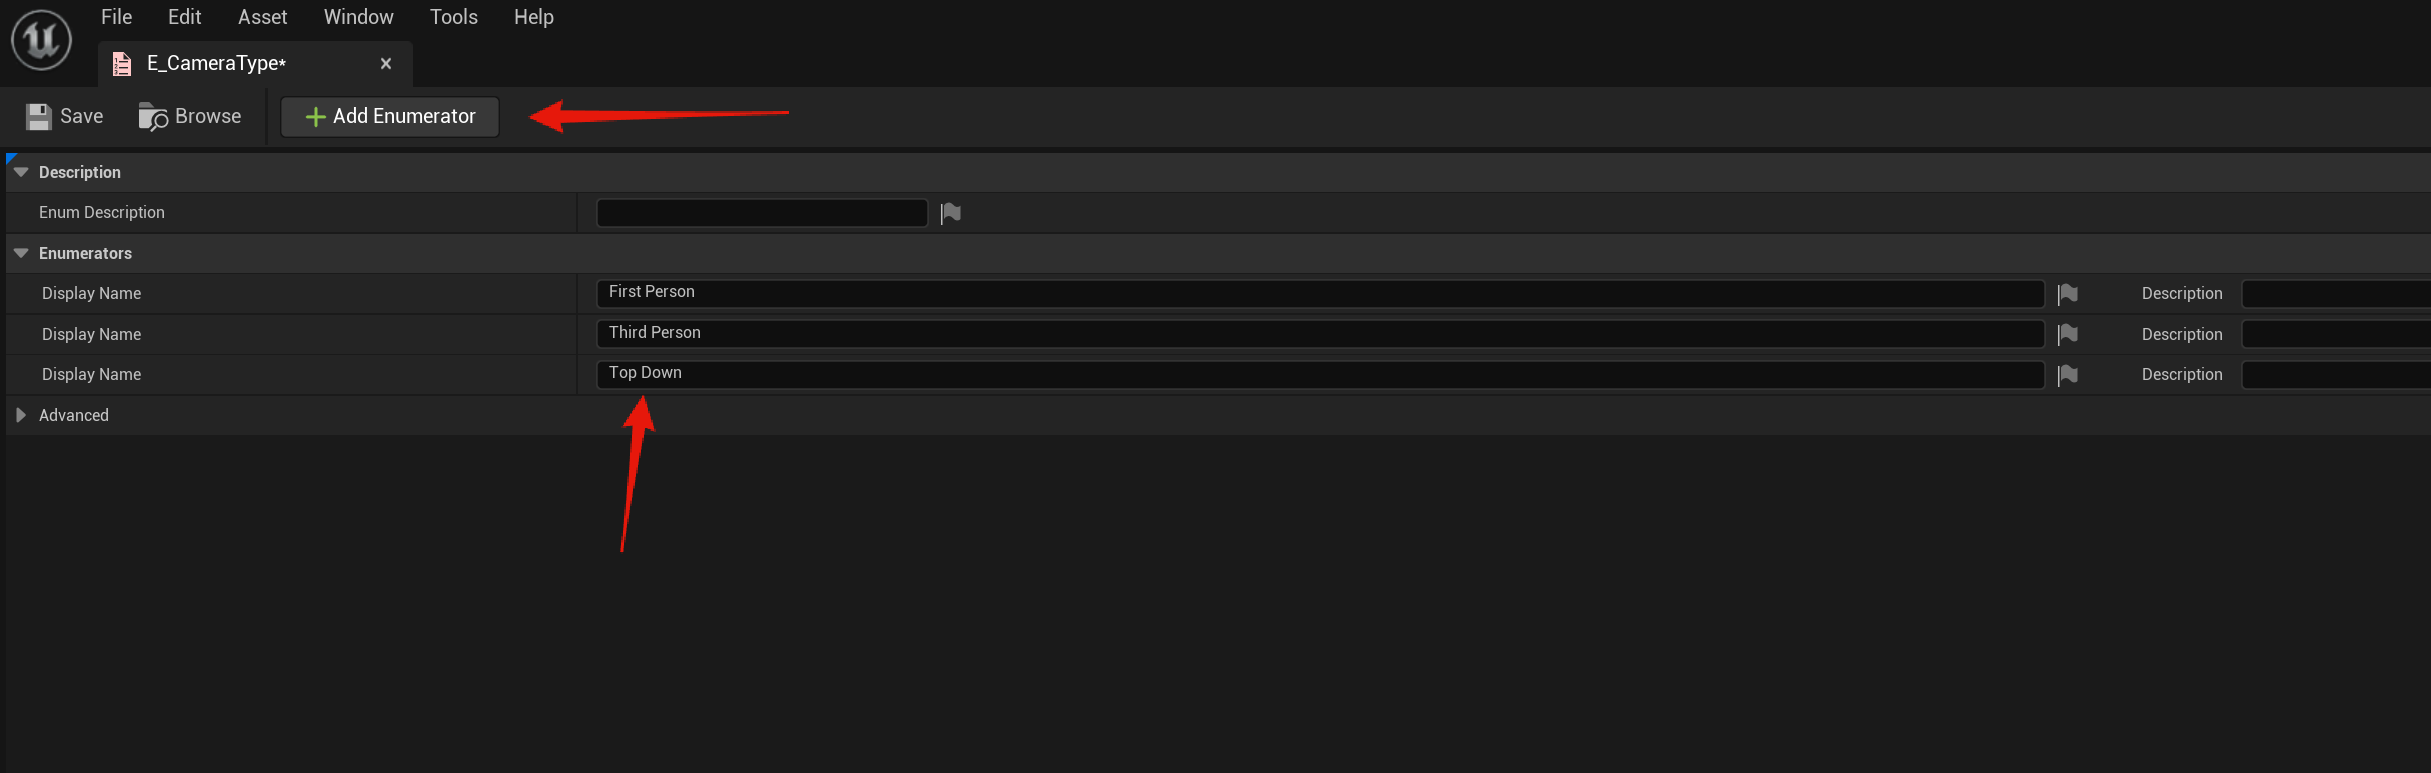
Next go to the E_CameraType in the PlayerElectricitySystem/Blueprints/Other/Enums folder and add a new entry called Top Down like the image below.
Next go to the BP_PBSCharacter and copy the video below, if your using your own character you will need to do this in that blueprint.
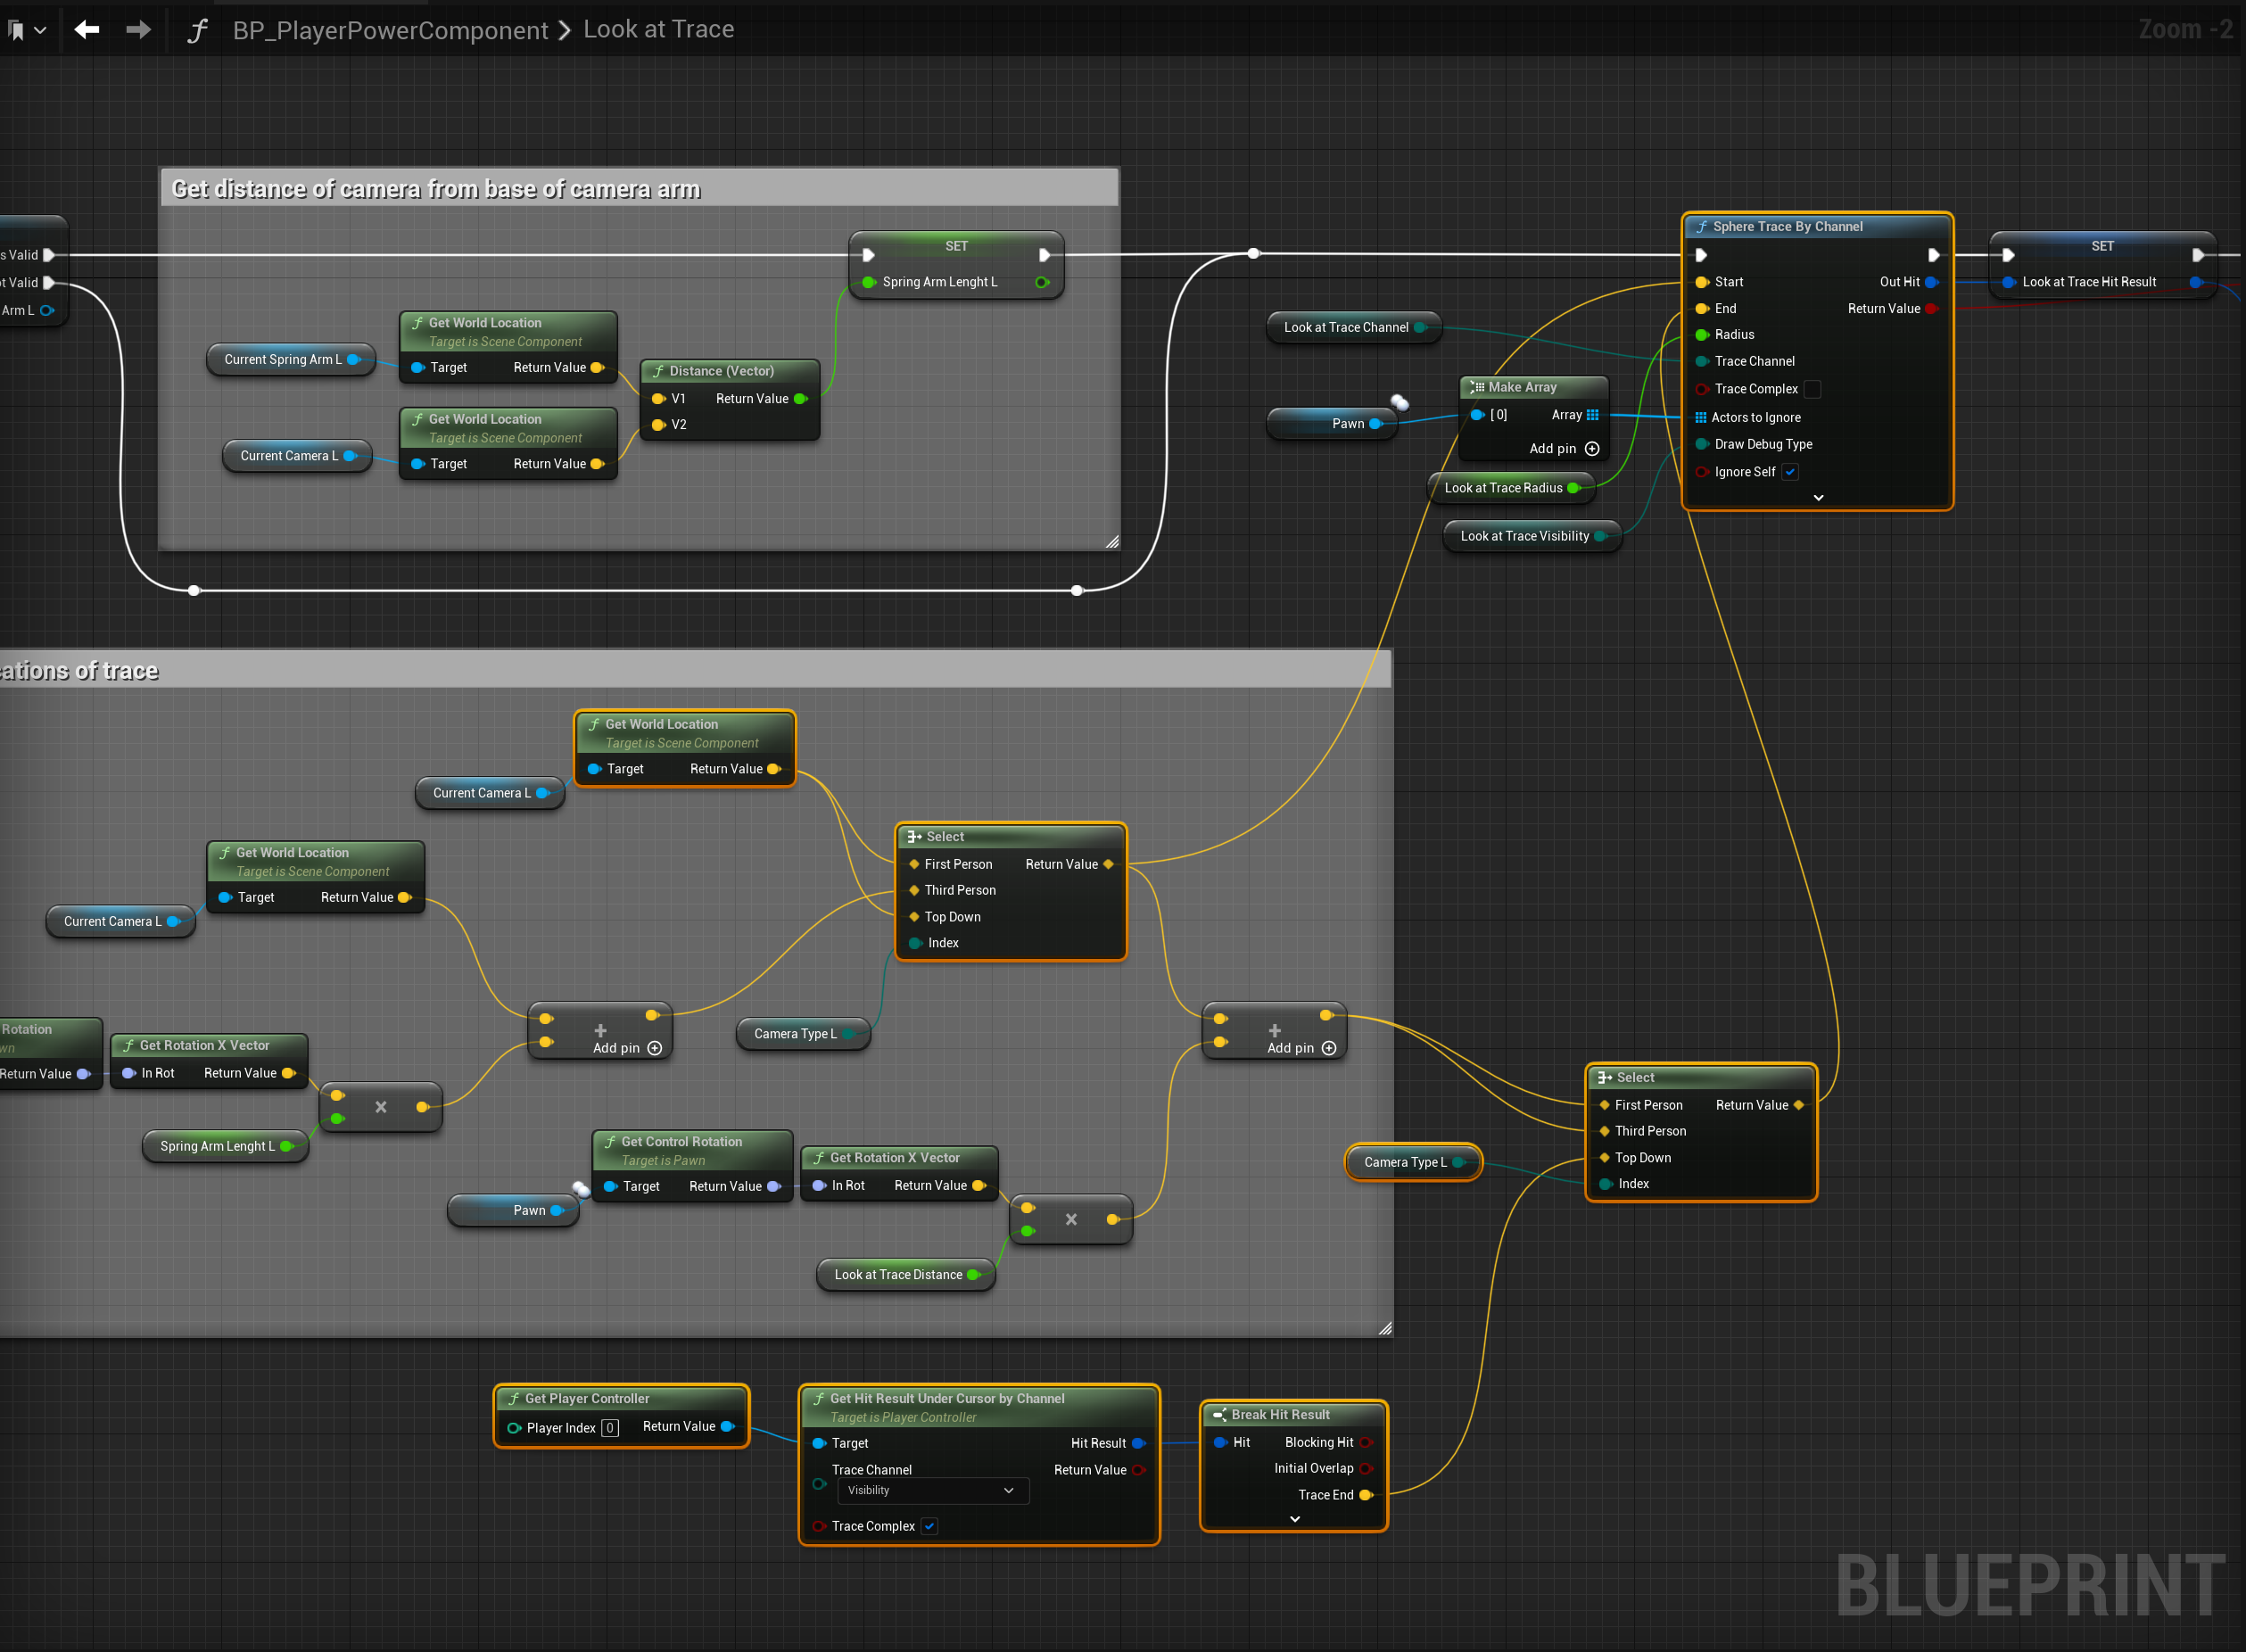
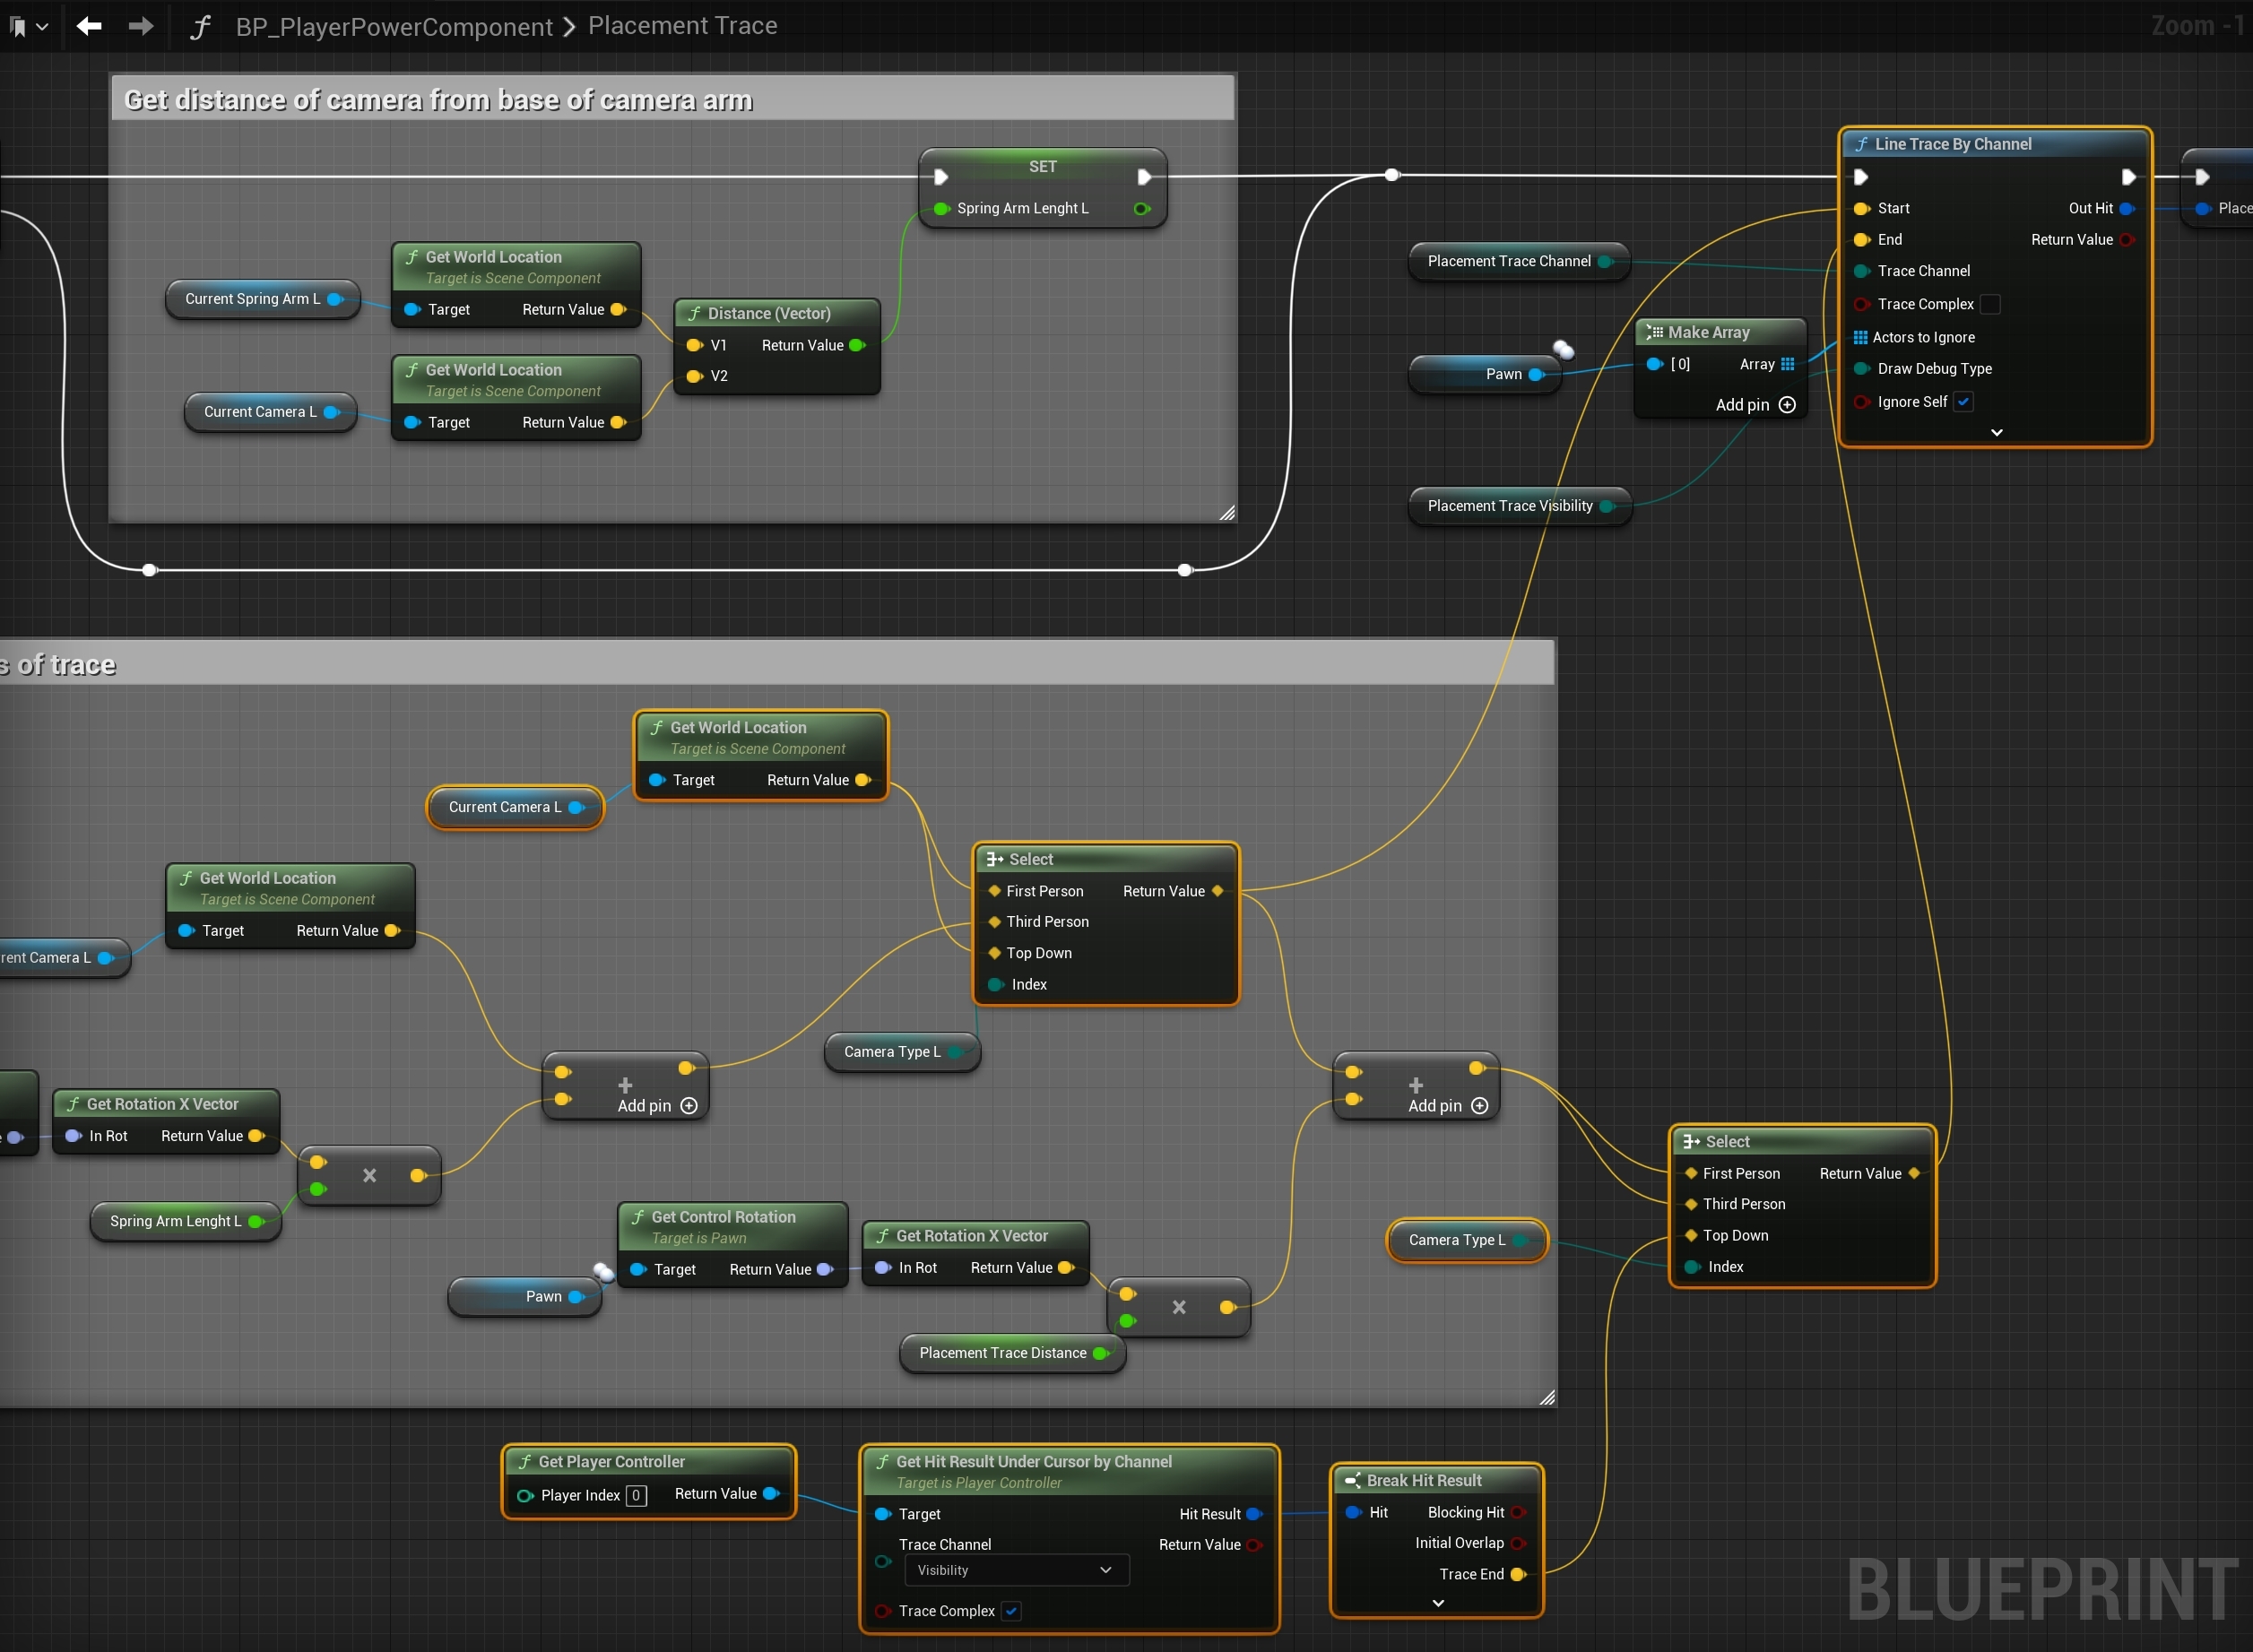
Once you finished the PES Current Camera function should look like the image below.

Open the E_BuildType in the content browser and add a new enumerator and call it Power like the image below.

At this point I recommend playing in editor, this will compile the effected blueprints, once the character loads in your can exit play in editor.
Player Building Component
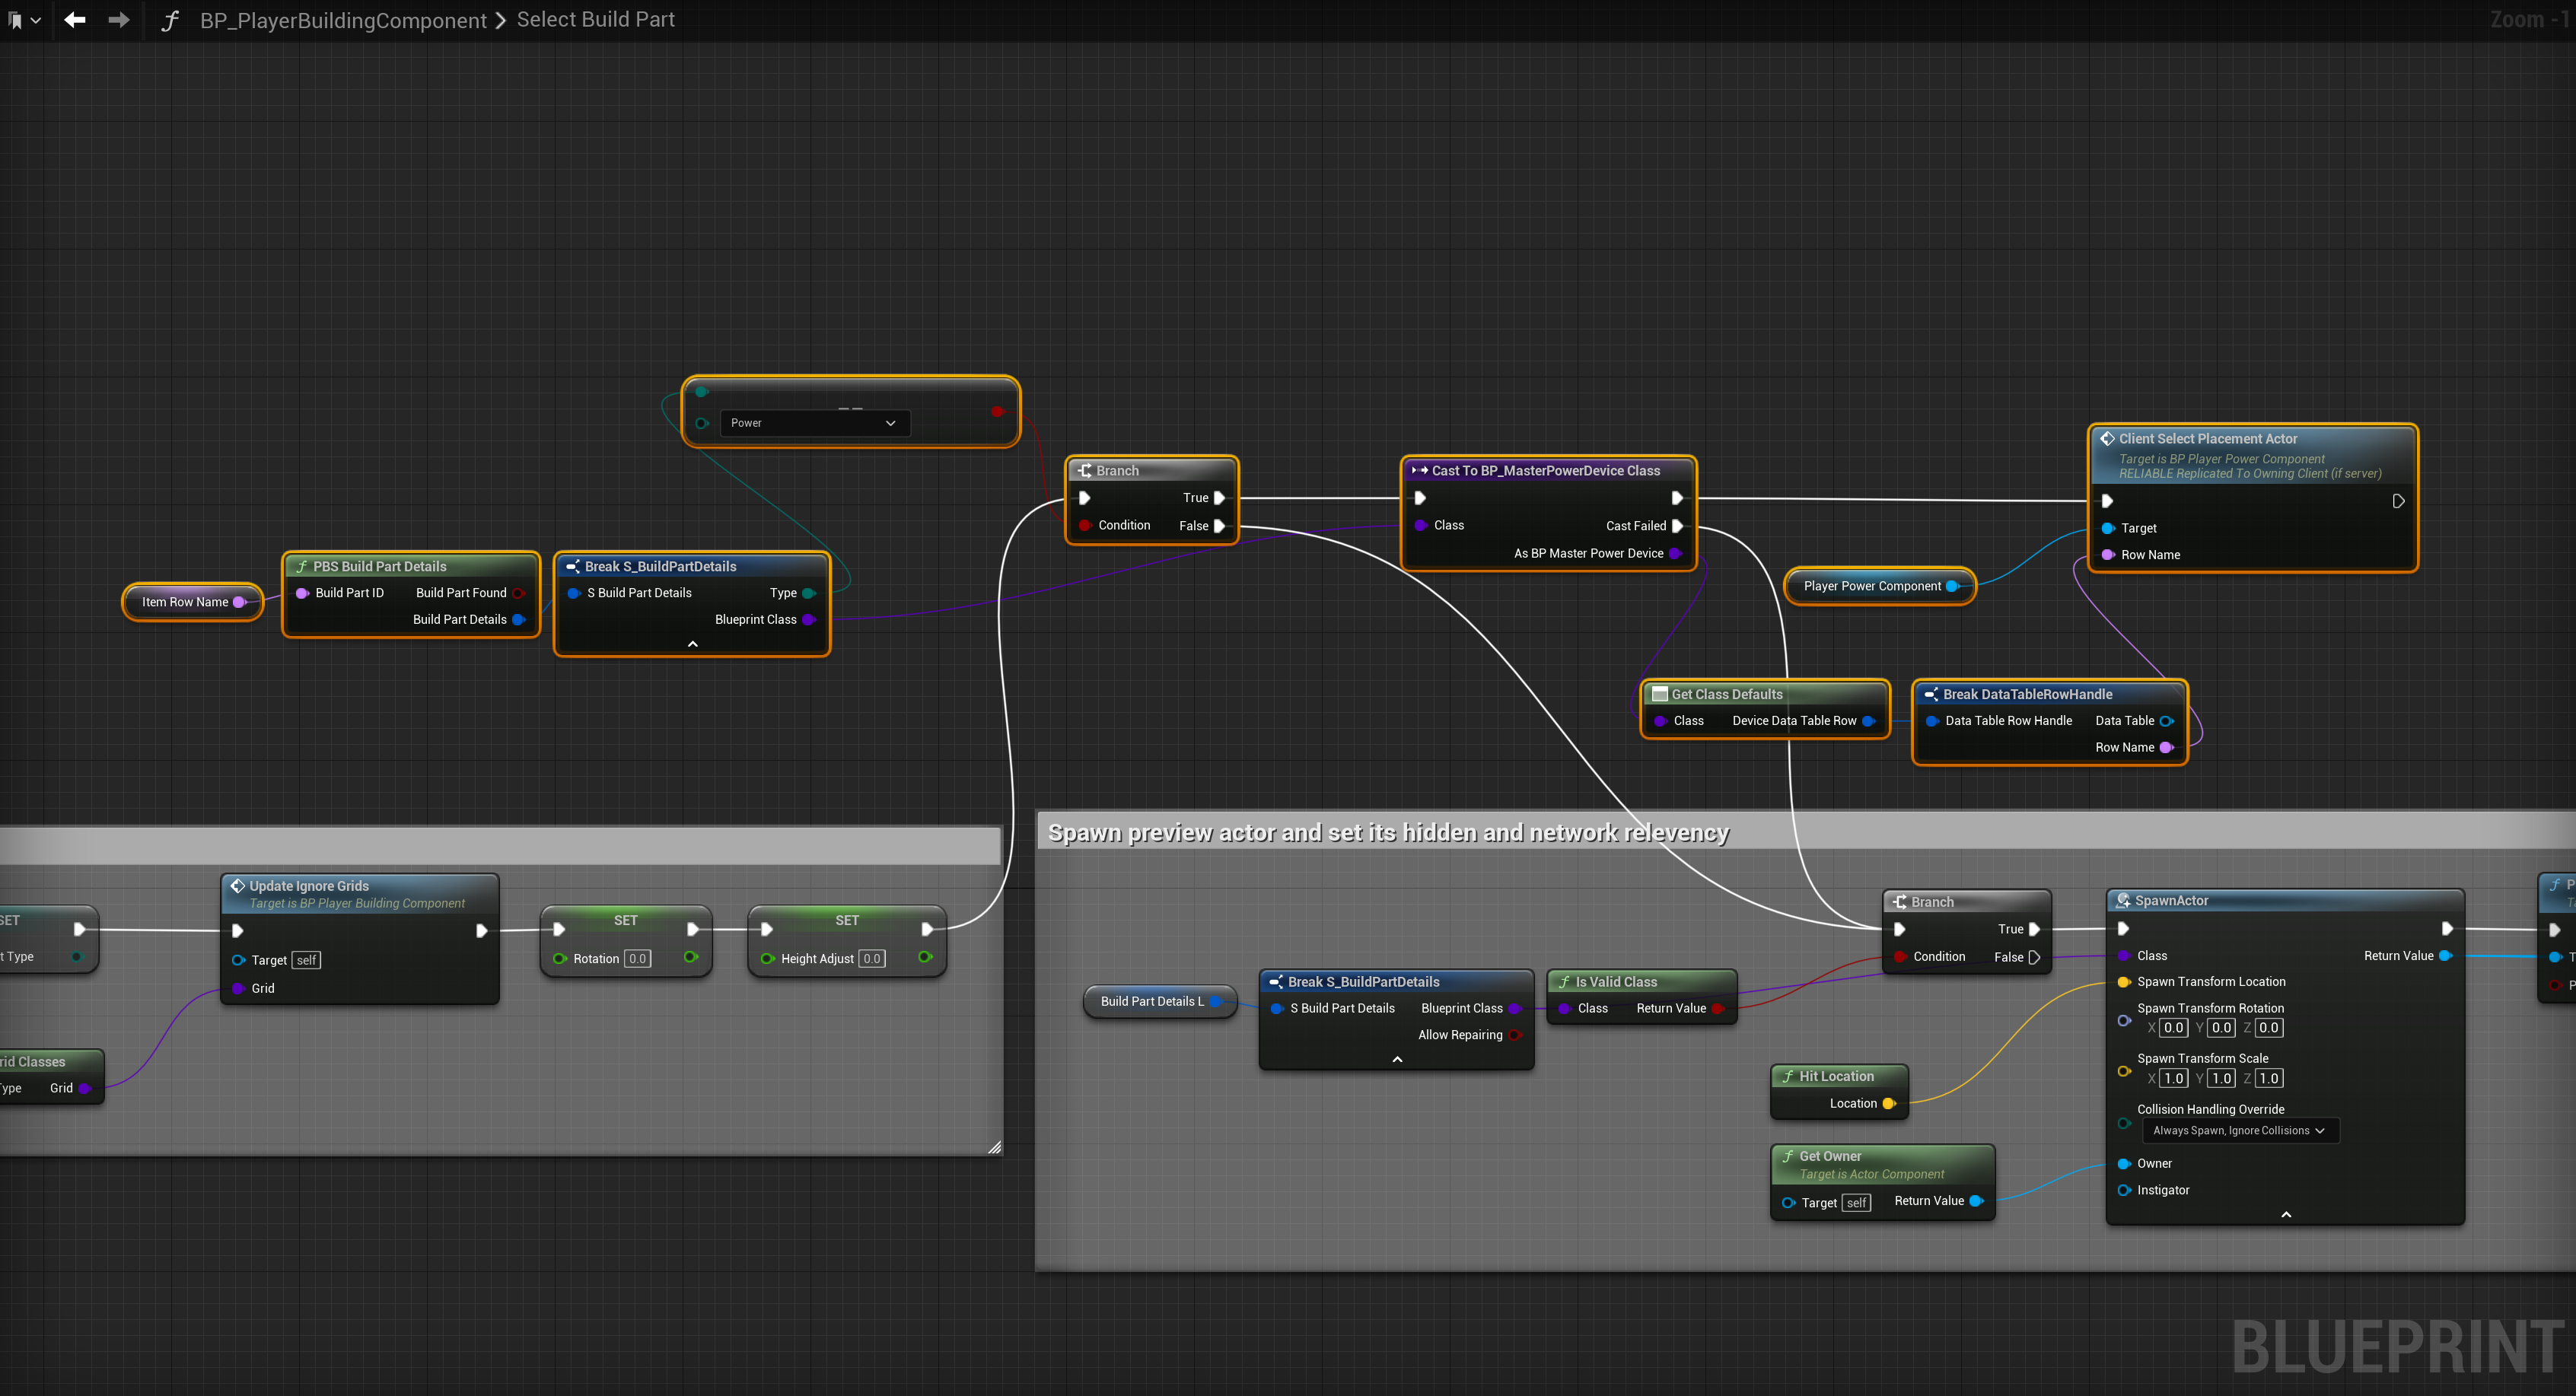
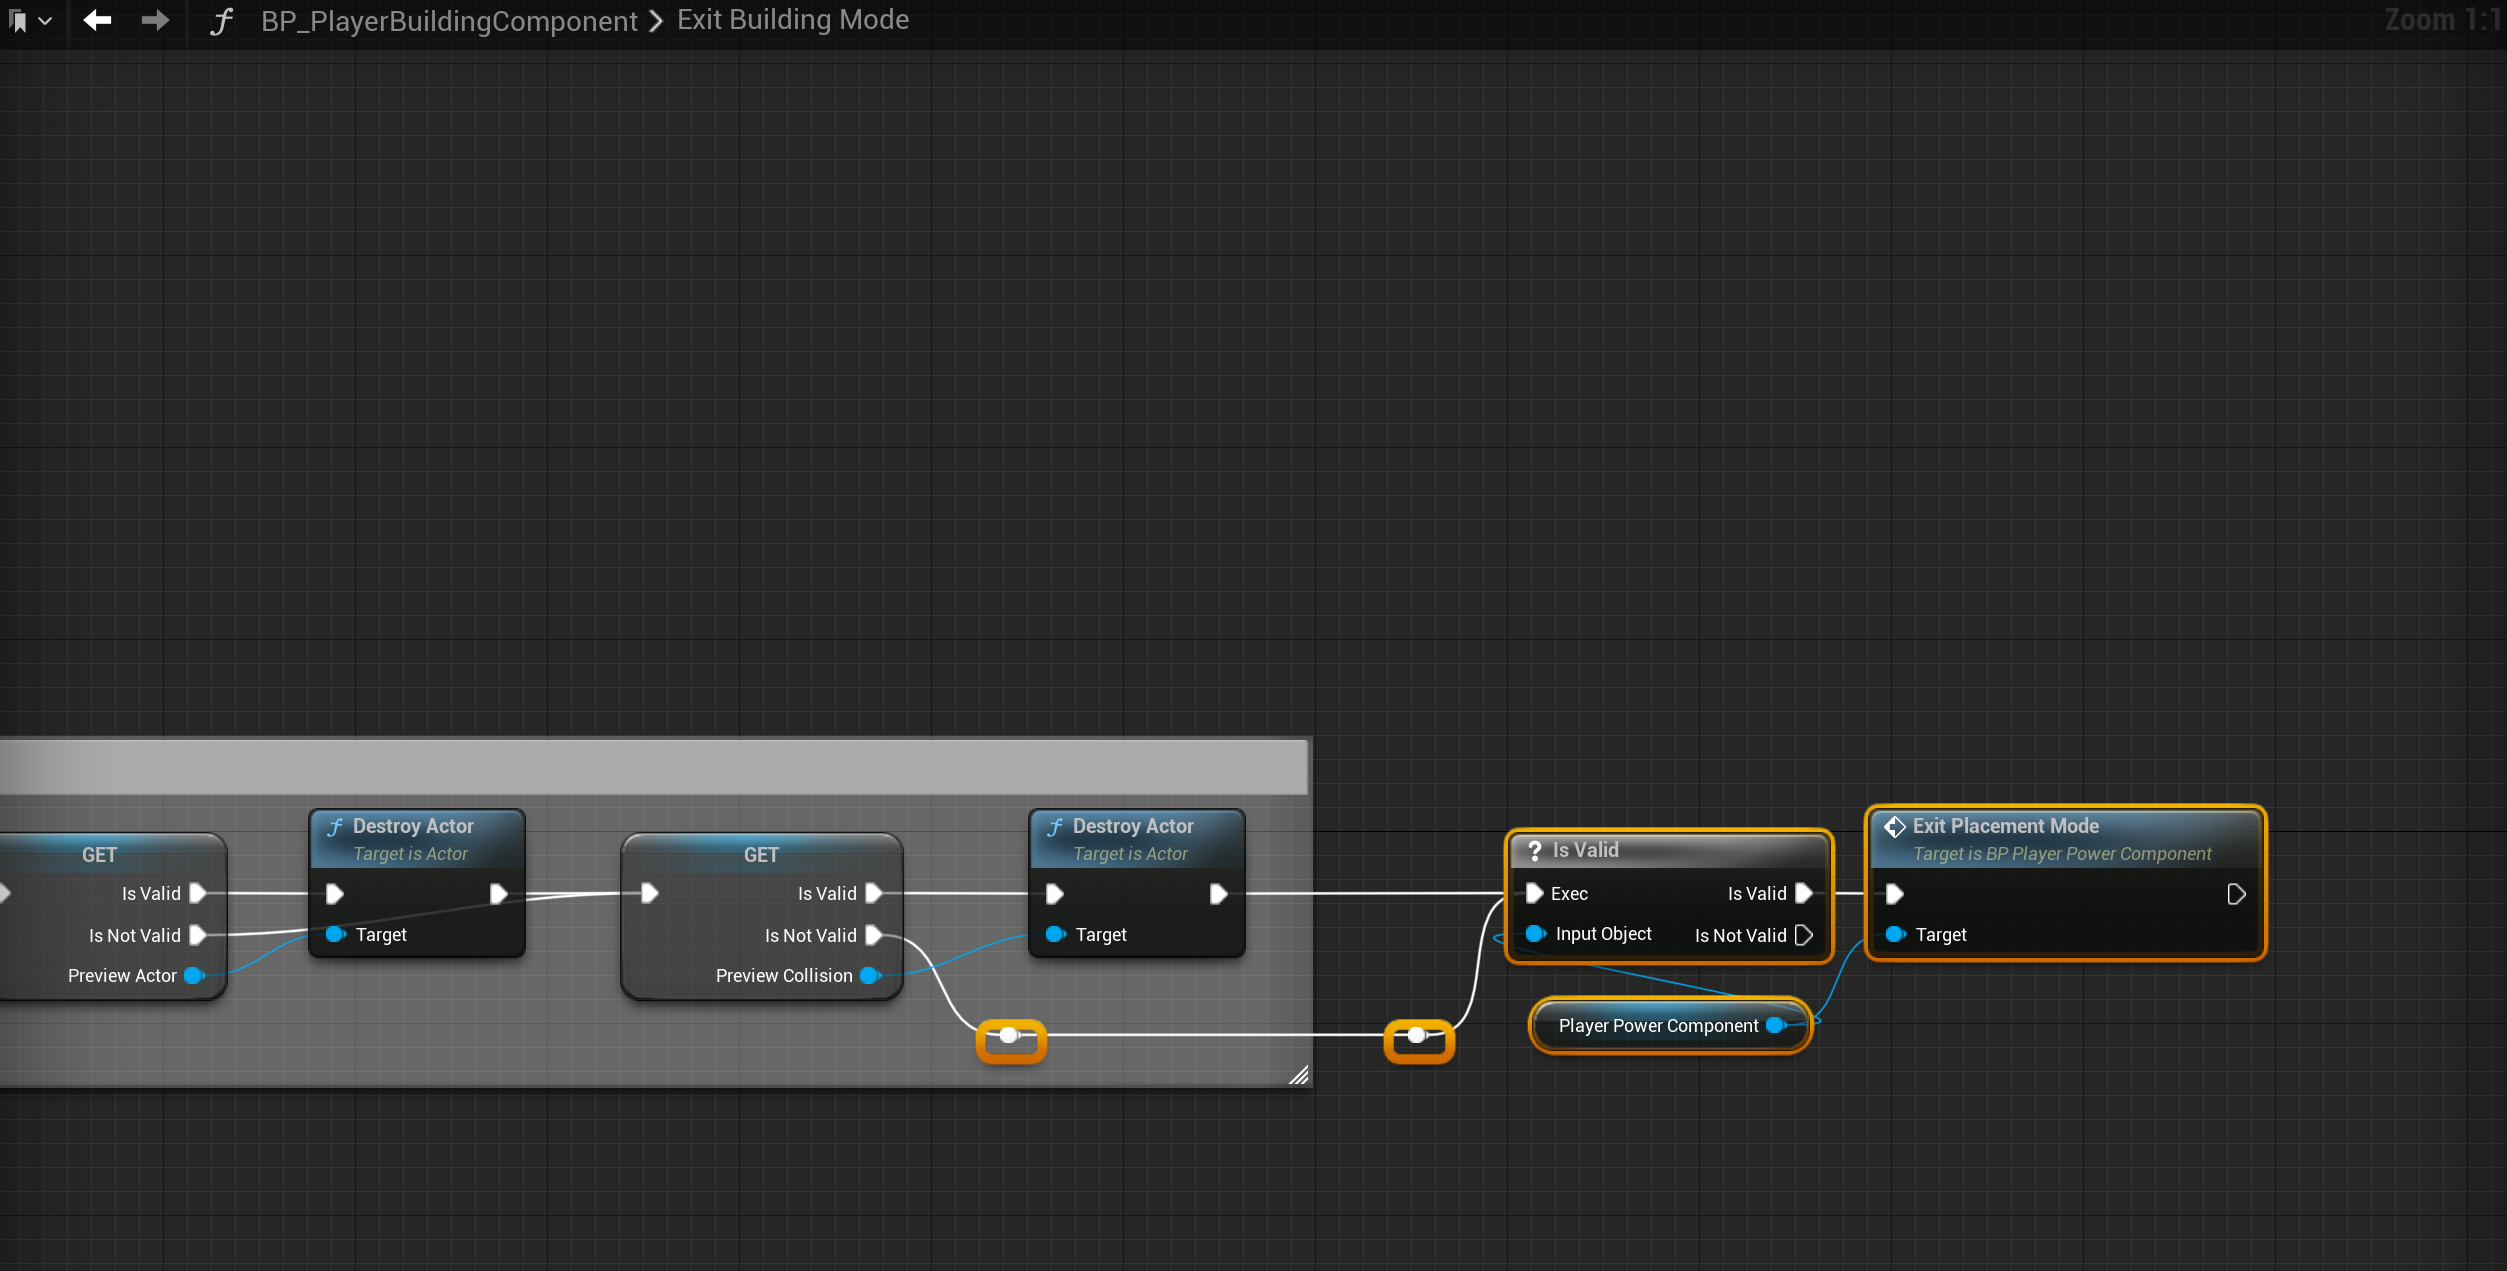
Next go to the BP_PlayerBuildingComponent, create a new variable called PlayerPowerComponent and set its type to BP_PlayerPowerComponent then copy the images below, locations at the top of the screenshots.


Next I recommend playing in editor, this will compile the effected blueprints, once the character loads in your can exit play in editor, I also suggest clicking save all in the content browser to save your progress.
Player Power Component
Go to the BP_PlayerPowerComponent then go to its Class Defaults and copy the settings shown in the image below.
Create a new variable called PlayerInventory and set its type to BP_PlayerInventory
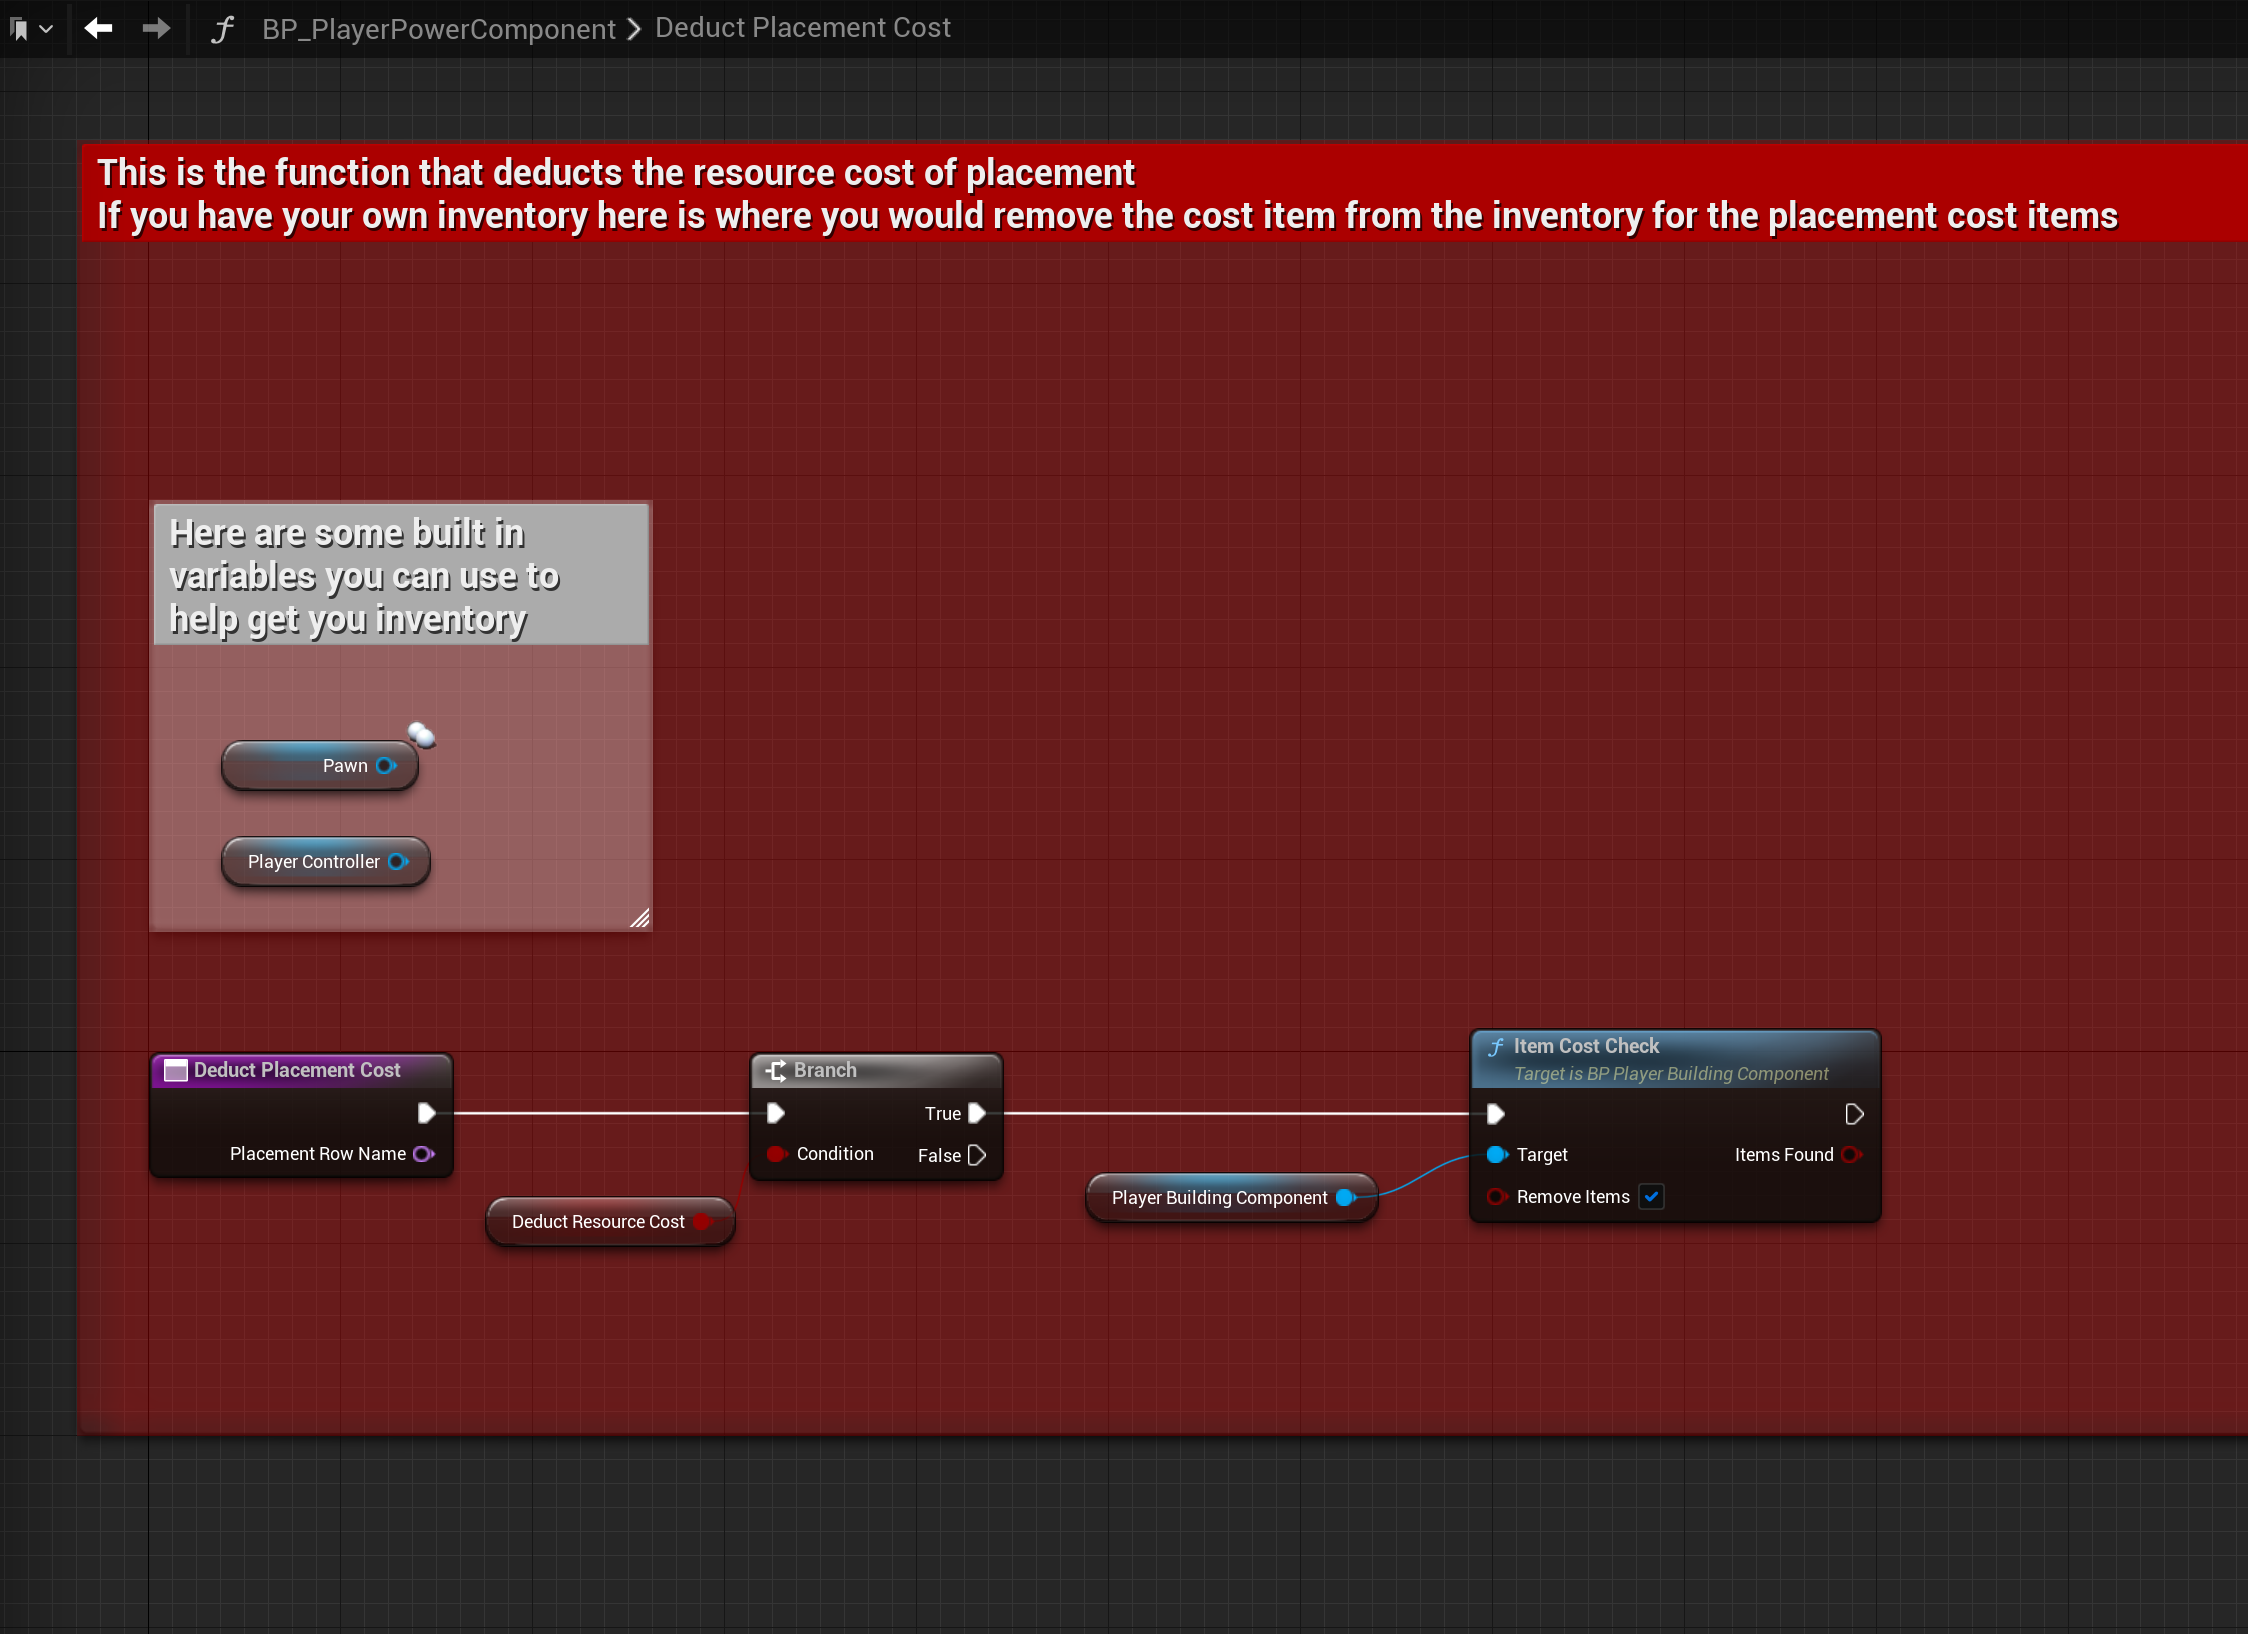
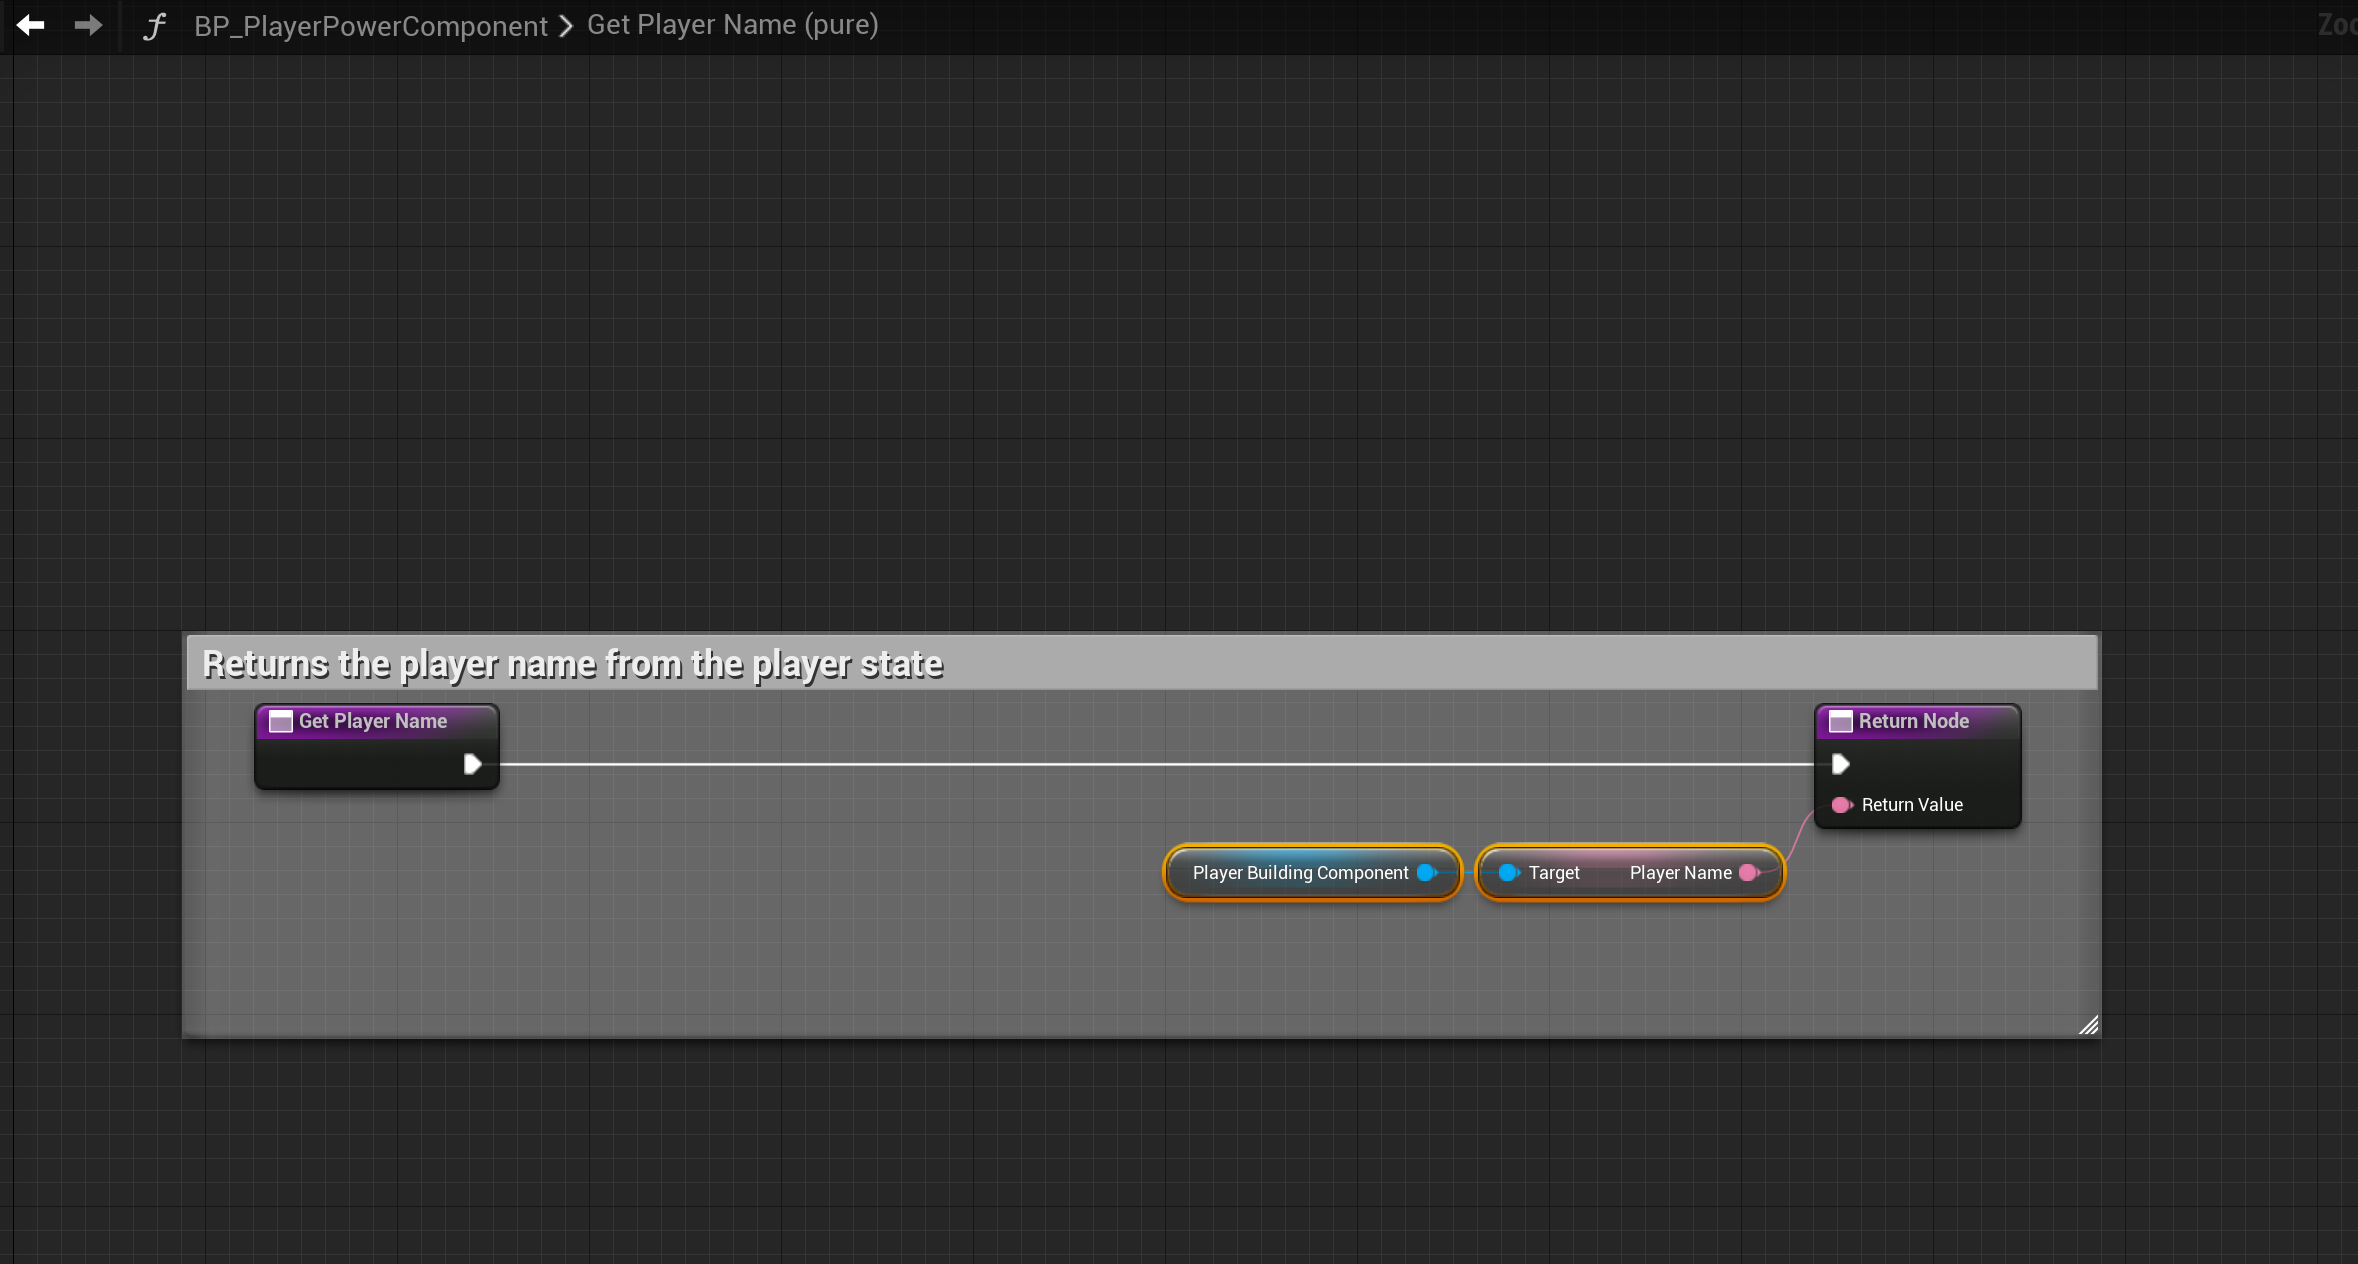
Then copy the images below, locations at the top of the screenshots.


Master Build Part
Go to the BP_MasterBuildPart and create a new variable called Power Device set its type to Boolean and tick on Instance Editable, set its Default Value to unticked. Then copy the images below, locations at the tops of the screenshots.

Next create a new function called SavePowerData then add a new input called LevelSaveData and set its type to S_LevelSaveData then add a new output call it PowerIndex and set its type to Integer. In the function set the Power Index output value to -1 like the image below.
Make sure you’ve set the correct S_LevelSaveData type, to do this drag out from the LevelSaveData pins and use the Break or make node for the output and its outputs/inputs should look like the break and make nodes in the image below, if it doesnt change the LevelSaveData or NewLevelSaveData variable type to the other S_LevelSaveData type.

Master Power Device
Next go to the BP_MasterPowerDevice click the Class Settings button and copy the video below.
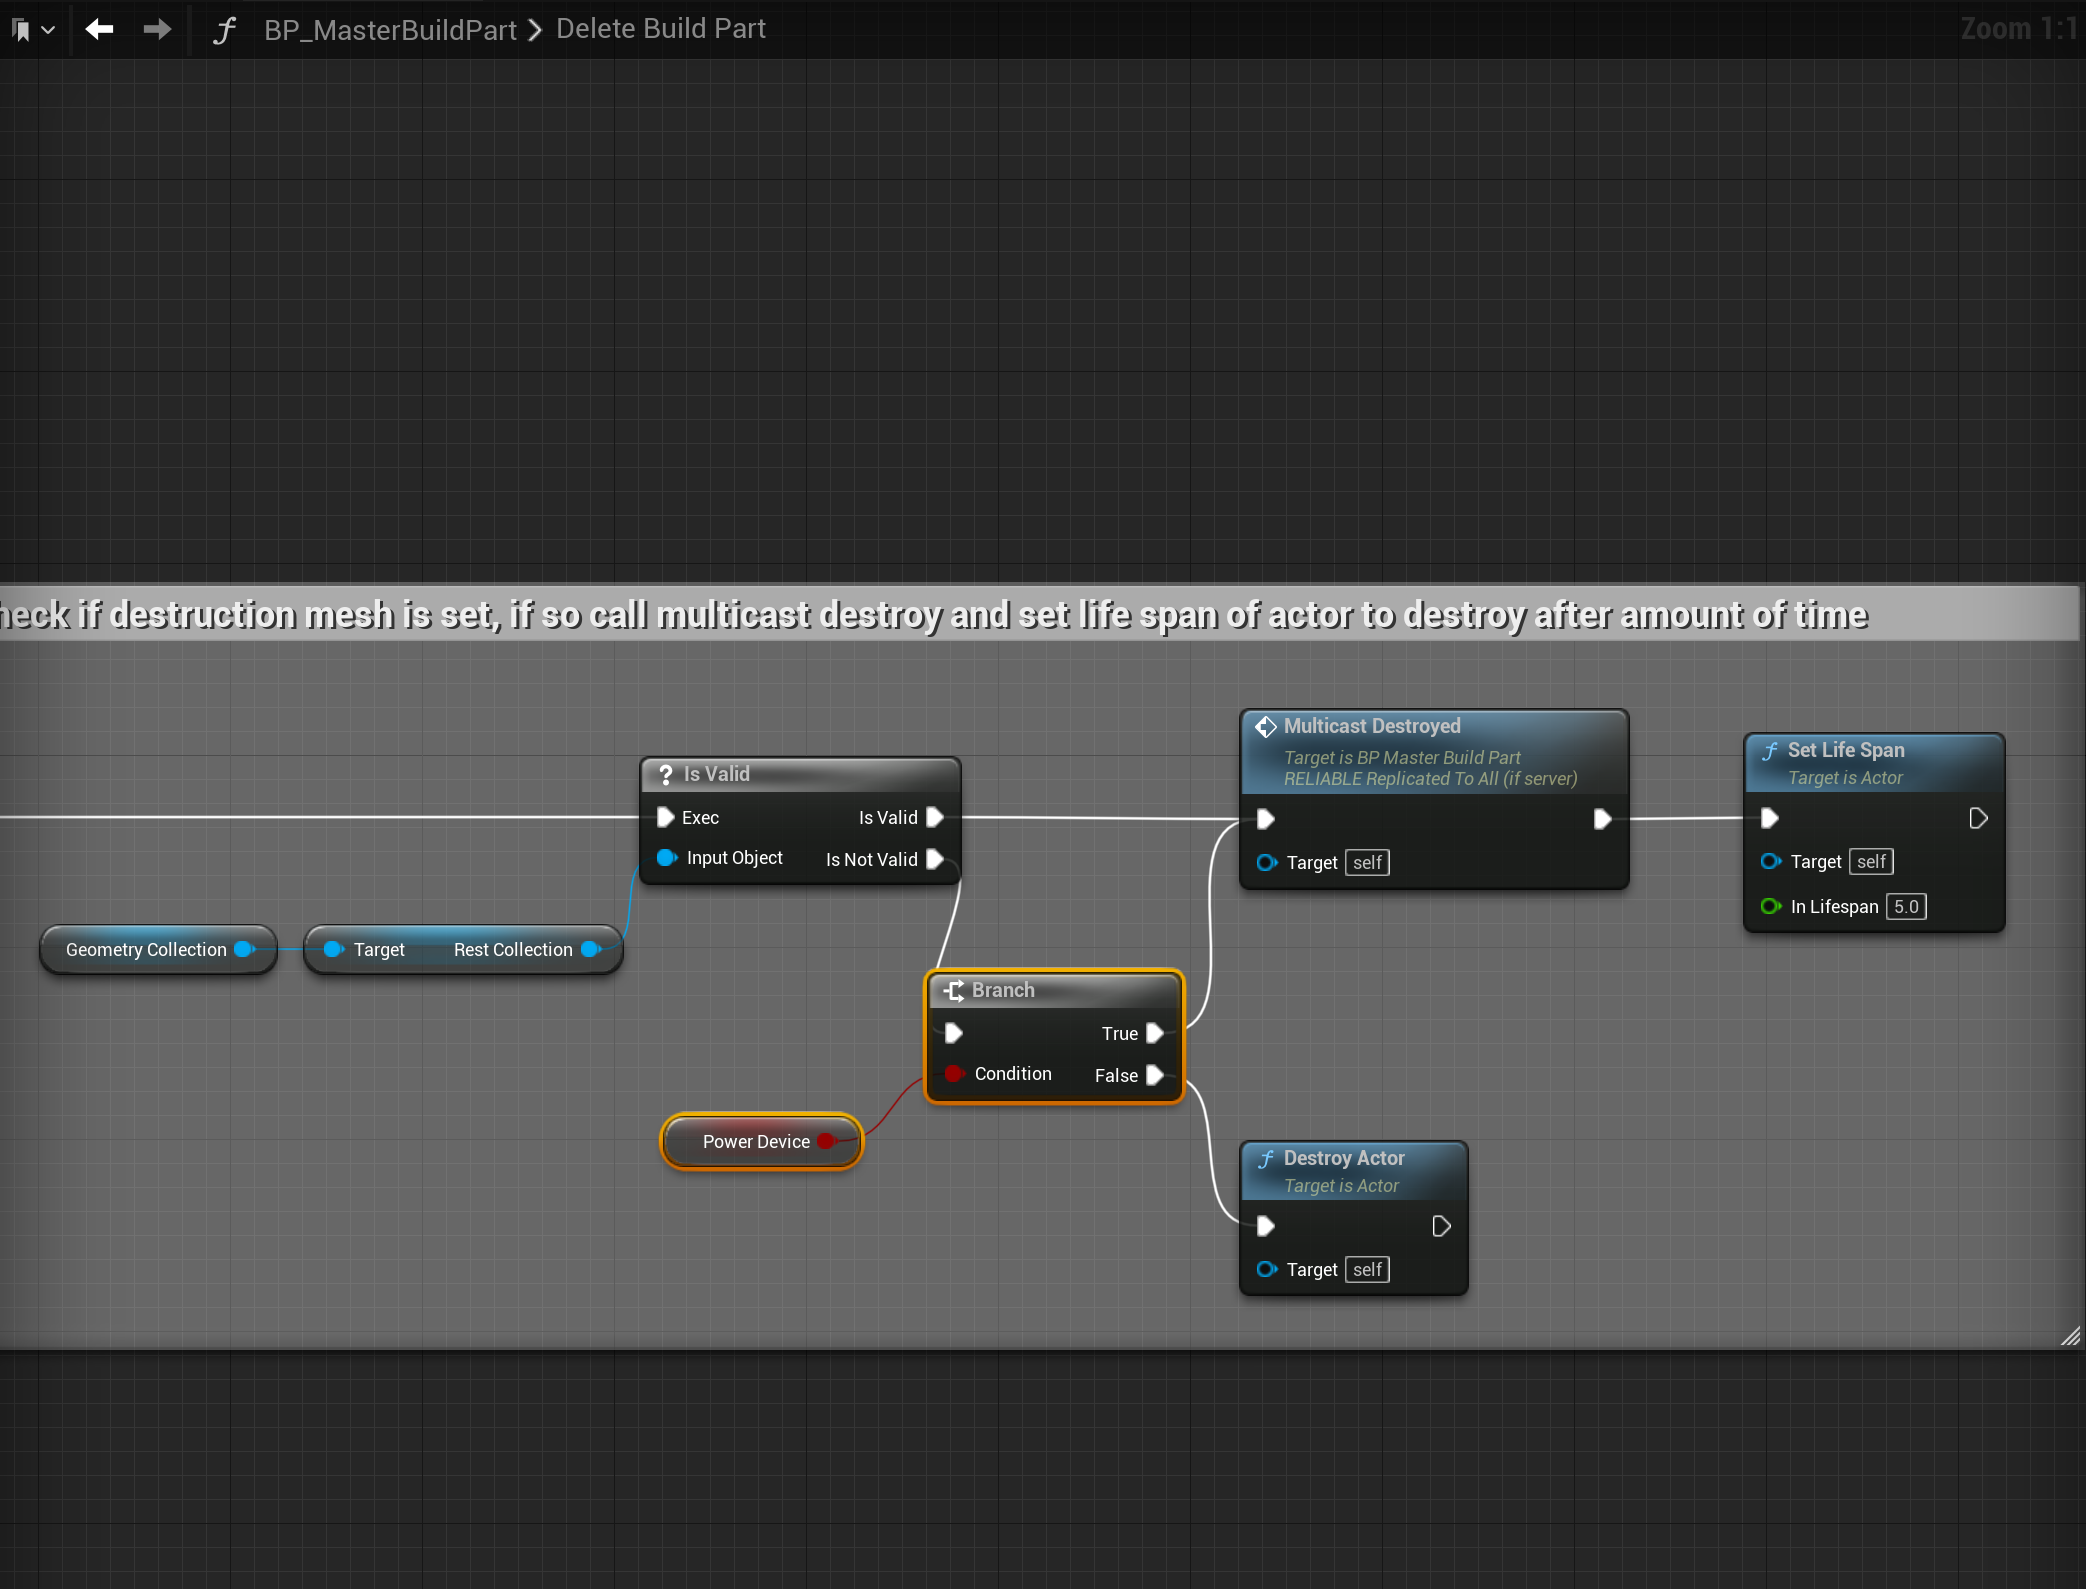
Next copy the images below, location at the top of the screenshots.


Create the Event Multicast Destroyed node then right click it and select the Add Call to Parent function to create the Parent:Multicast Destroyed node.

Select the StaticMesh component in the components panel and in the Details panel untick Visible like the image below.

Right click the BP_HealthComponent in the Components panel and select the Delete option
Next in the Class Defaults of the BP_MasterPowerDevice find the Power Device setting and tick it on.
Next go to the BP_MasterCable and click the File button in the top right corner of the screen and select the Refresh All Nodes button, then compile and the errors should be resolved.
Next I recommend playing in editor, this will compile the effected blueprints, once the character loads in your can exit play in editor, I also suggest clicking save all in the content browser to save your progress.
Save System
Go to the BP_PowerGameModeComponent and remove the highlighted nodes shown in the image below, you can delete this node, make sure you connect the output of the Spawn Managers to the input of the Get All Direction Lights.

Go to the S_BuildPartSave structure in the content browser and add a new variable to it called PowerIndex and set its type to Integer like shown in the image below.

Again I recommend playing in editor to compile the effected blueprints, once the character loads exit play in editor and click save all in the content browser.
If you get errors in any blueprints go to those blueprints and compile them, this should resolve the errors
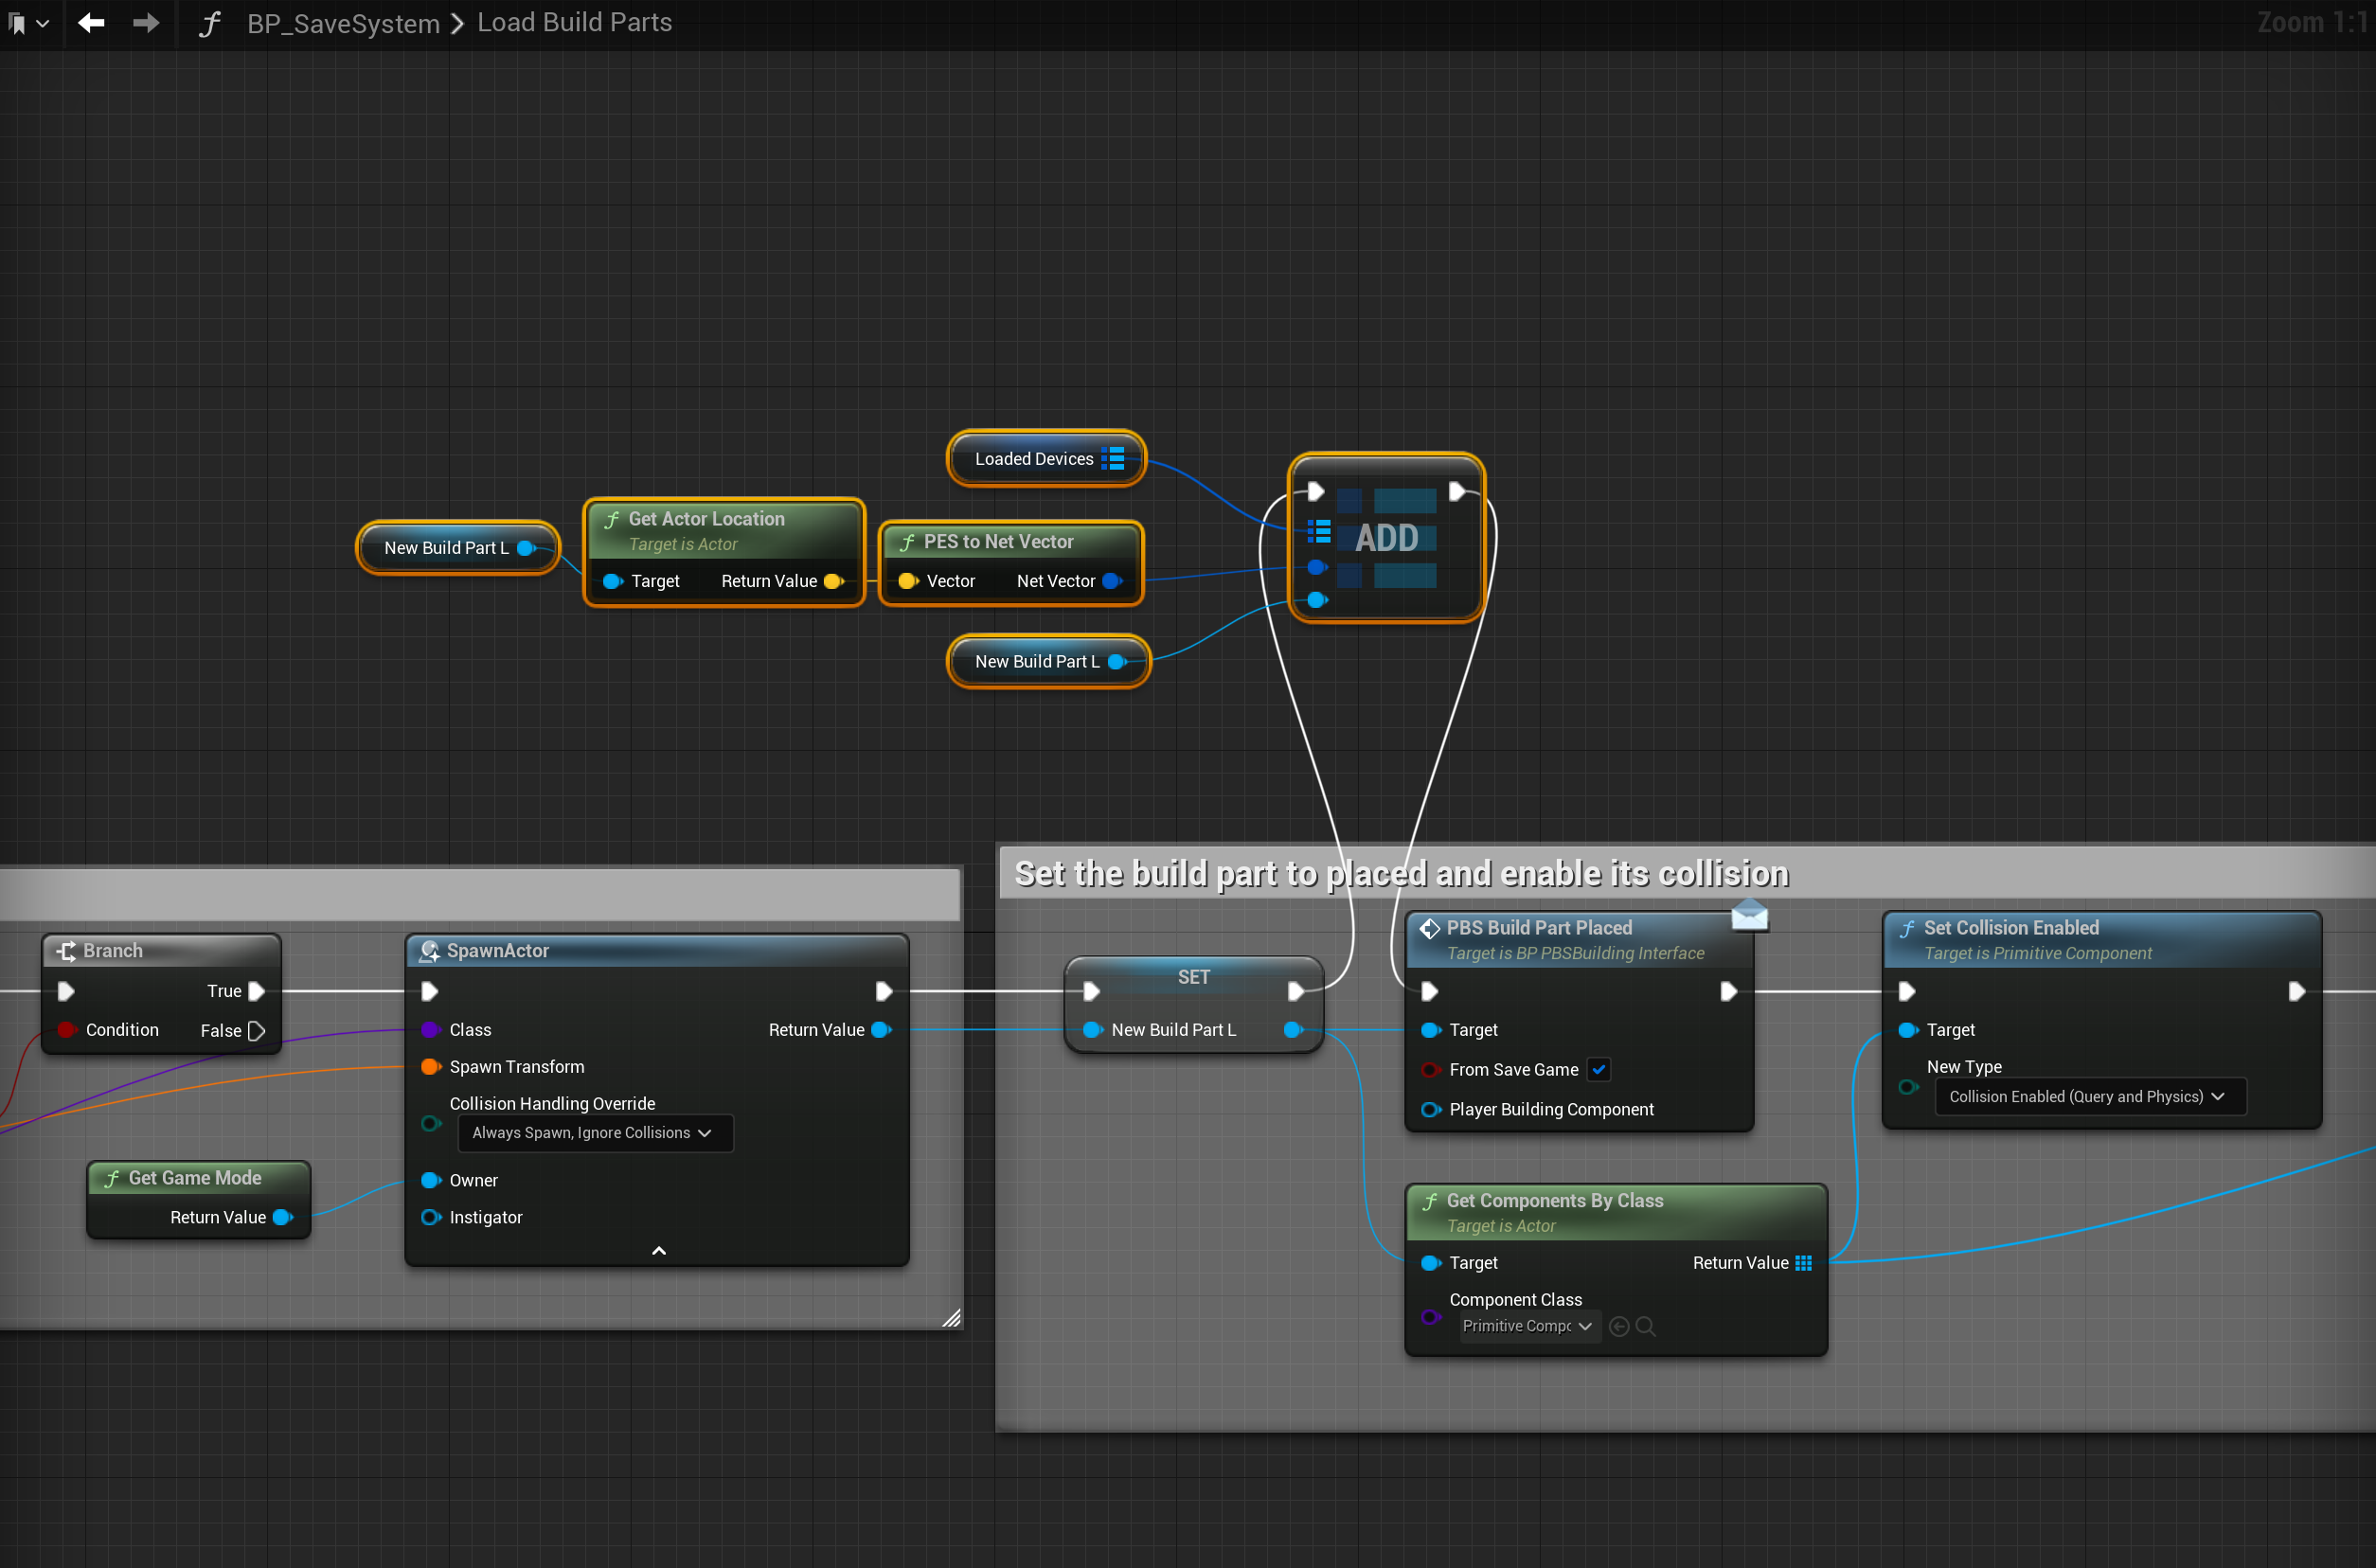
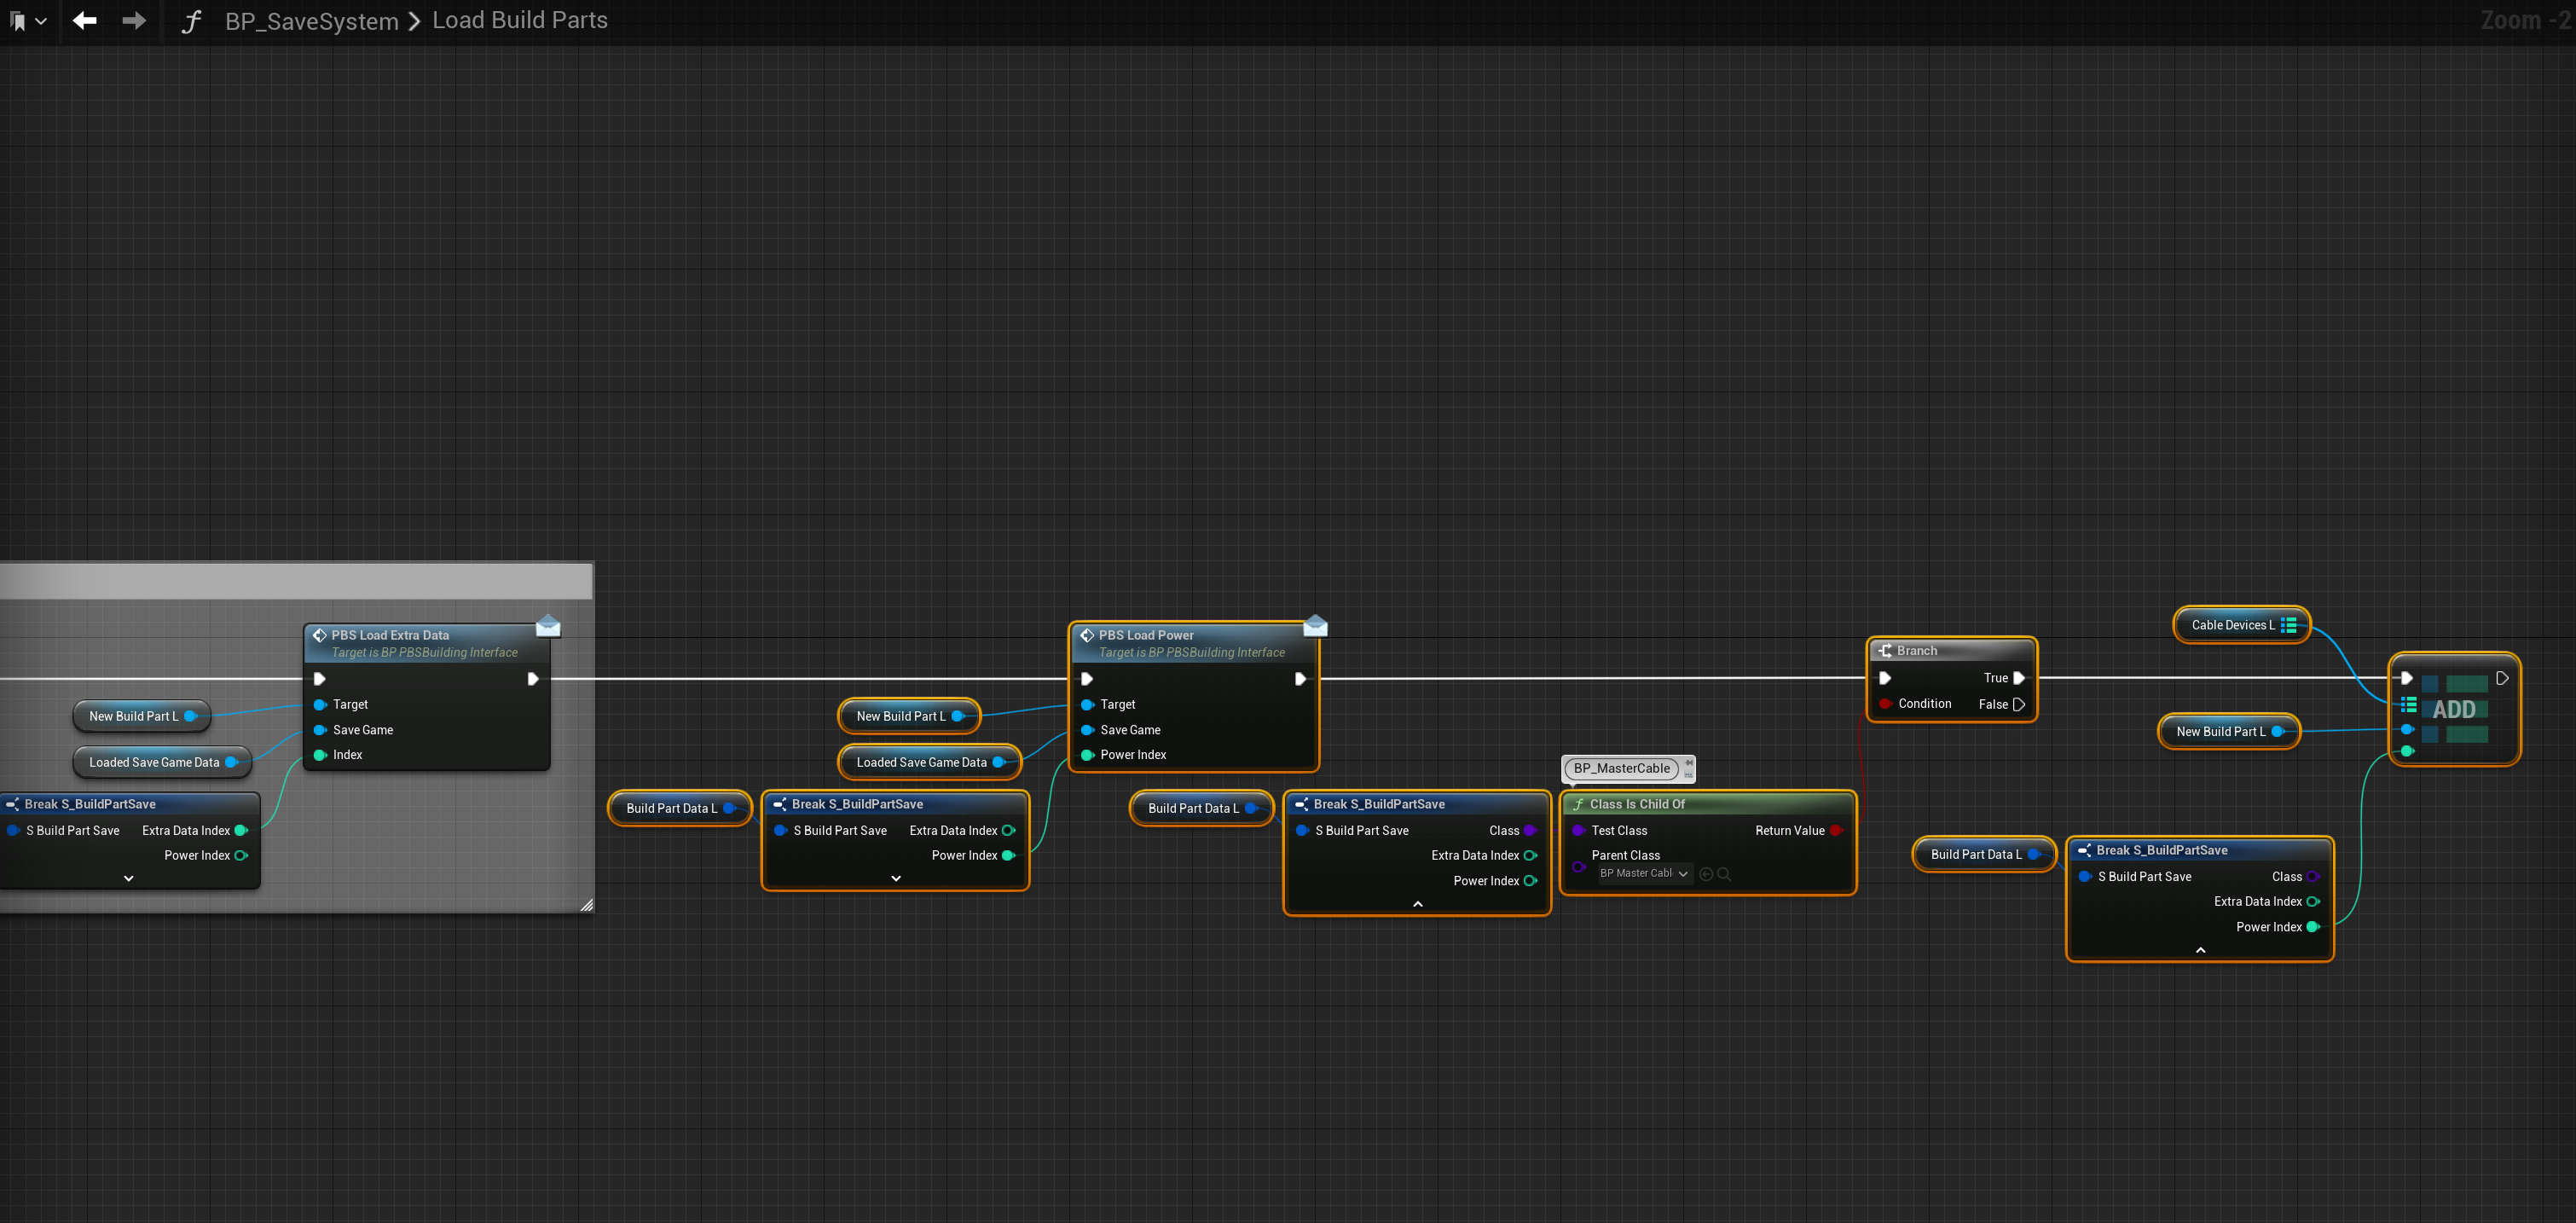
Next go to the BP_MasterBuildPart and add the nodes shown below, locations at the tops of the images then compile and save. If you cant connect the LevelSaveDataL node to the input or output of the Save Power Data function you’ve set the wrong S_levelSaveData when creating the SavePowerData function, go back to this step to set it correctly.

Next go to the BP_PBSBuildingInterface and add a new function called PBS LoadPower then add a new input called SaveGame and set its type to BP_PBSSaveGame then add another input called PowerIndex and set its type to Integer like shown in the image below.

Next I recommend playing in editor, once the character loads exist play in editor and click save all in the content browser, then restart the project, this will make editing the next struct blueprints faster.
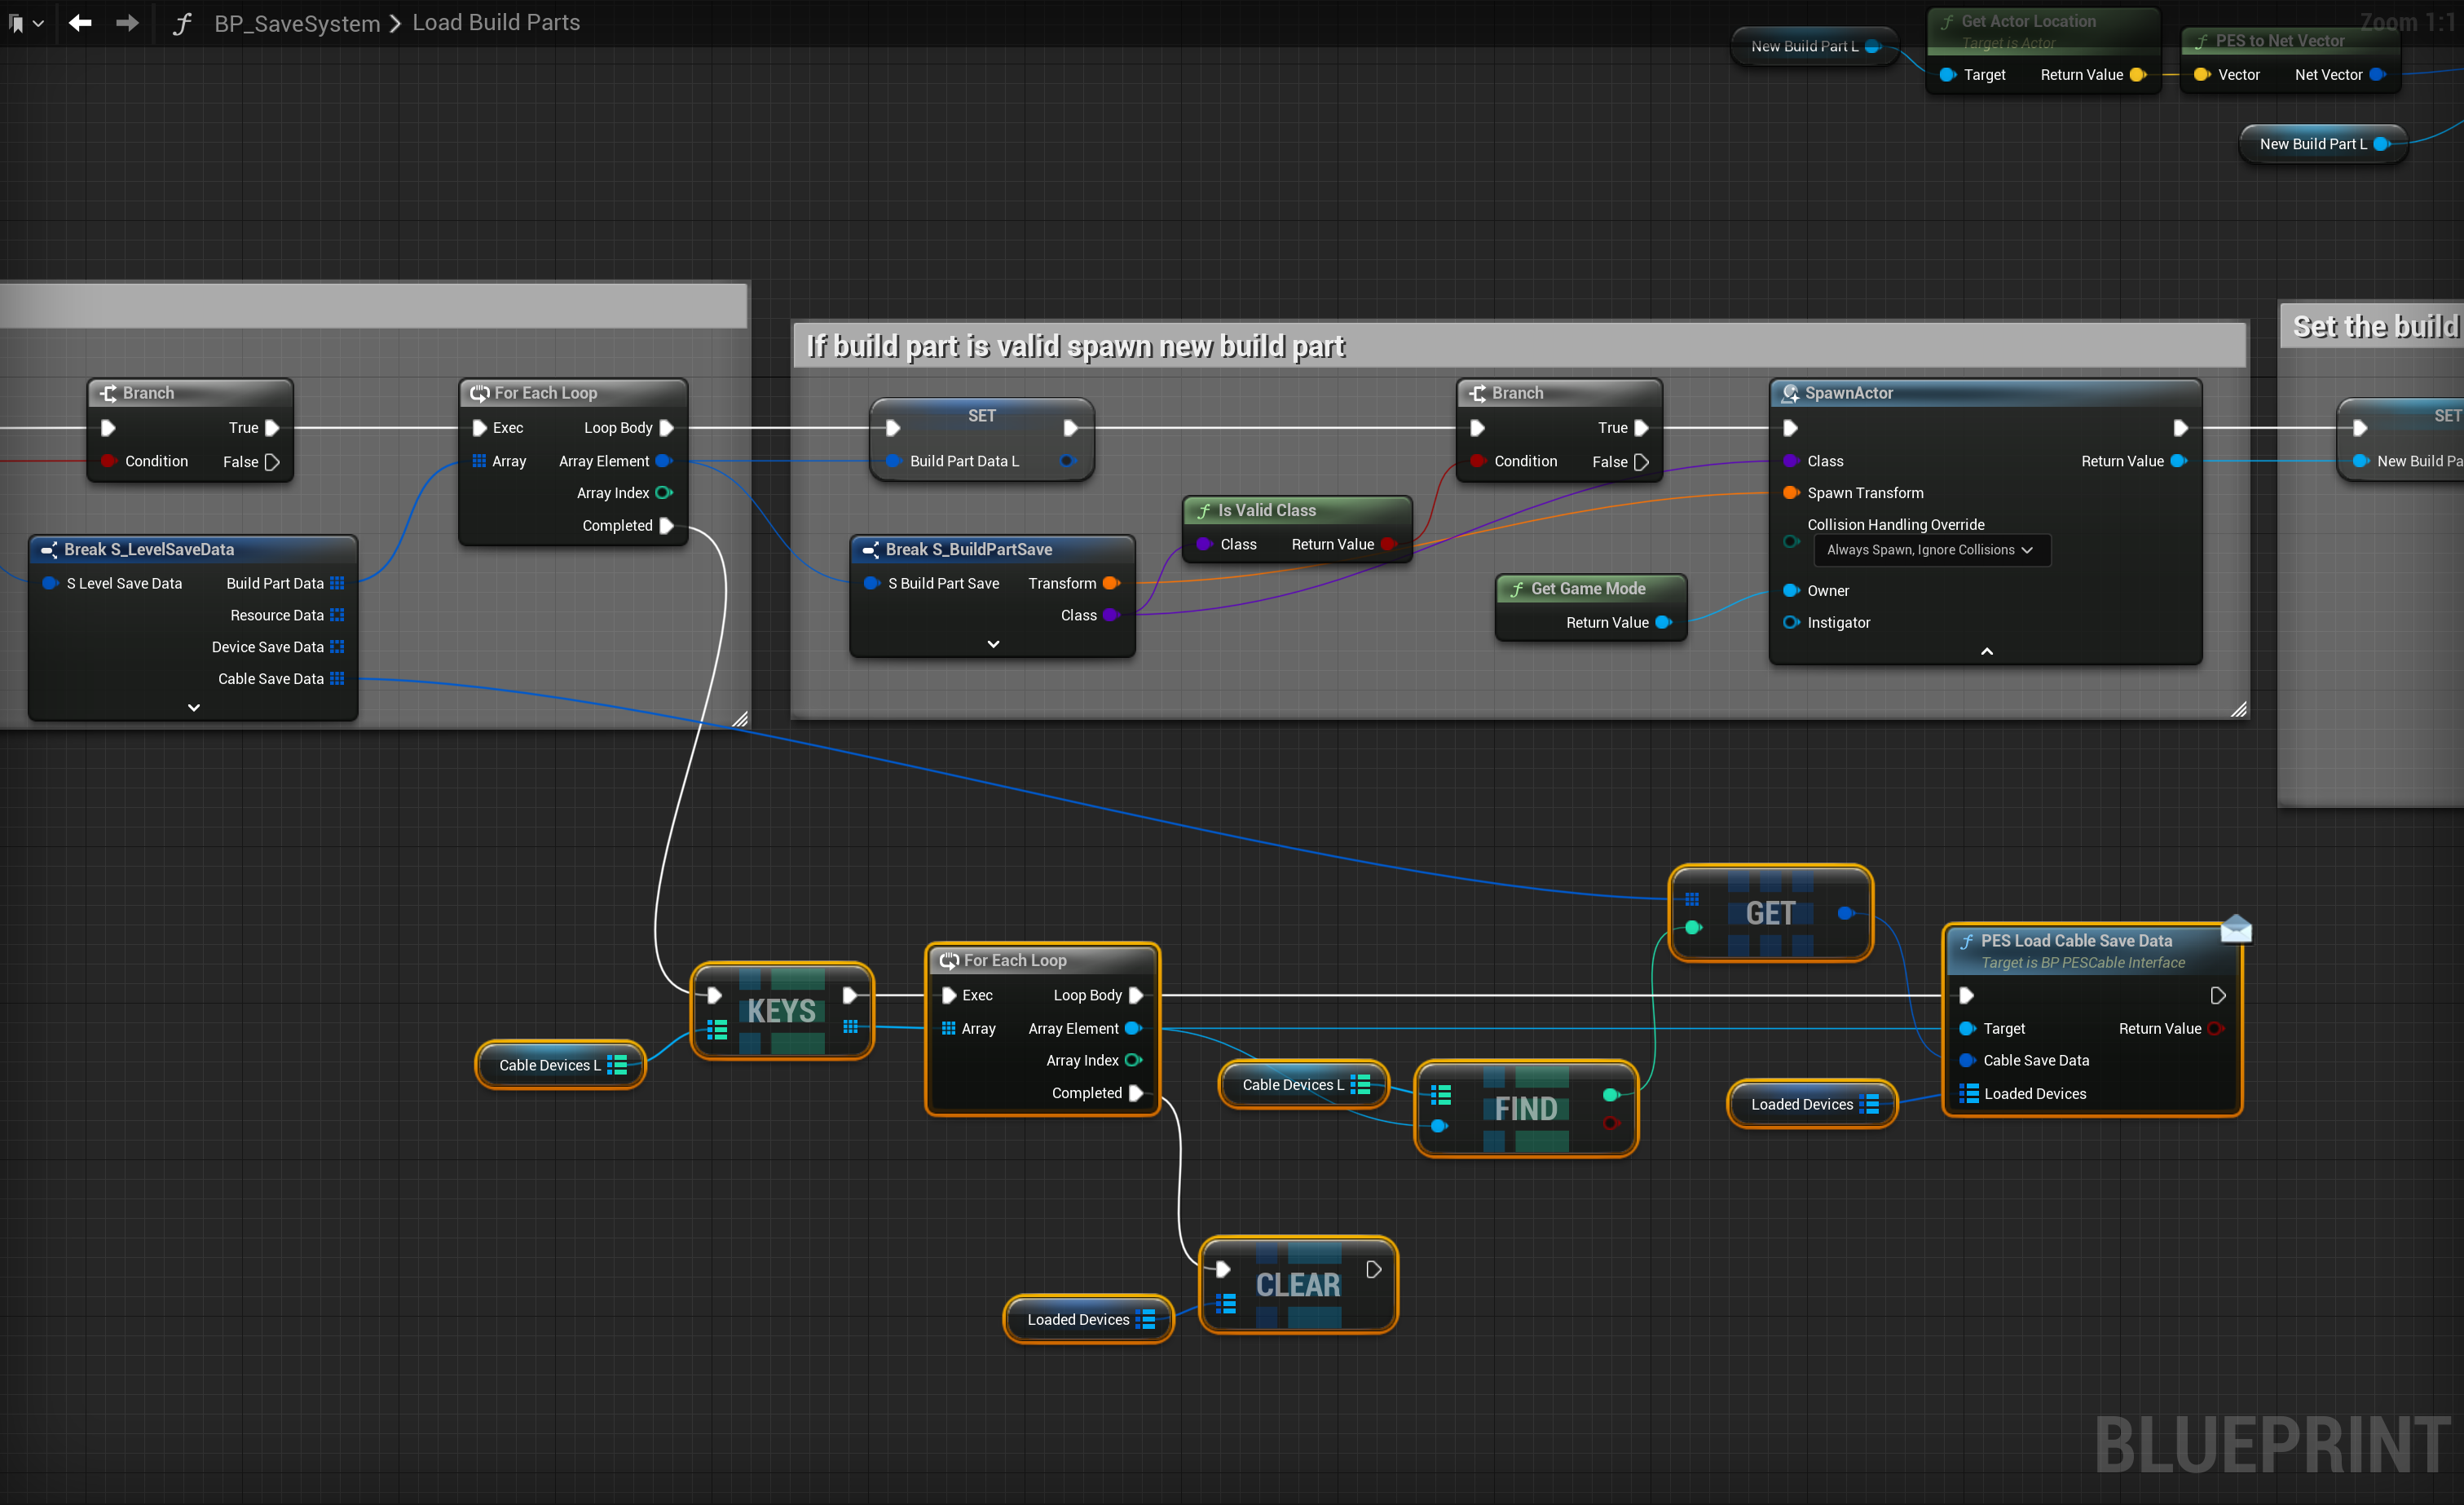
Next go to the S_LevelSaveData make sure its the one that comes with Player Building System V2, then copy the video below.
Then again play in editor to compile the blueprint and exit once the character loads. You may get errors again, just go to those blueprint and compile them and the errors should be resolved. Then click save all in the content browser.
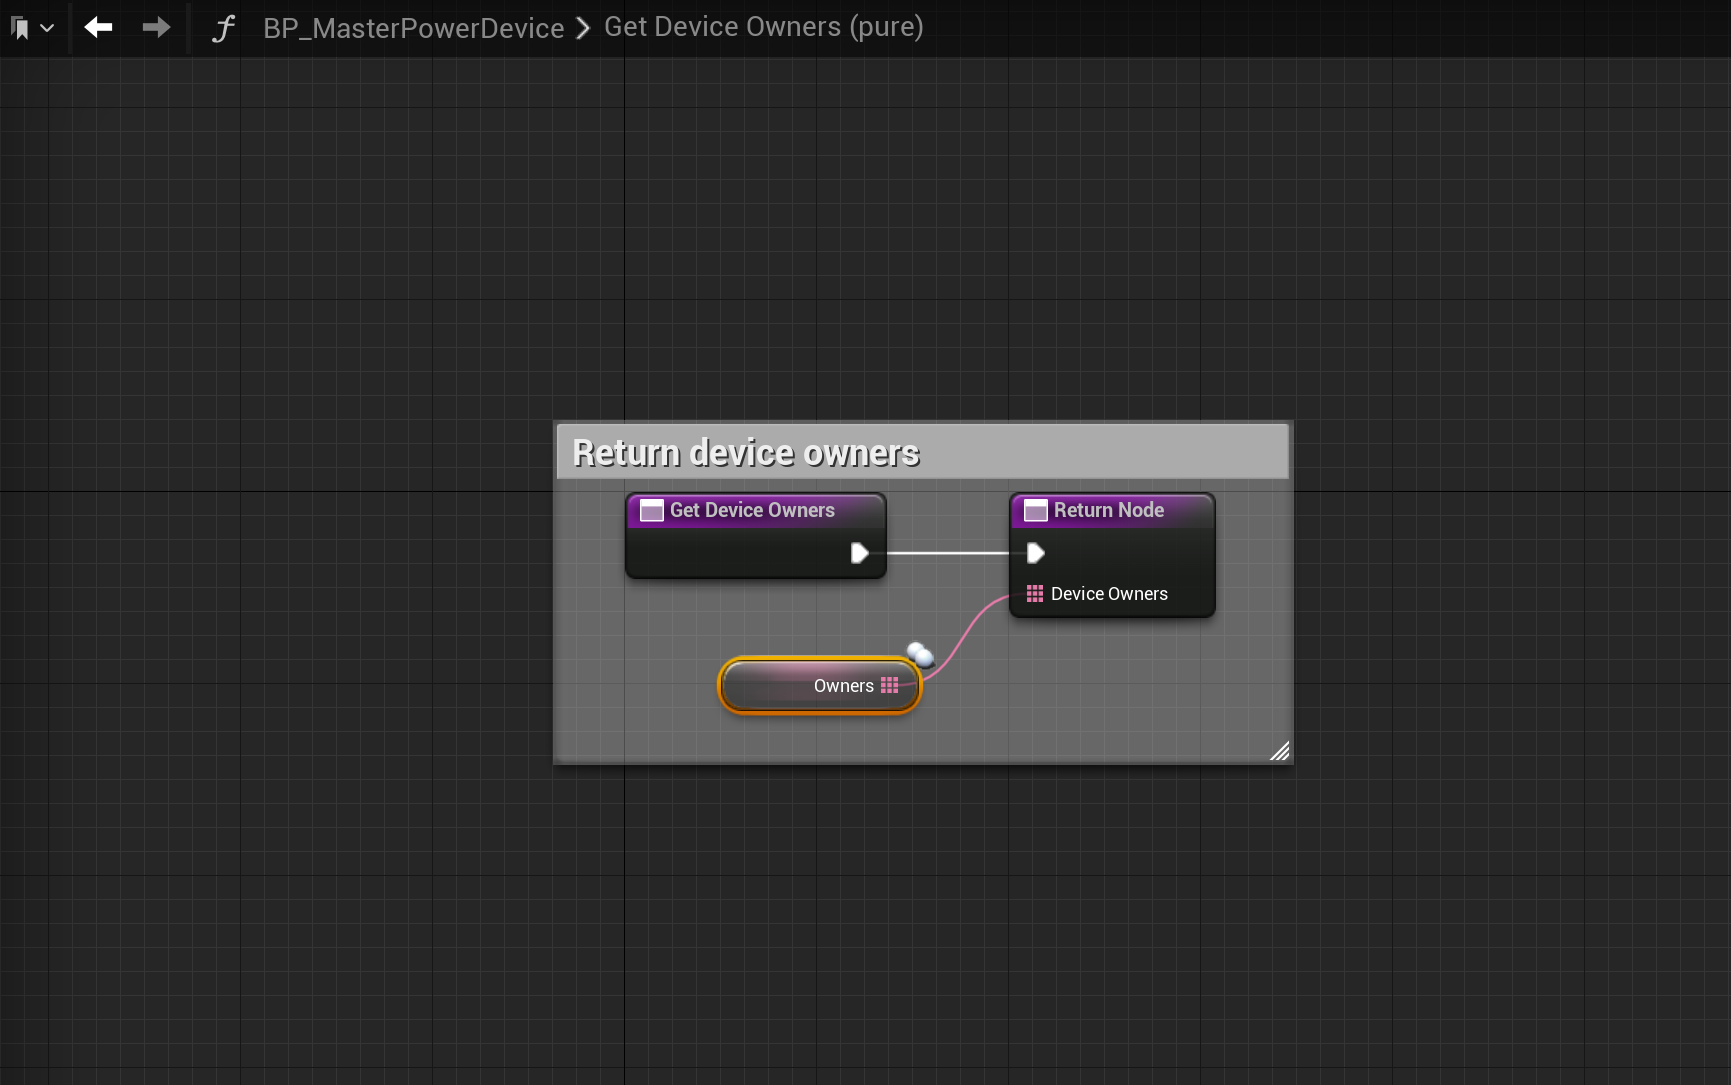
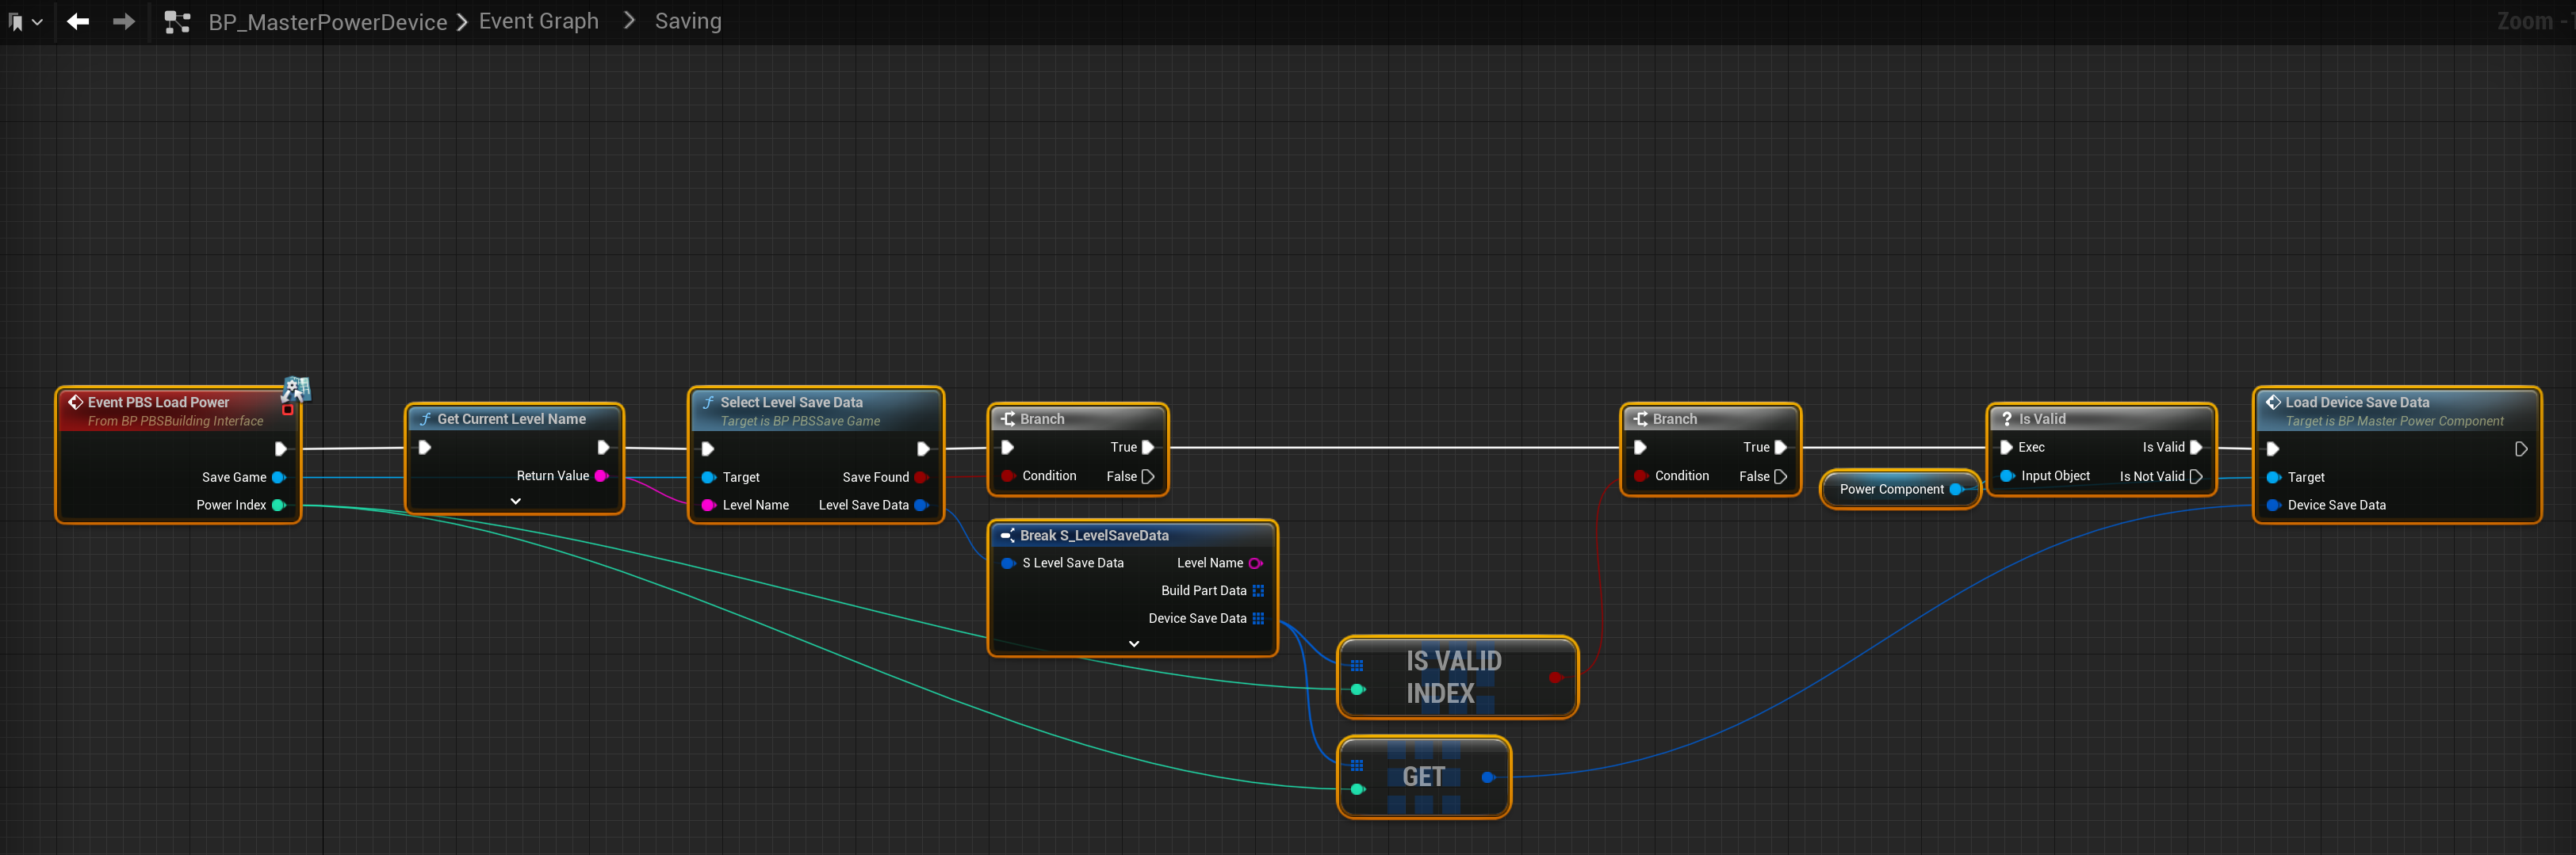
Next go to the BP_MasterPowerDevice and copy the image below, location at the top of the screenshot.
Next copy the video below.
Next go to the BP_MasterCable and copy the video below.
Next copy the video below.
Next copy the image below, location at the top of the screenshots then compile and save.
Next go to the BP_NetworkManager and copy the image below.

Interaction
Go to the BP_Switch and copy the video below.
Next go to the BP_ElectricDoor and copy the video below.
Go to the BP_Generator and copy the video below.
UI
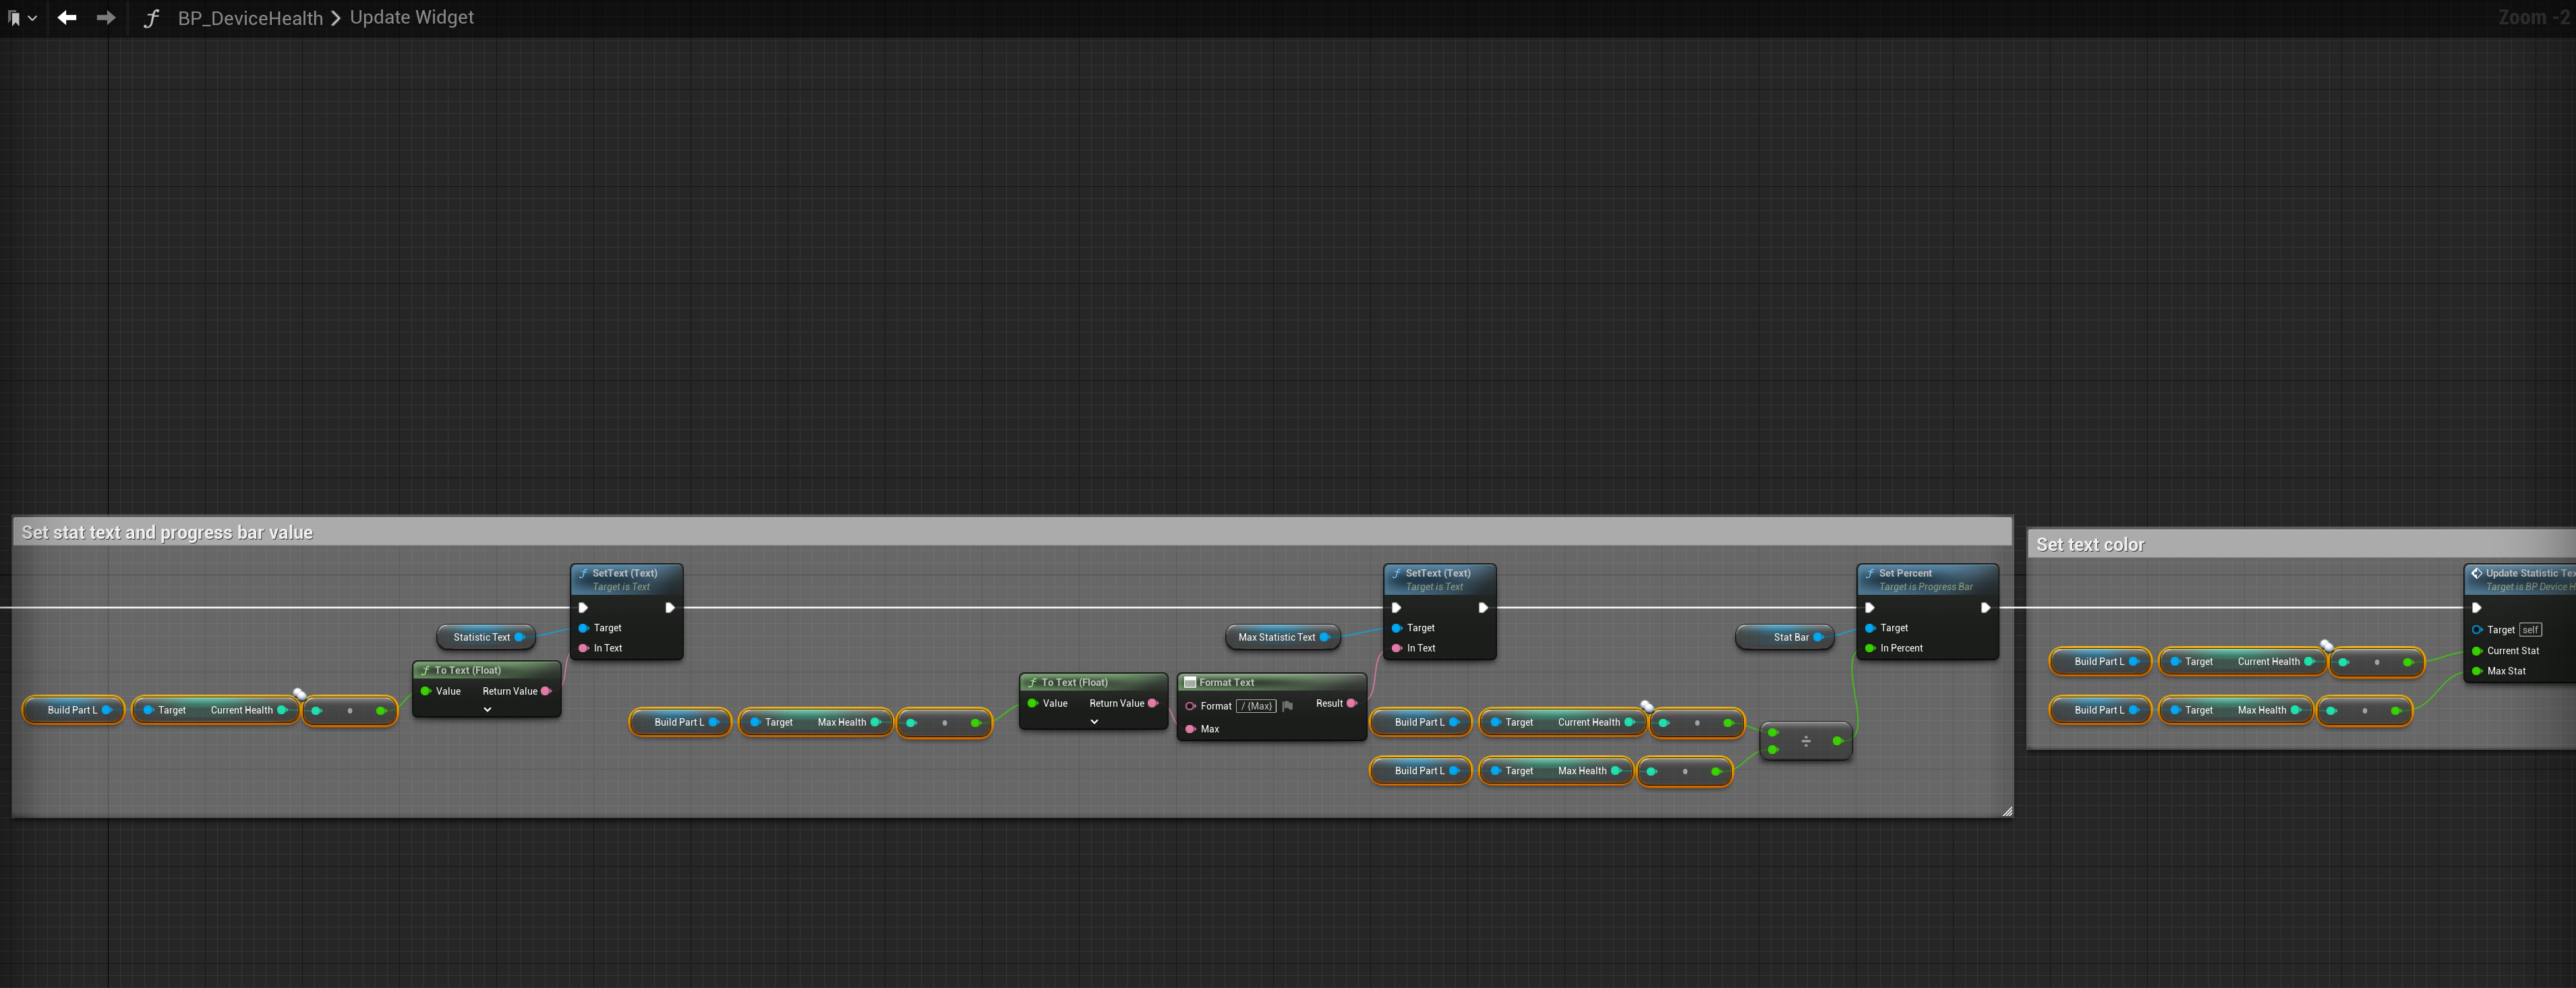
Go to the BP_DeviceHealth then go to the Graph view and go to the Update Widget function, then create a new local variable called BuildPartL and set its type to BP_MasterBuildPart. Then copy the images below.

Resources
Go to the BP_PlayerBuildingComponent and select the Class Defaults and search for the Resources setting and add the resources used by the devices, this is optional, you may want to use different resource names. But if you rename a resource here you will have to change the names in the build part list resource cost setting.

Adding Build Parts
You will need to create new row entries in the Build Part List for each power device. Below is an example how to setup these build parts, you will need to do the same steps for the rest of the devices. You can see a second example (here).
Click the Add button to add a new row to the BuildPartList, then double click the row name in the bottom left corner and set the device row name. Then go though and set the build part details, make sure you set the Type to Power and make sure you set the Blueprint Class to the devices blueprint.
Here you can also set the resource cost to place the build part and the Icon.

Next go to the device blueprint, so for this example thats the BP_MasterCable, then go to the Class Defaults and find the Build Part setting and set the Row Name to the entry you created in the BuildPartList.

Next we need to add the build part to the radial menu so go to the BP_BuildingMenuThree and copy the video below.
For more info about the radial menu and its settings you can check out the video below.
You can now select the device in the build menu to place it, keep in mind you will need to repeat these steps for each device, the cable wont be placeable until its snapped to a socket on anther device. You can see a second example (here).
Other Blueprints
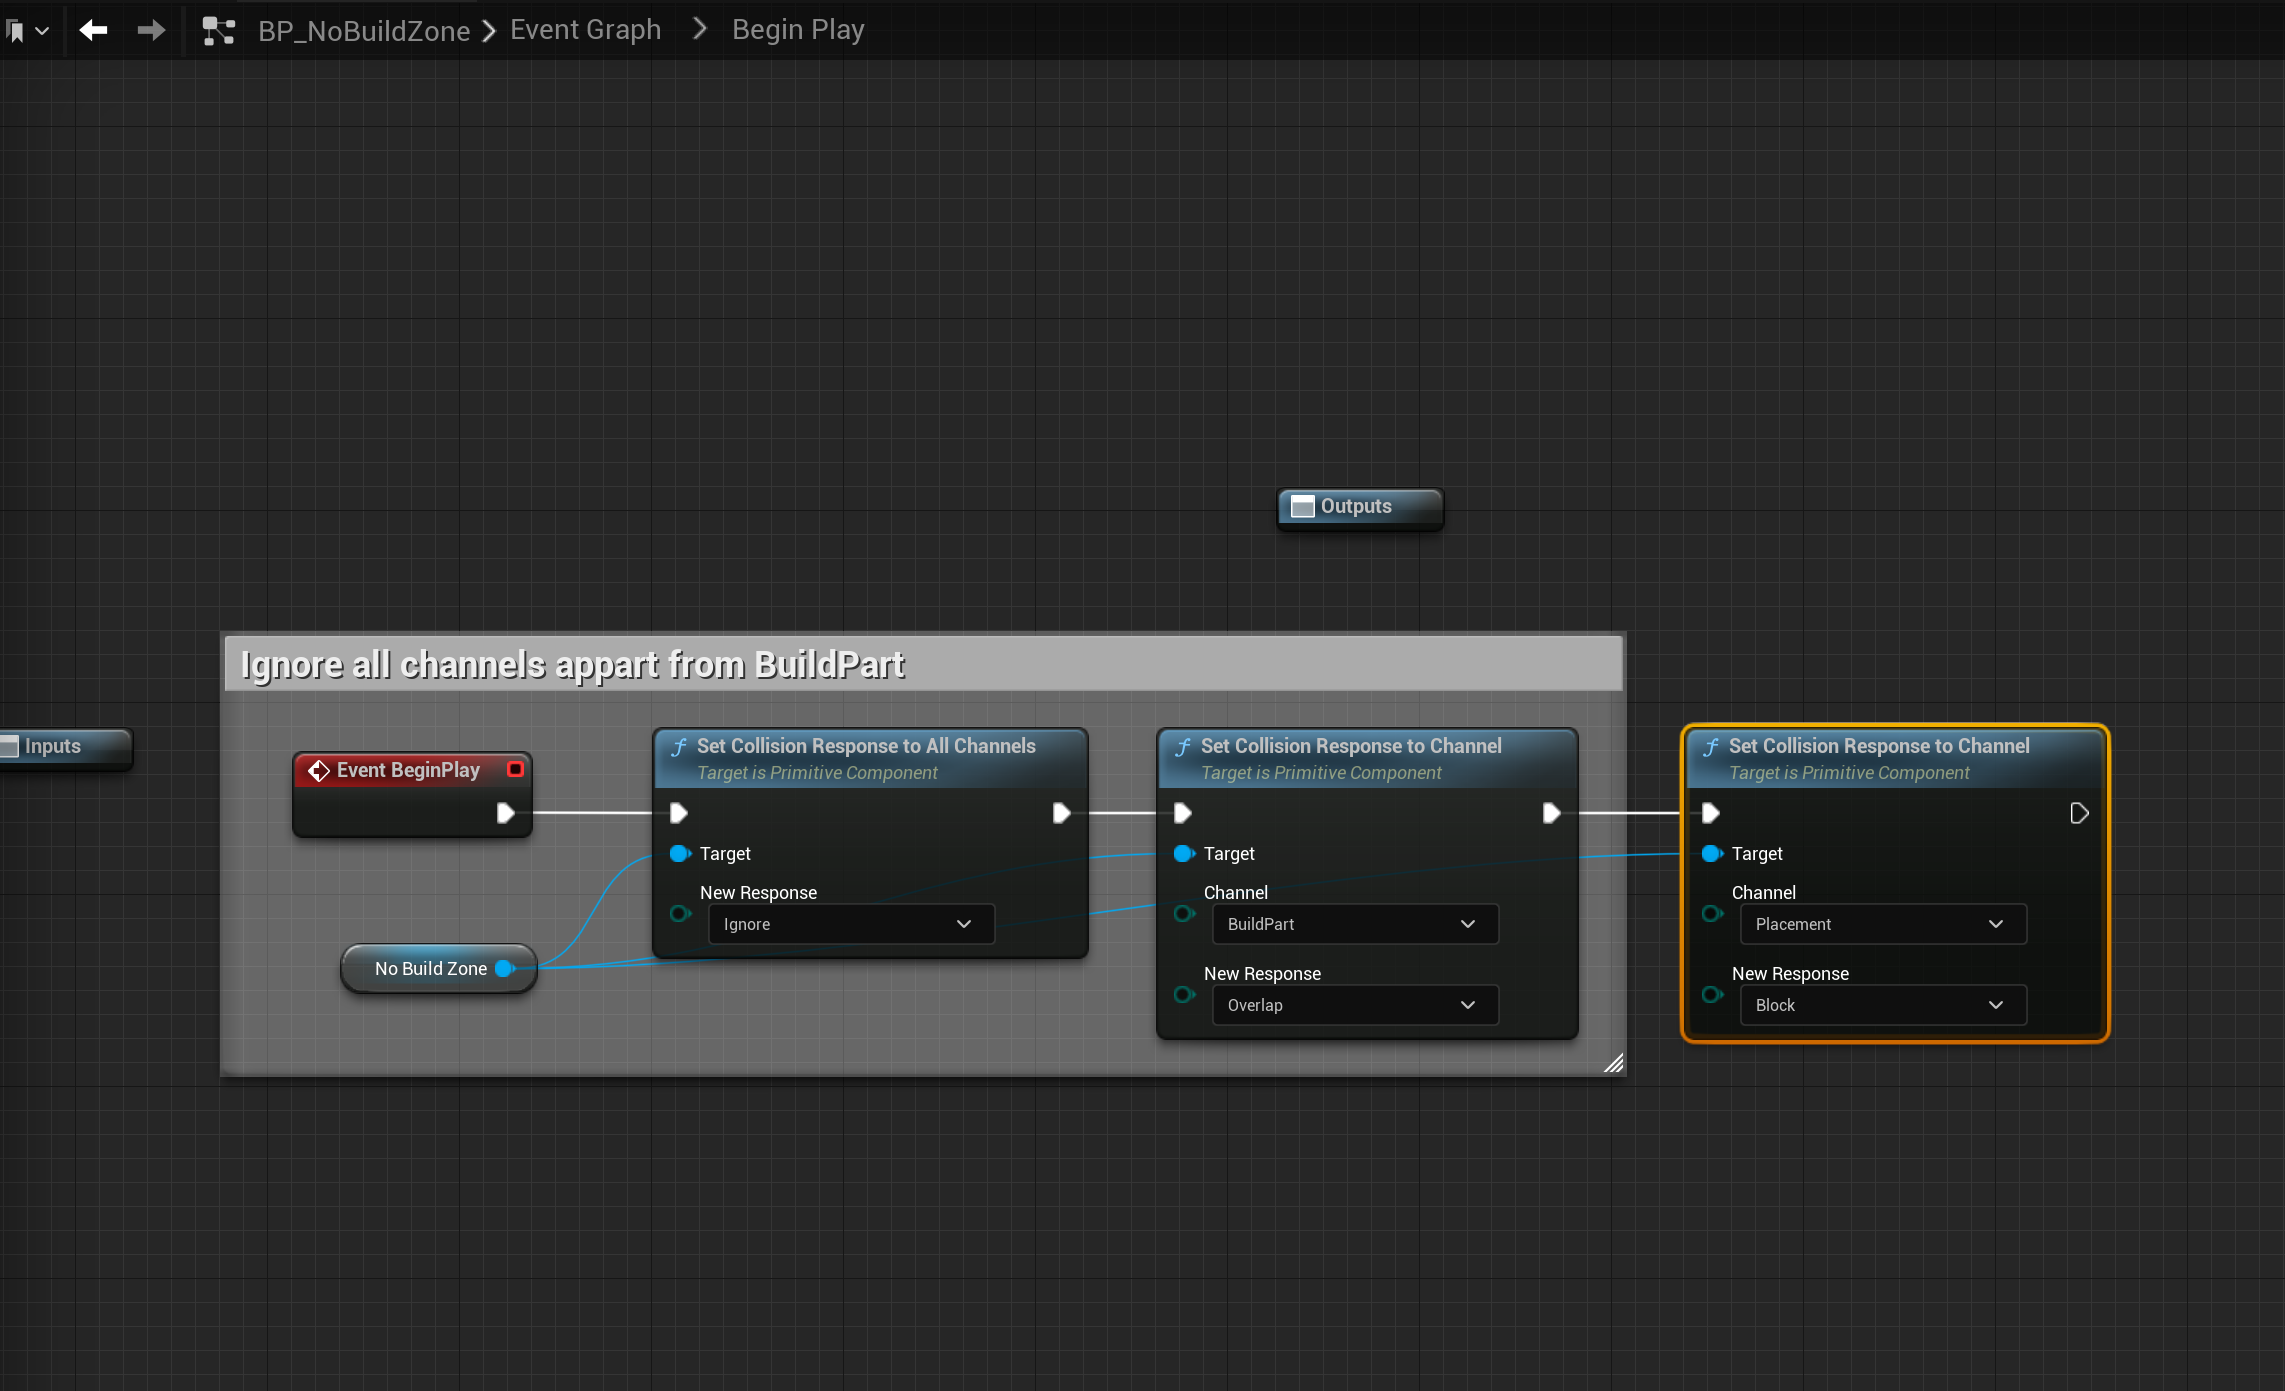
Open the BP_NoDamageZone and BP_NoBuildZone and copy the images below.

You may want to remove HUD elements from the power HUD, there is a guide here on changing the HUD which includes instruction on removing the controls and resources panels.
