Start by going to your custom melee attack montage and opening it. If you do not know how to create a montage find the attack animation you want to use and right click on it in the content browser and select Create Anim Montage.
Once in your montage first set the Slot to UpperBodyGroup.UpperBody this is shown in the image below.
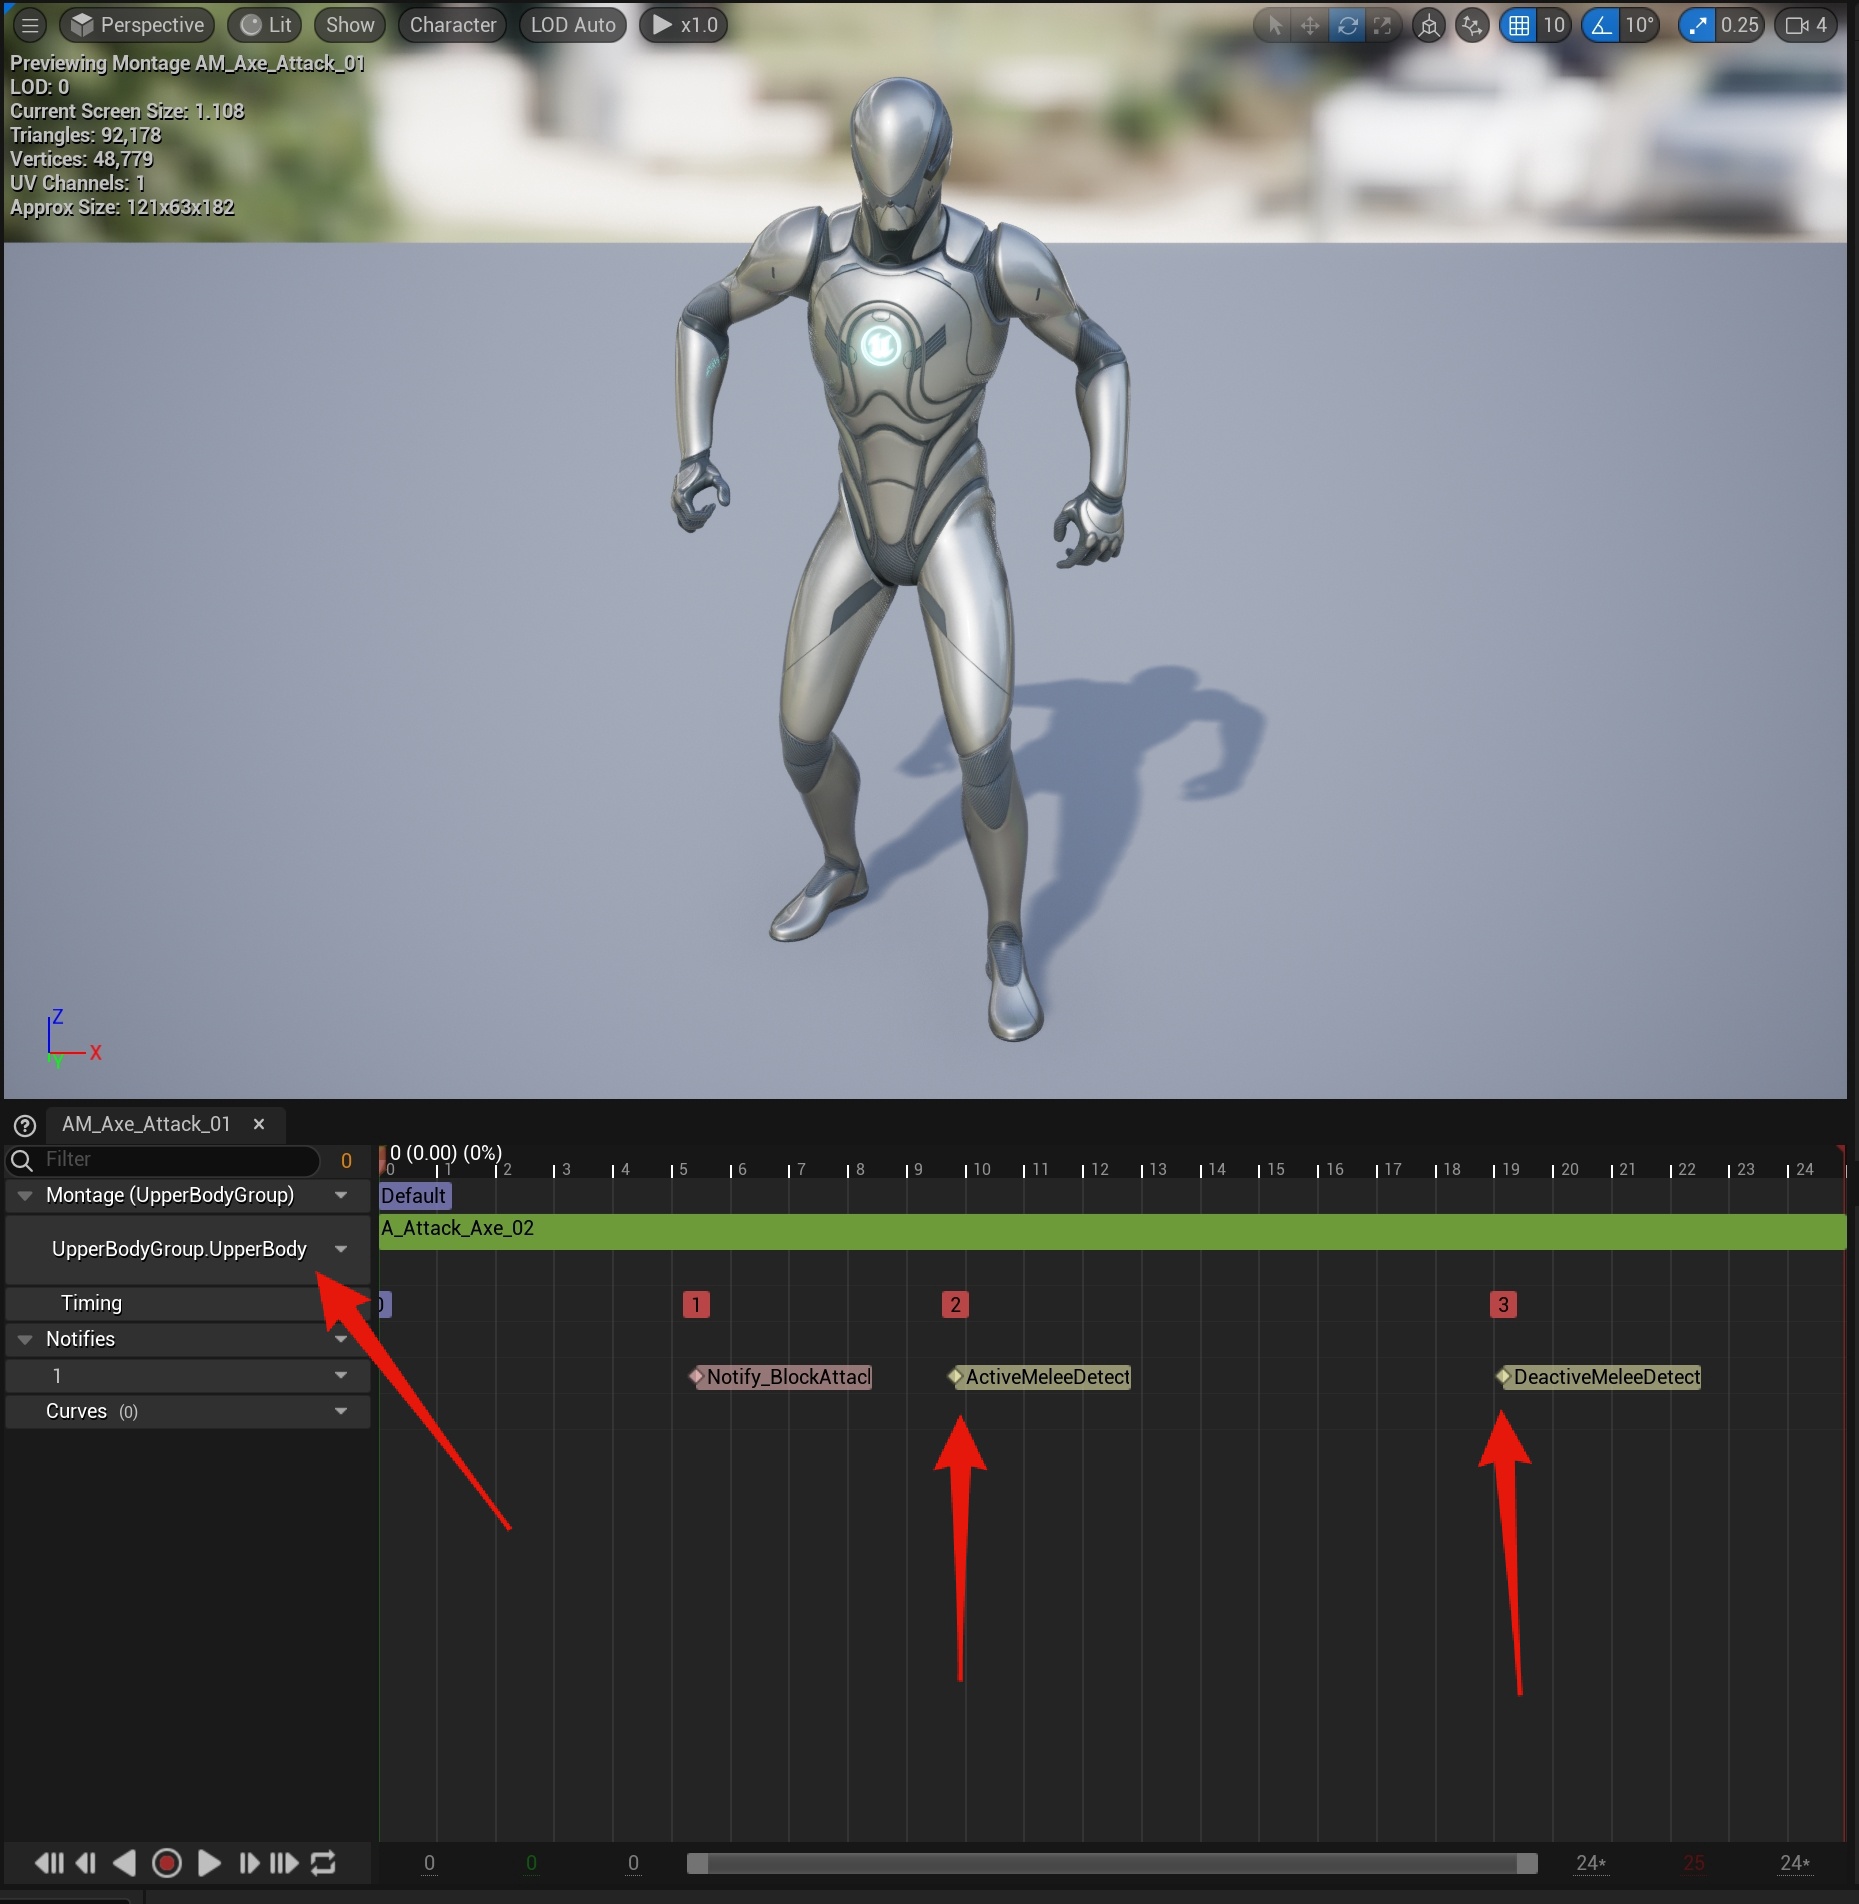
Next you need to add the ActivateMeleeDetect and DeactivateMeleeDetect notifys like show in the image above. If you do not know how to add a notify the video below shows you how.
You want to position your ActiveMeleeDetect notify at the time in the animation where you want the melee trace to start (This is when the animation can deal damage to things) and the DeactiveMeleeDetect when you want it to stop, make sure the DeactiveMeleeDetect isnt to close to the end of animation. A good position is about were it is shown in the image below.

Once this is done your montage should now be ready to be used as a melee attack montage for Smart AI.
Setting New Melee Animations
To set a new melee montage for an AI not using a weapon go to the AI’s character blueprint, like for example the BP_Zombie, if necessary click the Open Full Blueprint Editor link at the top of the blueprint if you cannot see the event graph.
Then select the BP_AIComponent and in the Details search for Melee Animations. Here you can change, add or remove melee animations used by this AI.
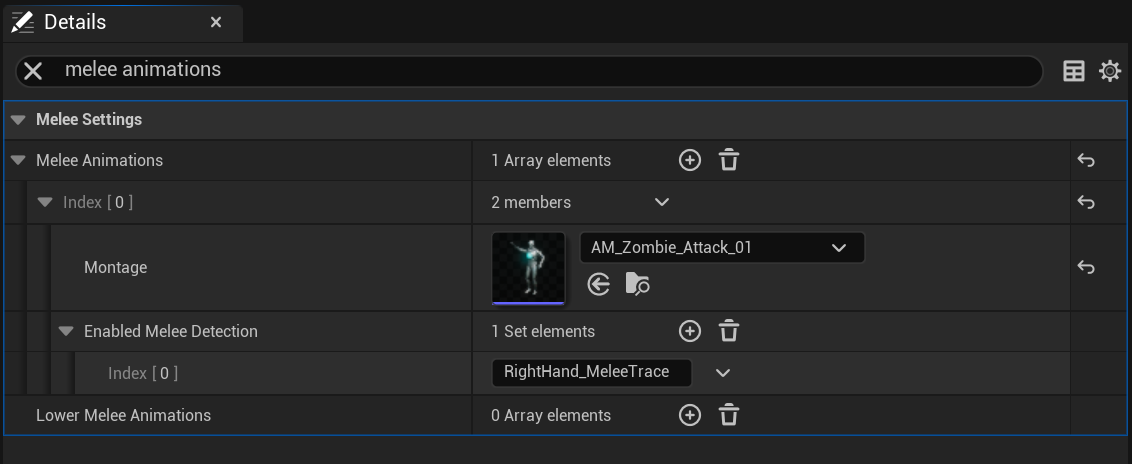
Here you can click the + icon to add a new animation or you can remove an animation by clicking the down arrow next to the Index number.
Here you set the Montage you want to play as well as the Melee Detection sockets that will be activated when this montages plays, in the example above you can see it enabled the RightHand_MeleeTrace socket which is a socket attached to the right hand bone. You can add multiple socket names here by clicking the + icon in the Enabled Melee Detection panel.
