Make a backup of your project before following this guide!
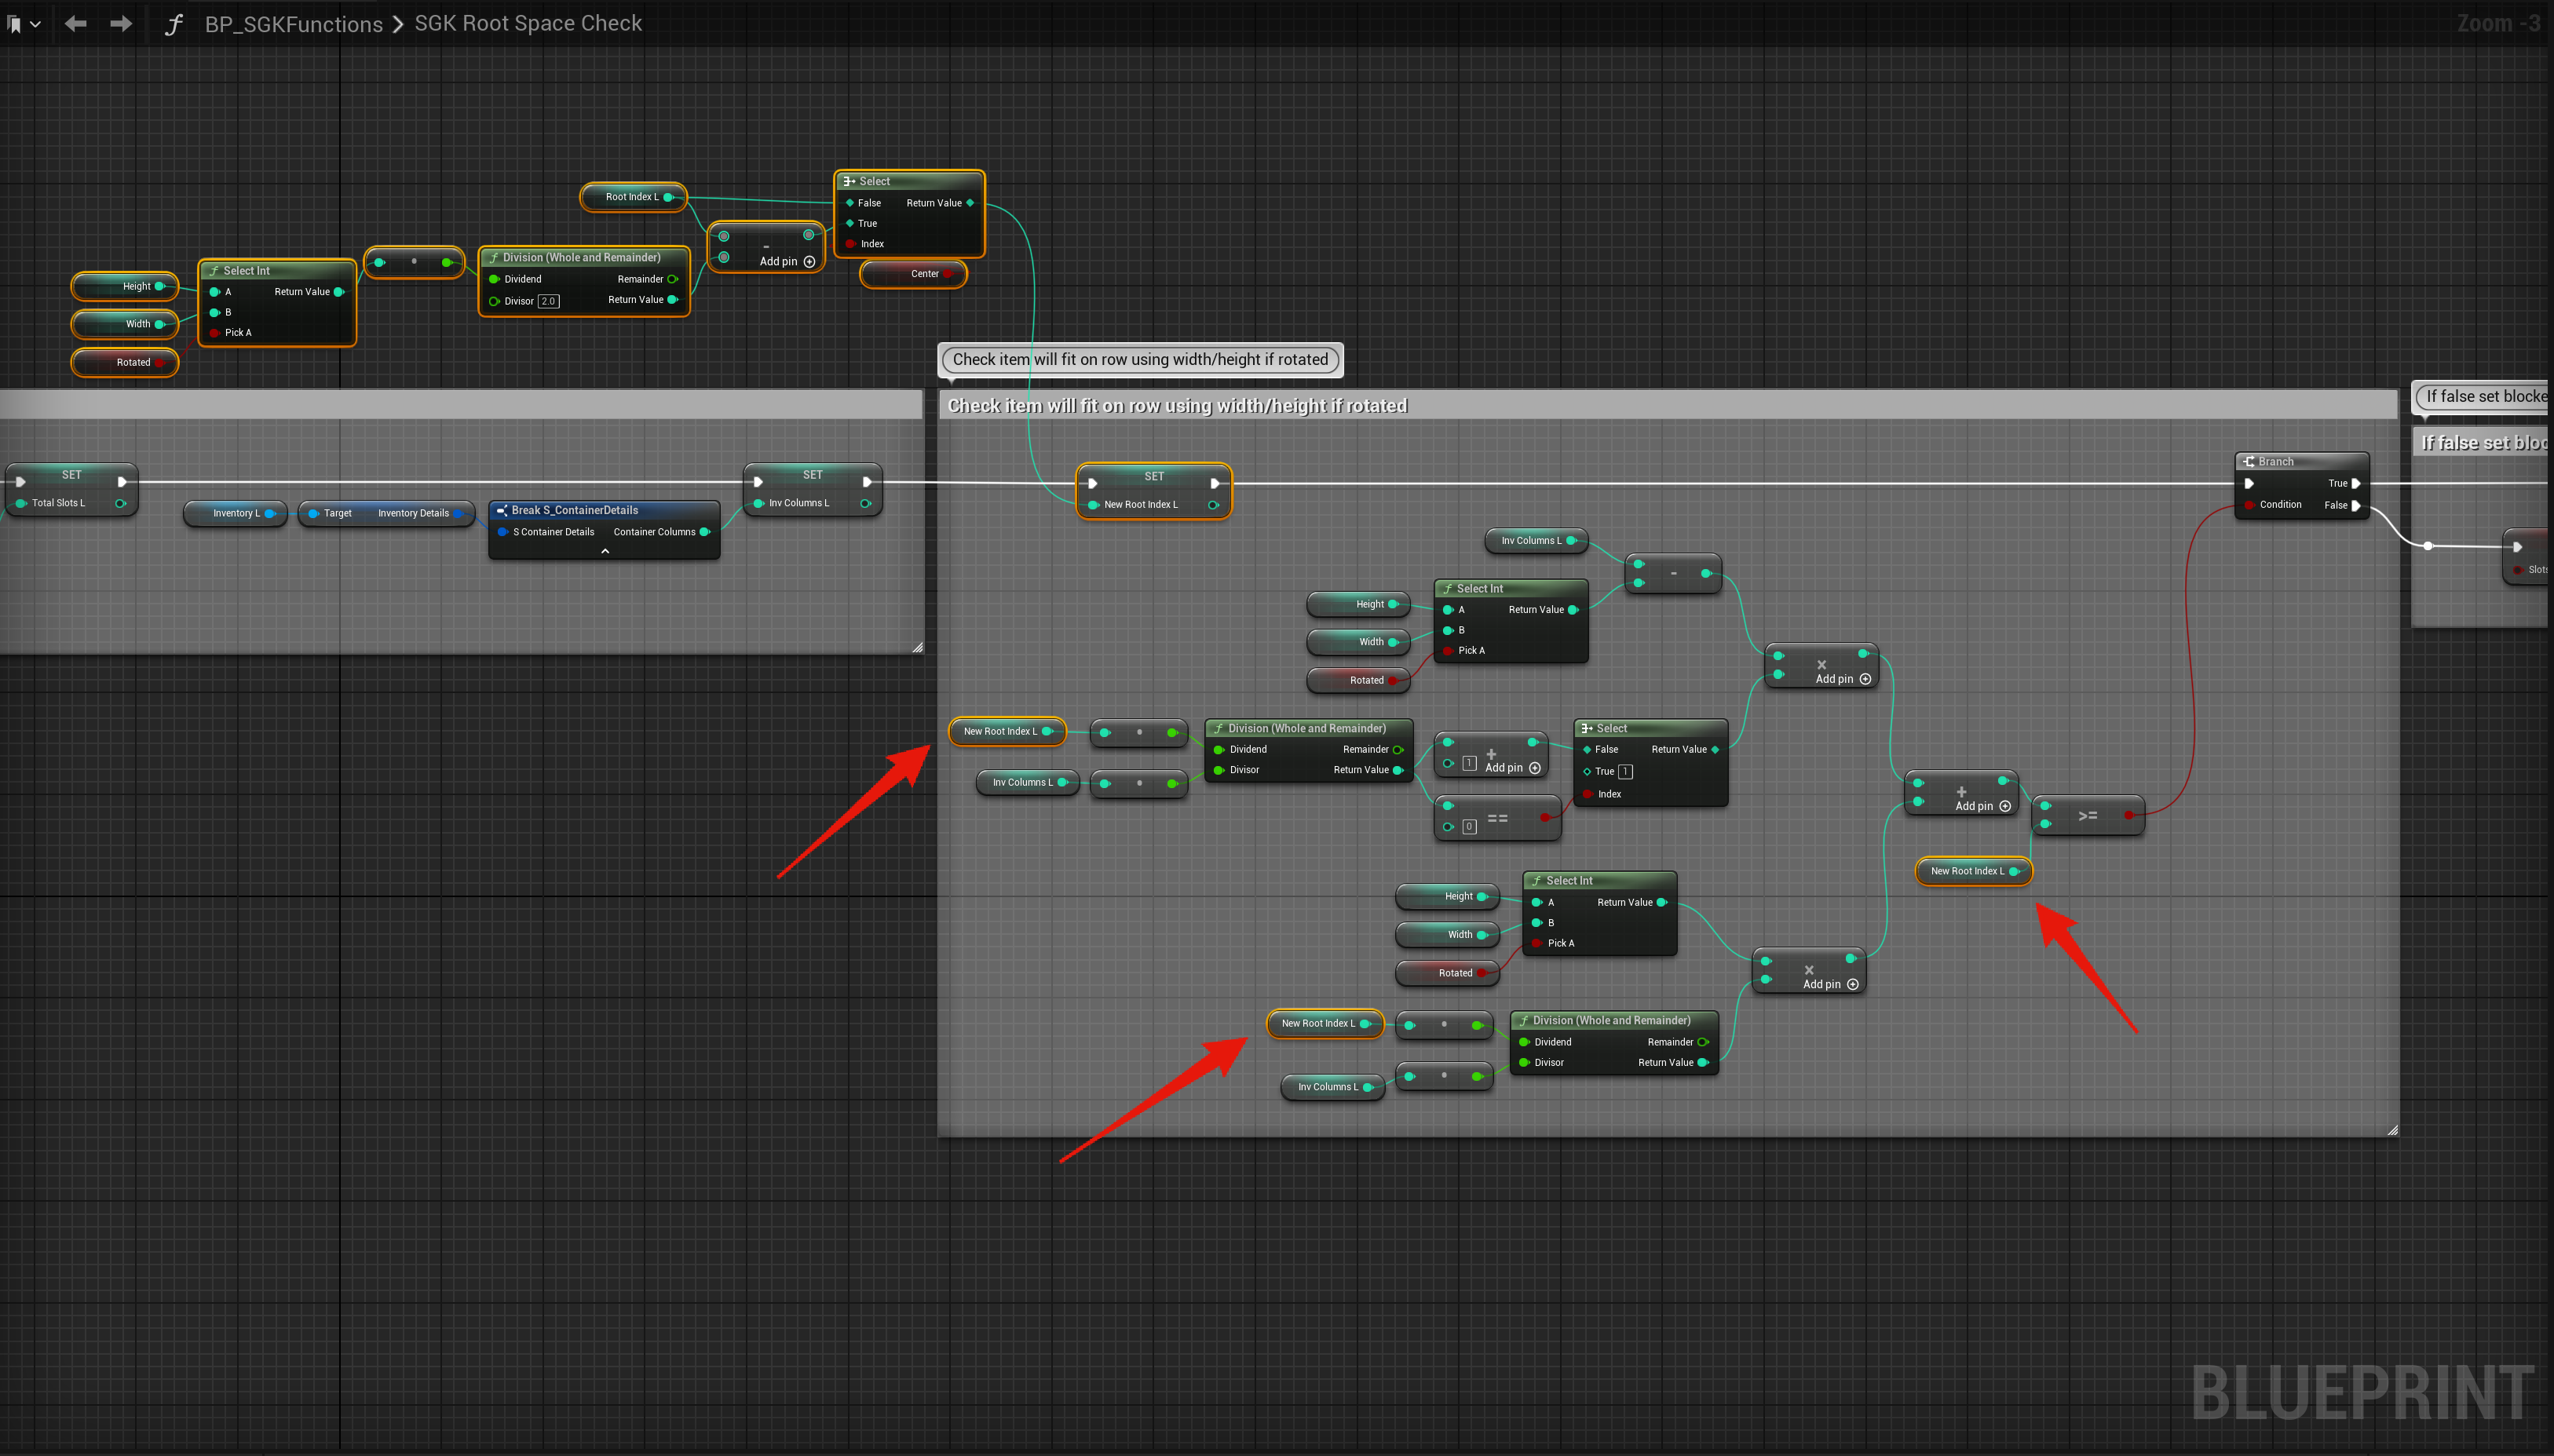
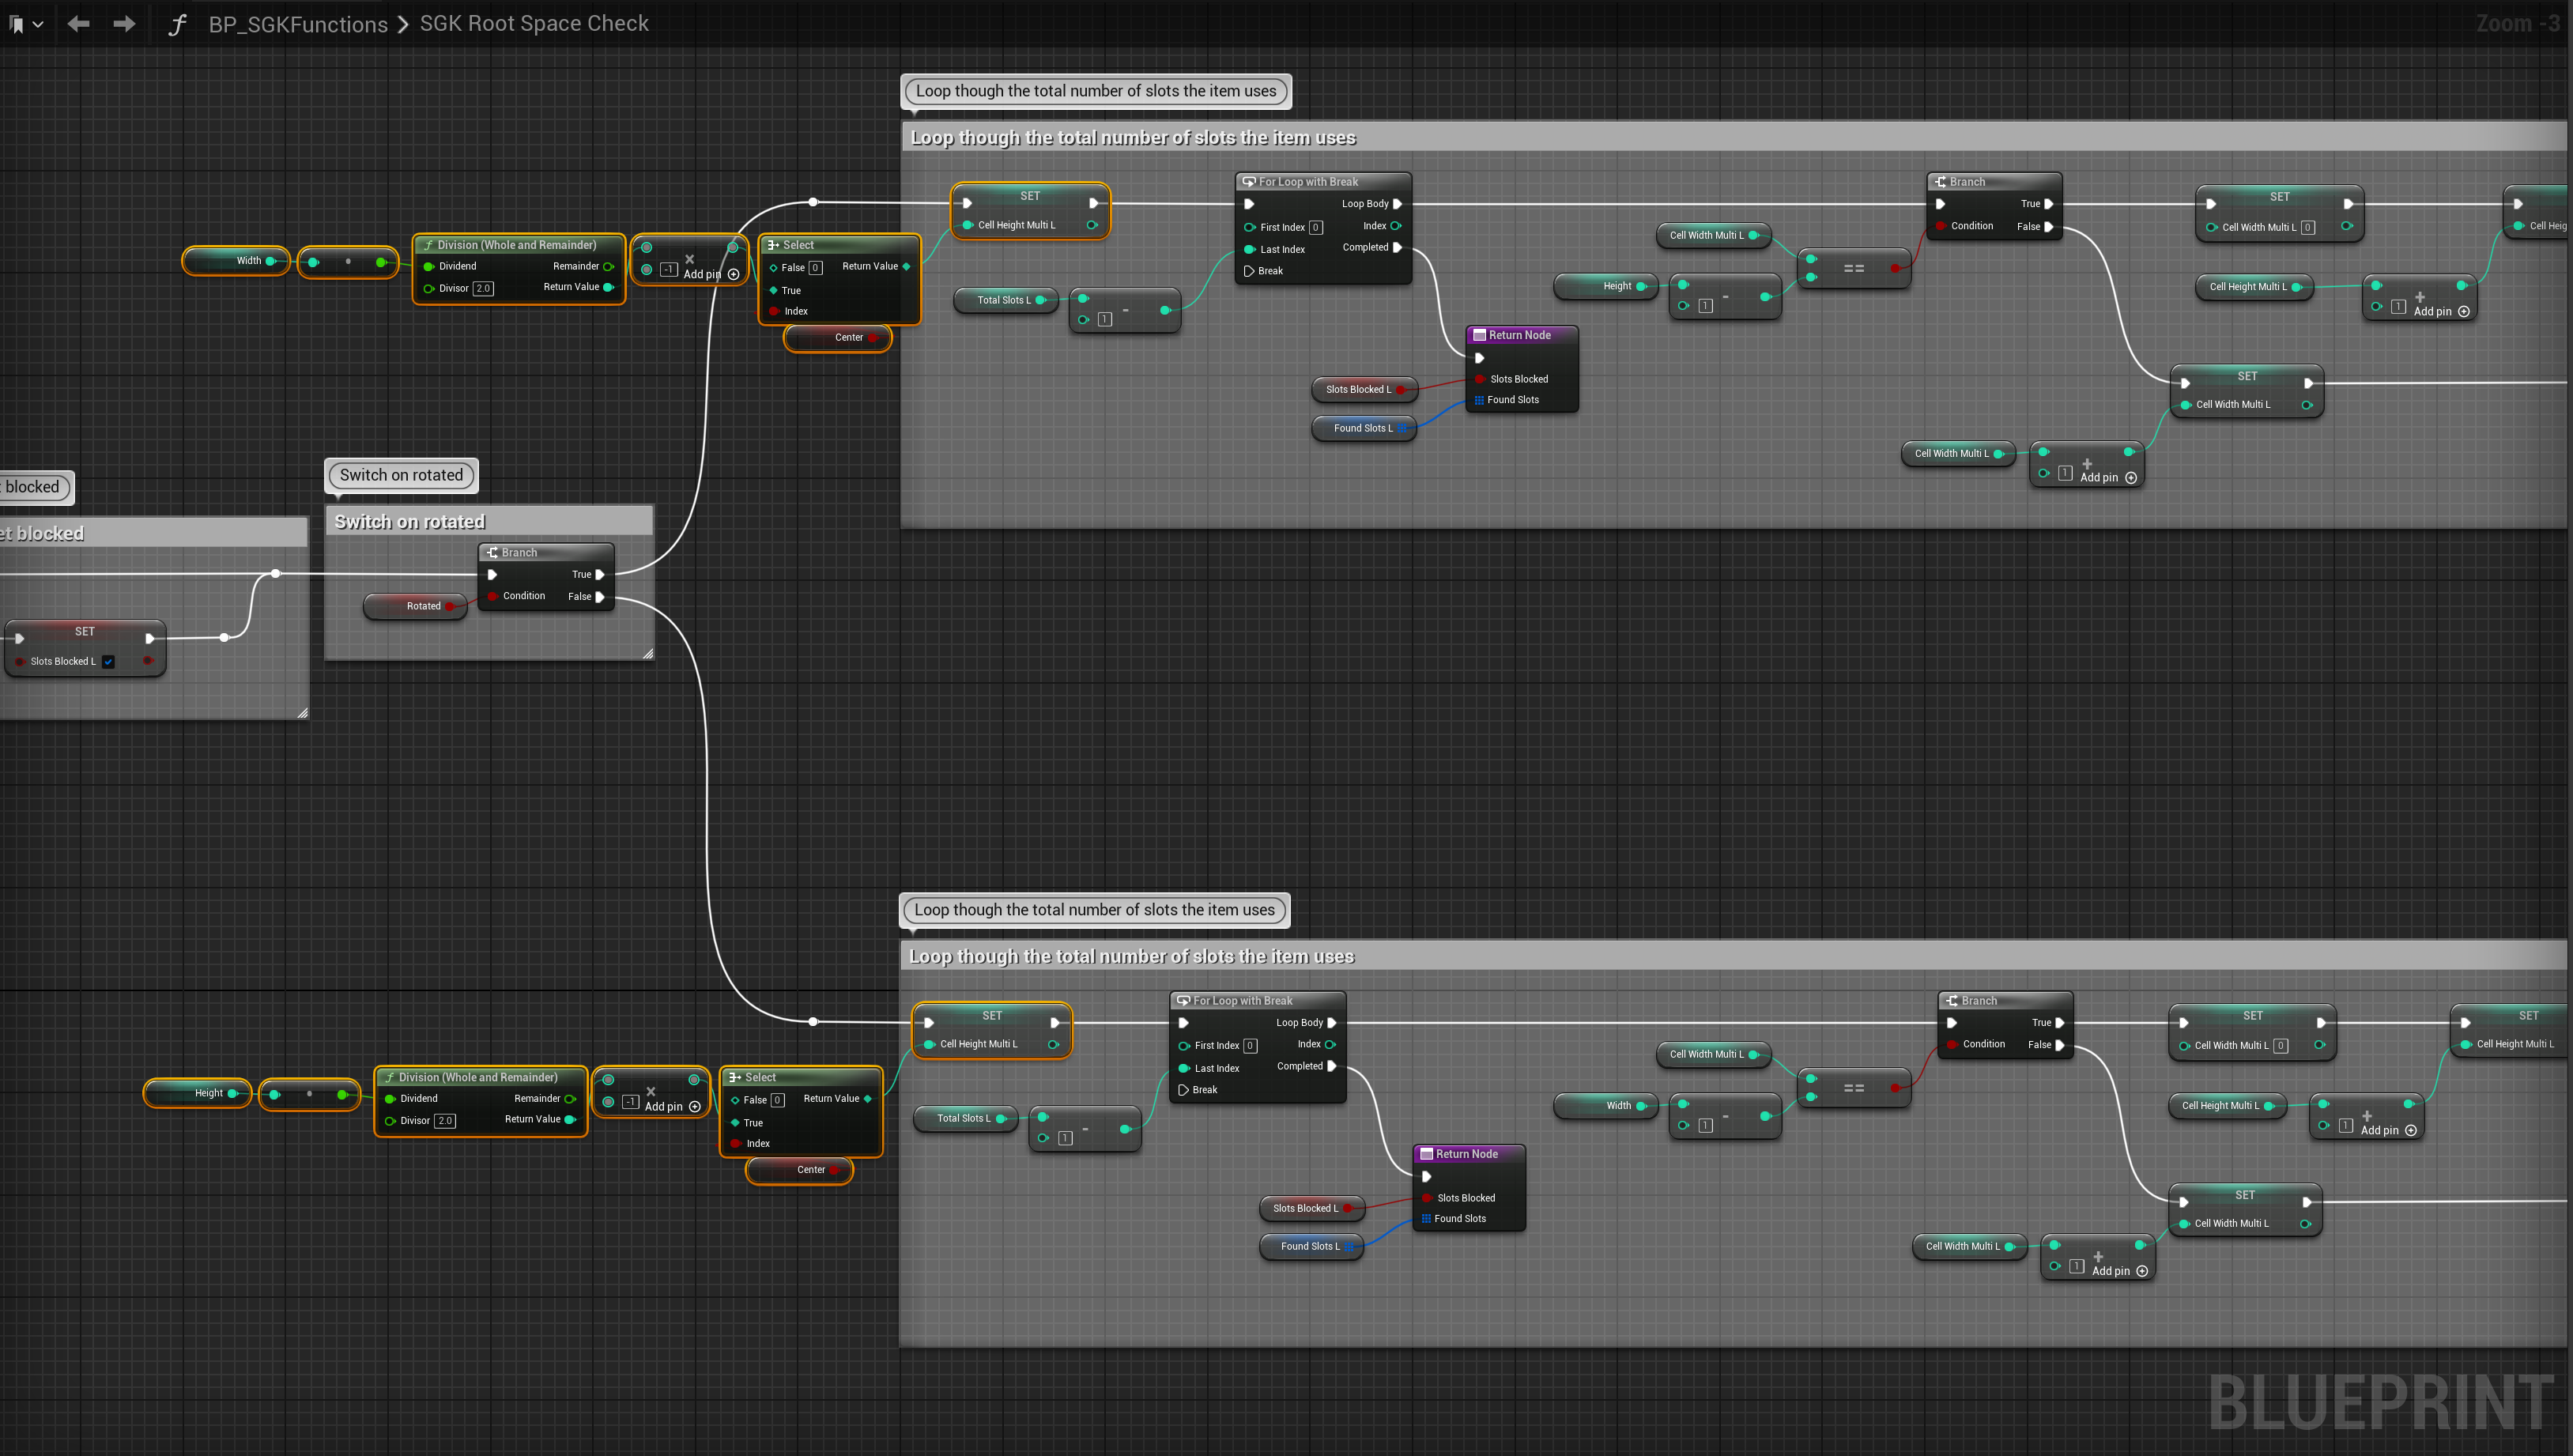
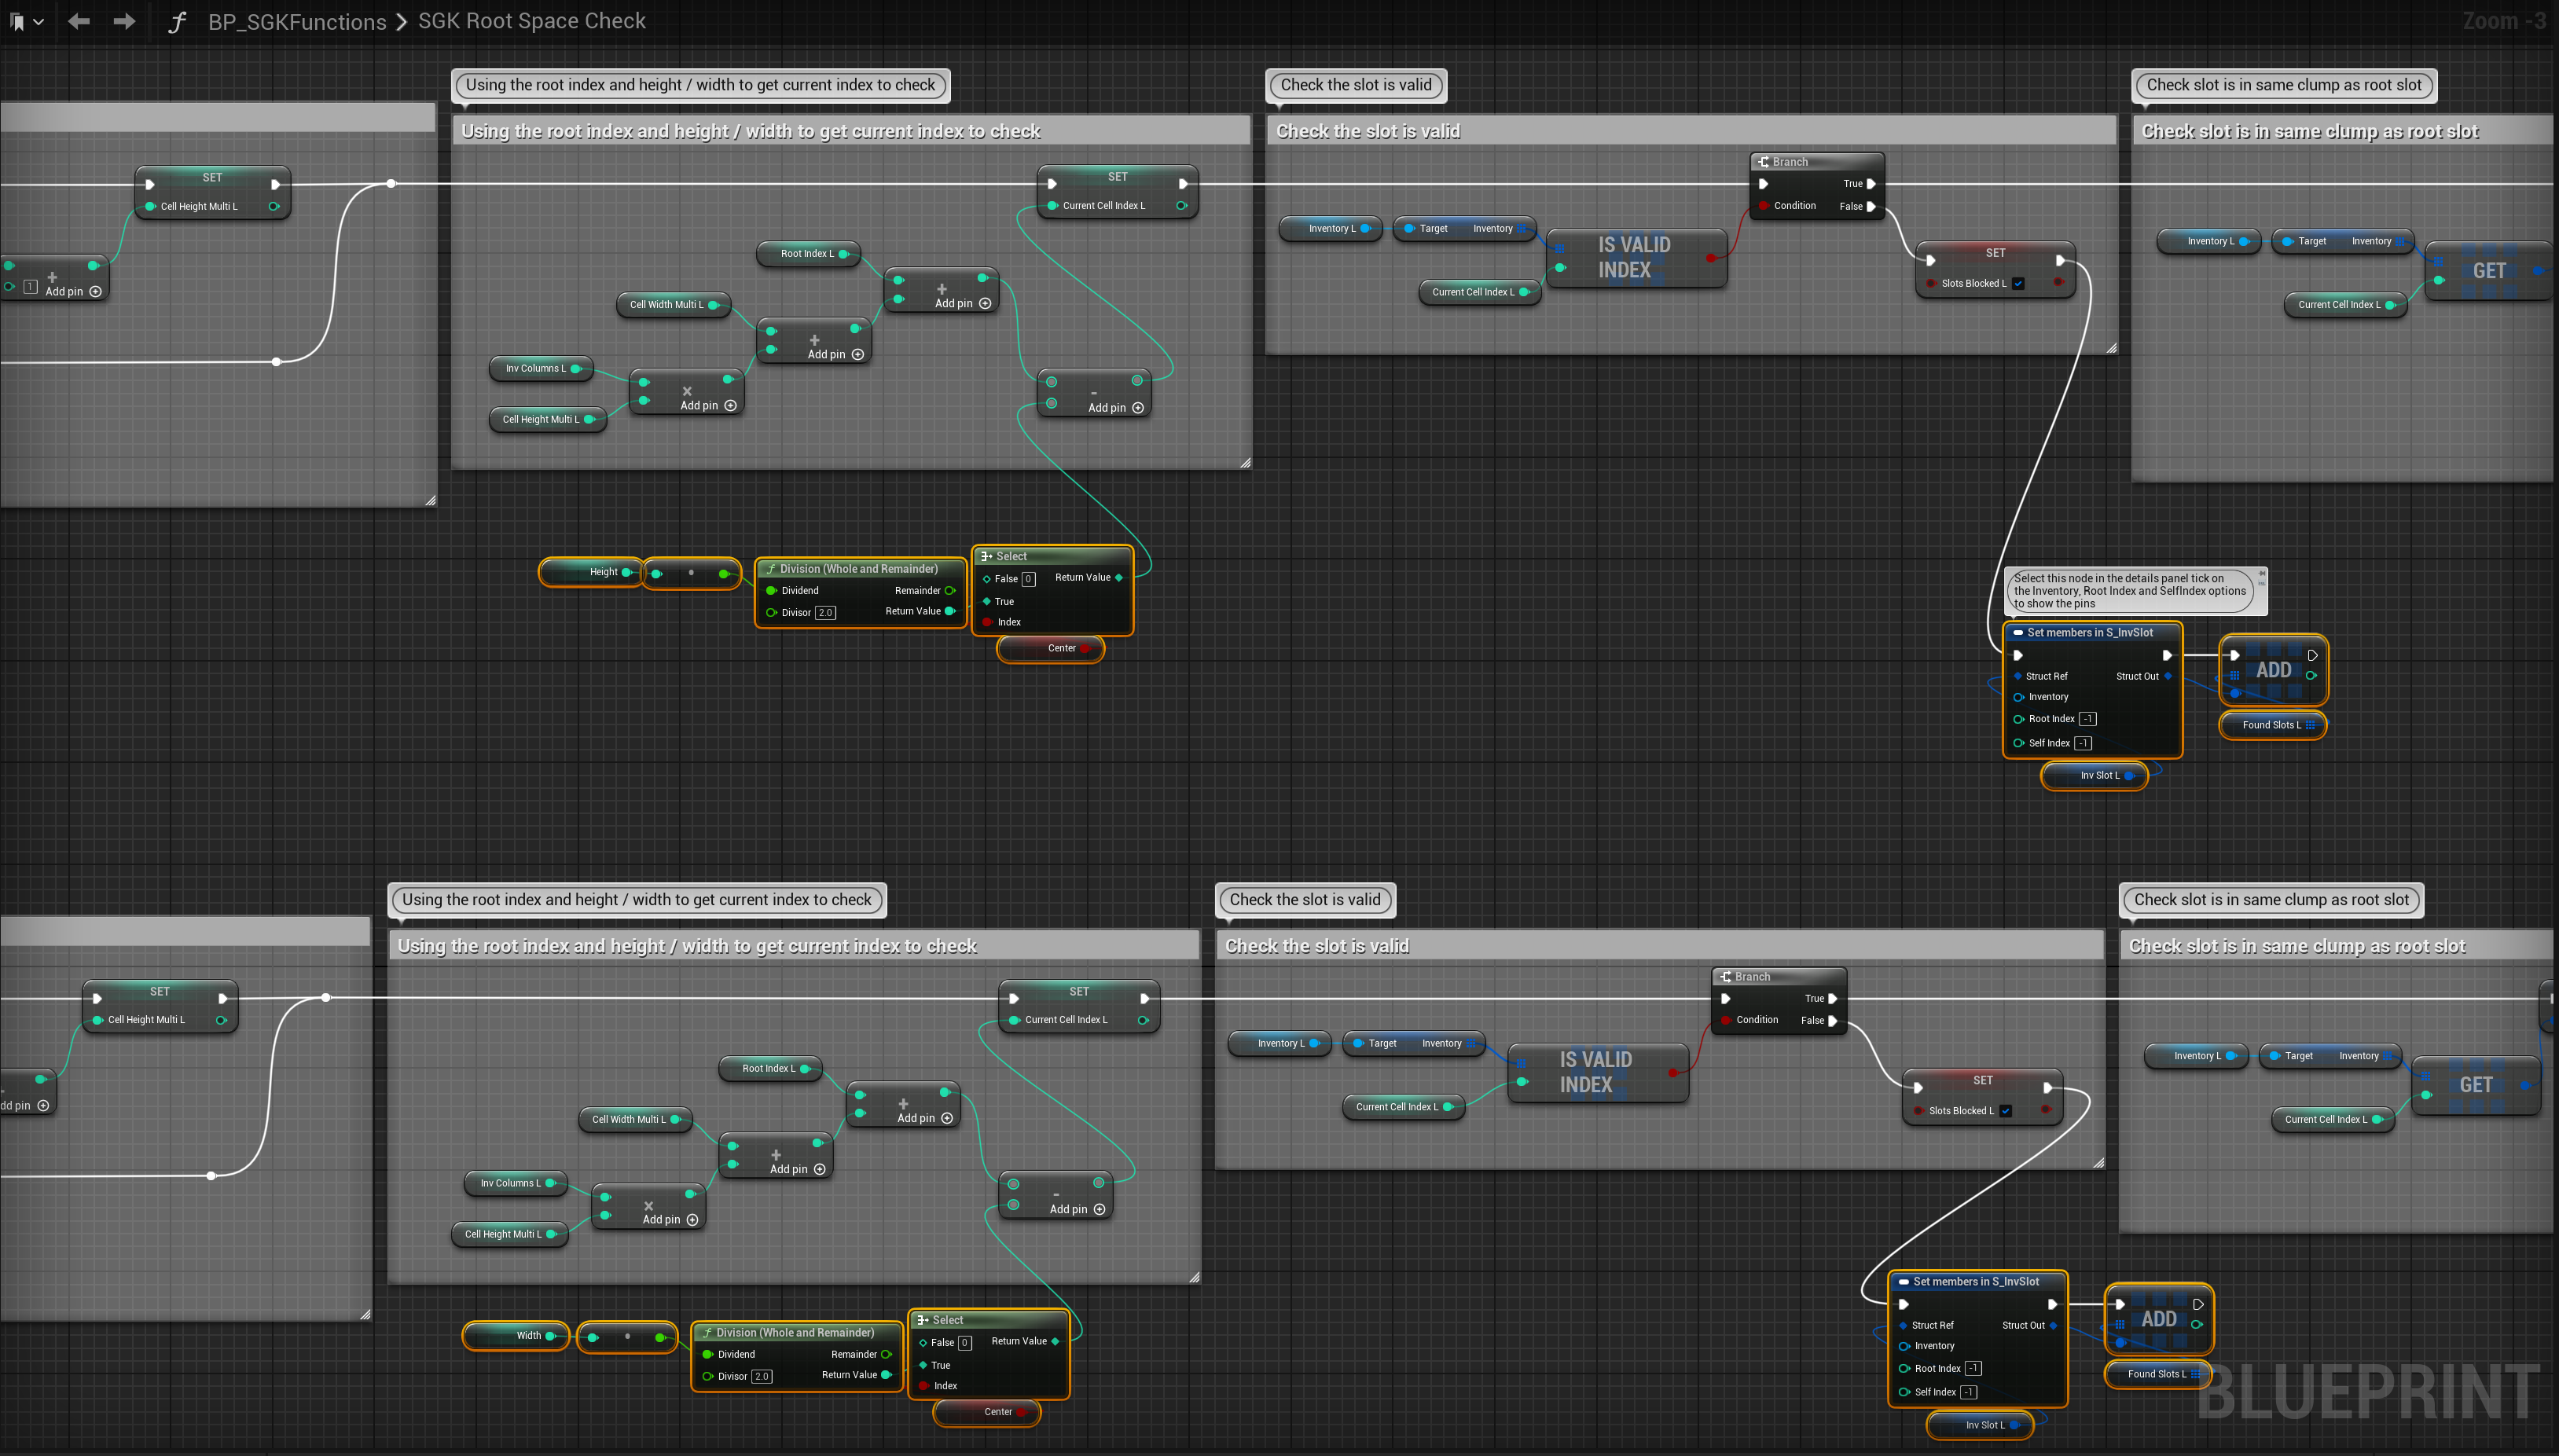
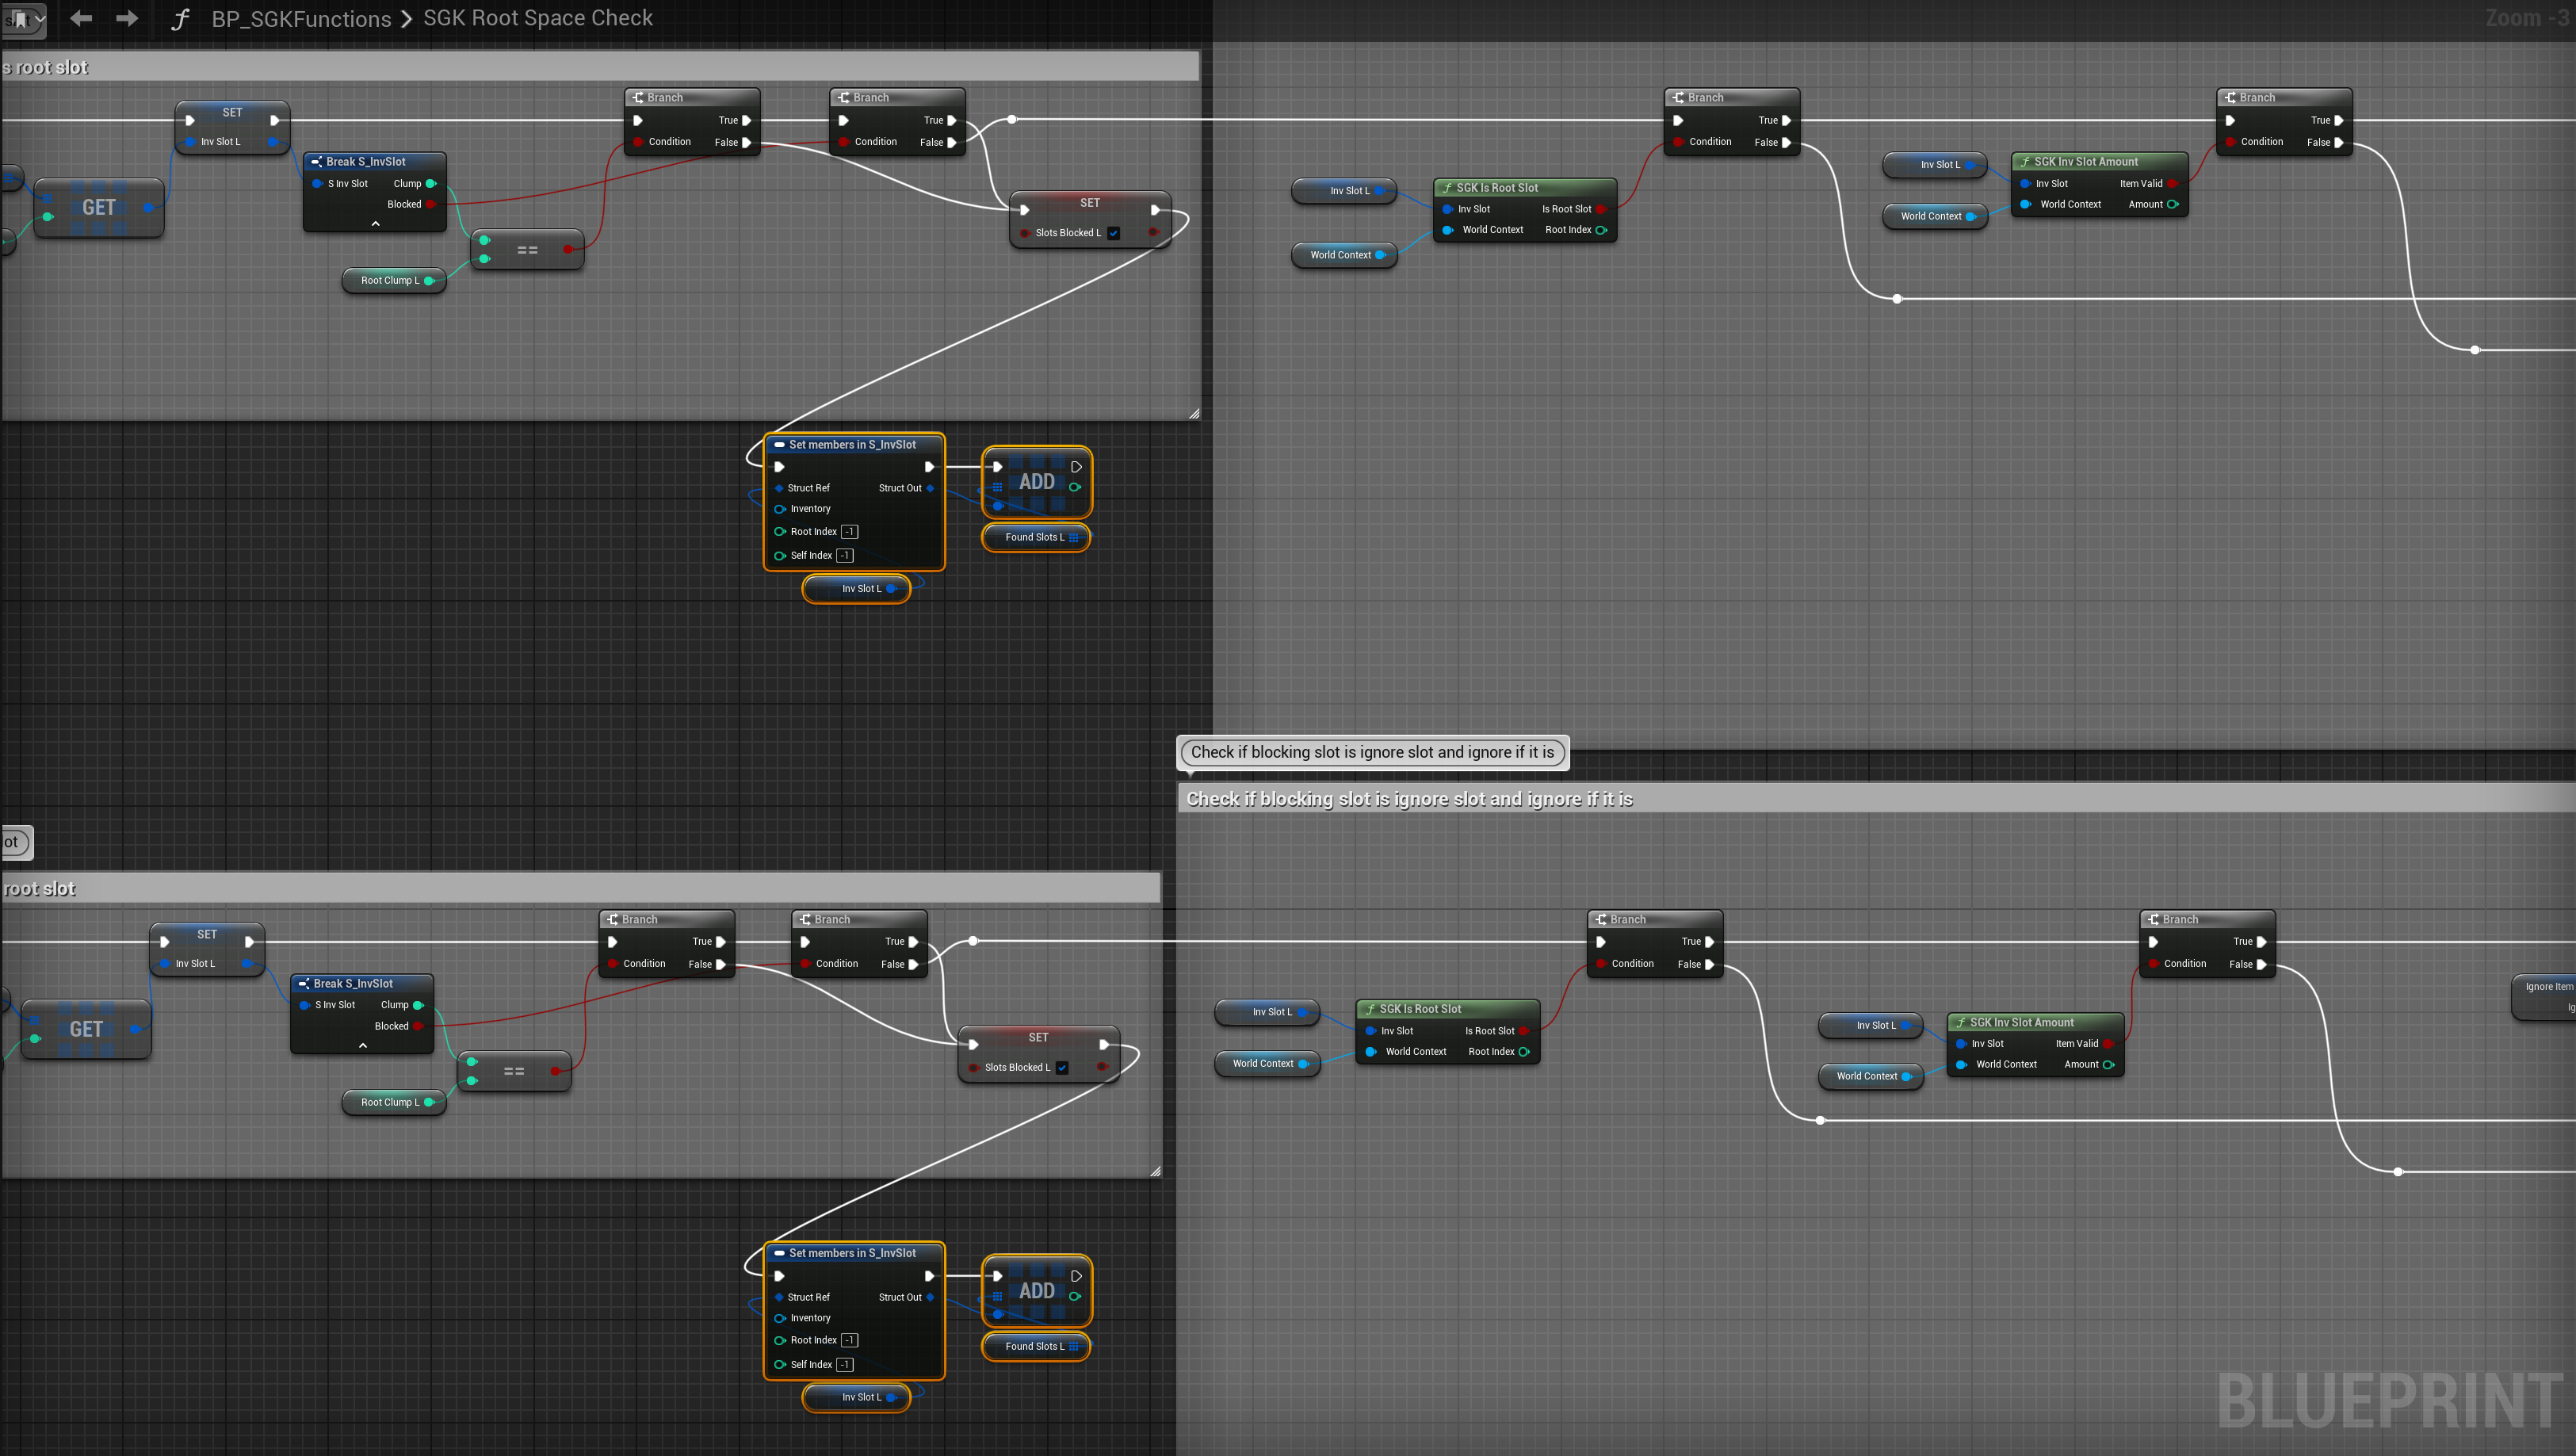
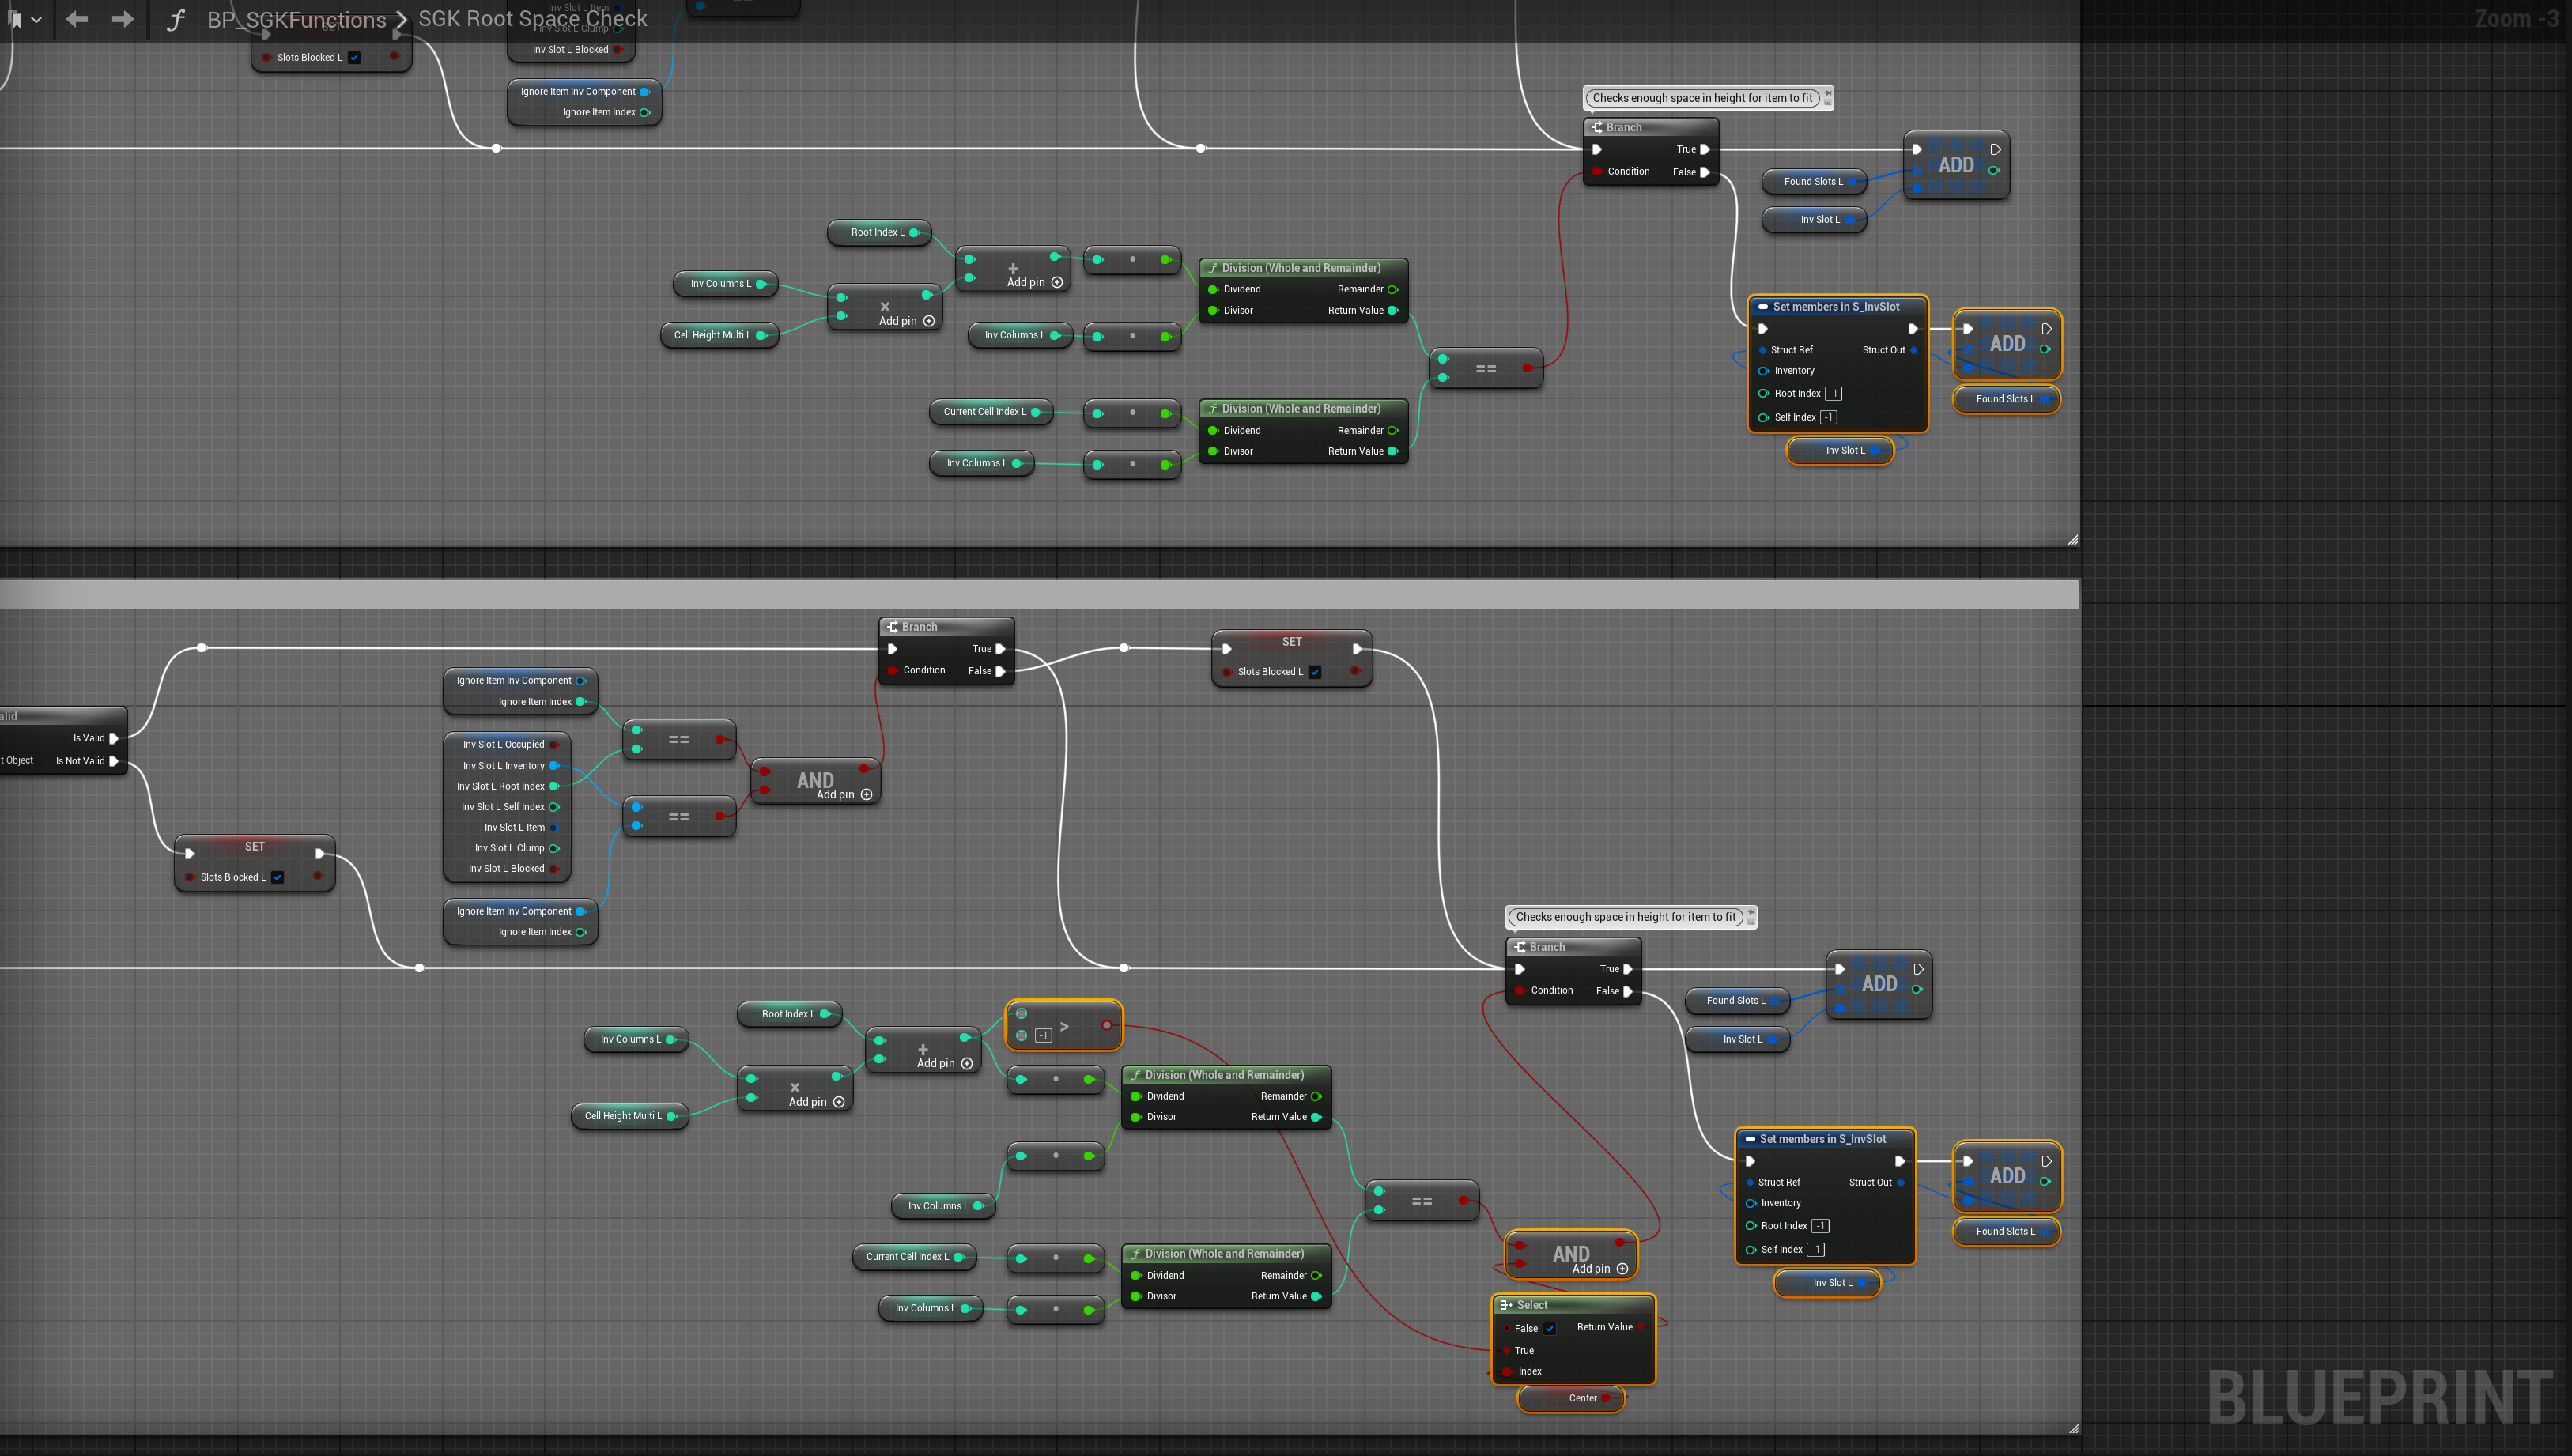
Open the BP_SGKFunctions blueprint then open the SGK RootSpaceCheck function, add a new input set its type to Boolean and new it Center.
Then add a new local Integer variable called NewRootIndexL. Then copy the images below.
Next go to the BP_PlayerInventory and create a new Boolean variable called CentreItemIcon and tick on Instance Editable. If you have errors in the BP_PlayerInventory compile it, then open the BP_MasterInventory and compile it then compile the BP_PlayerInventory again.
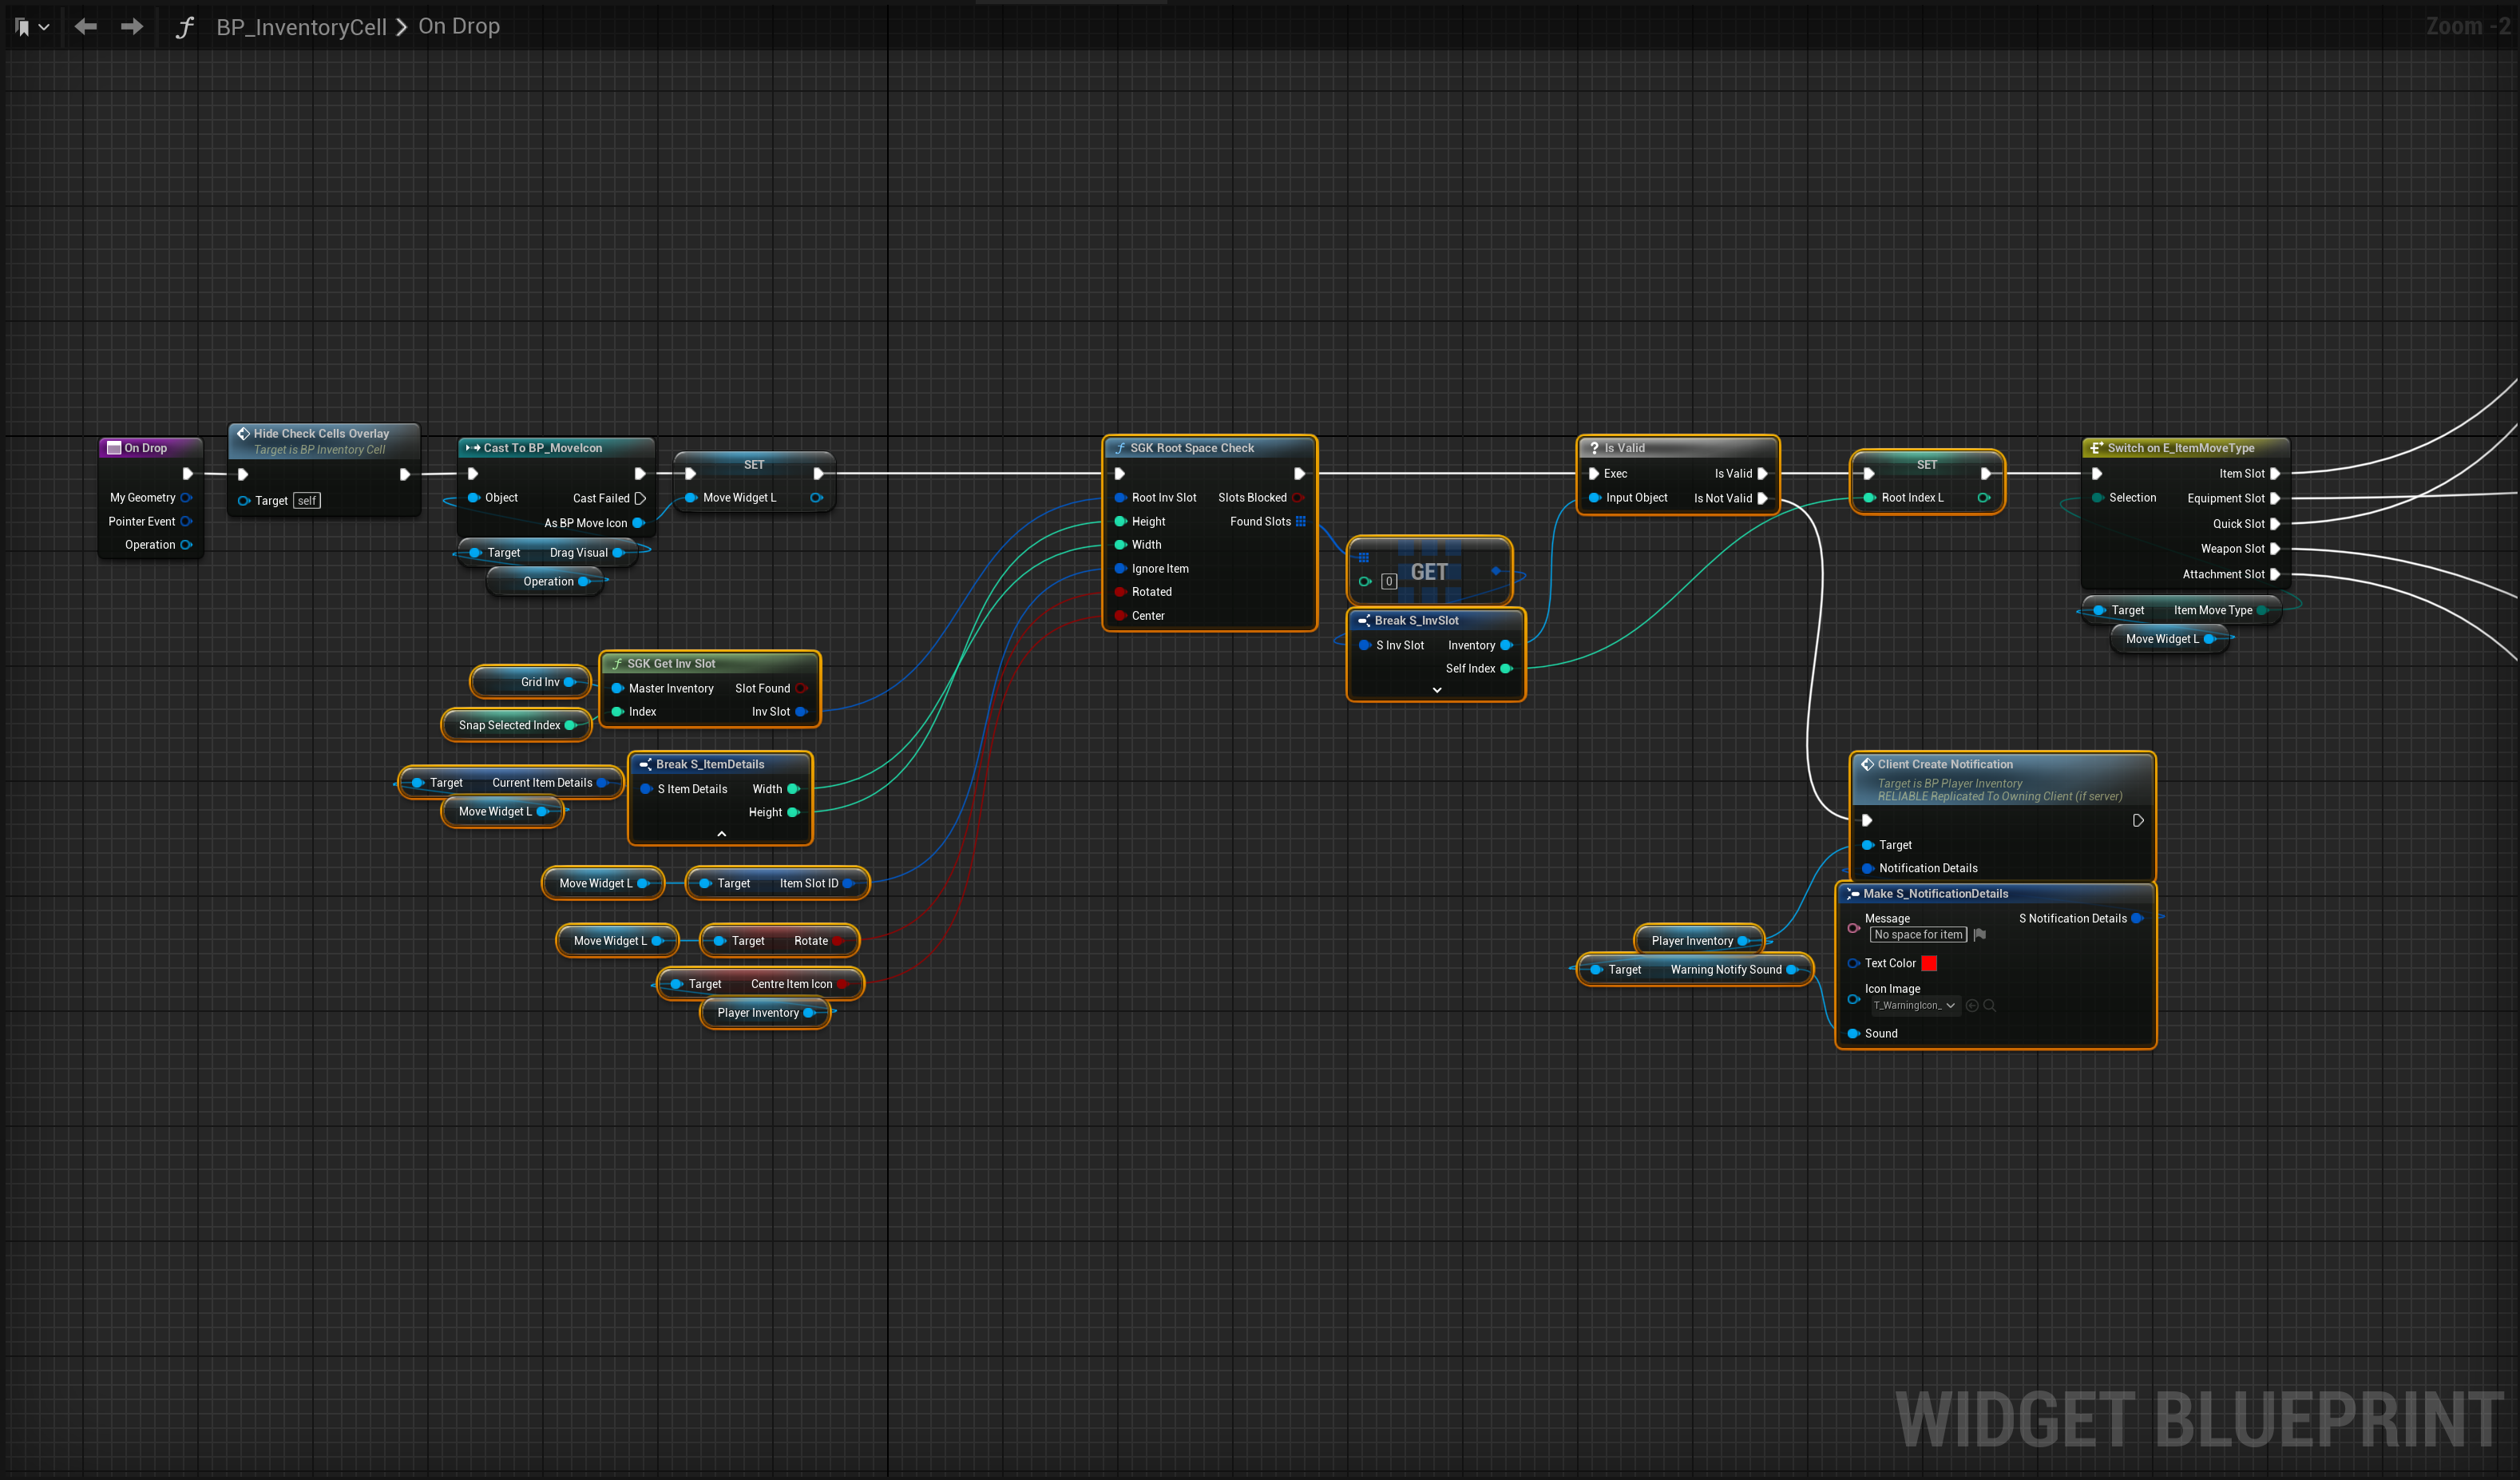
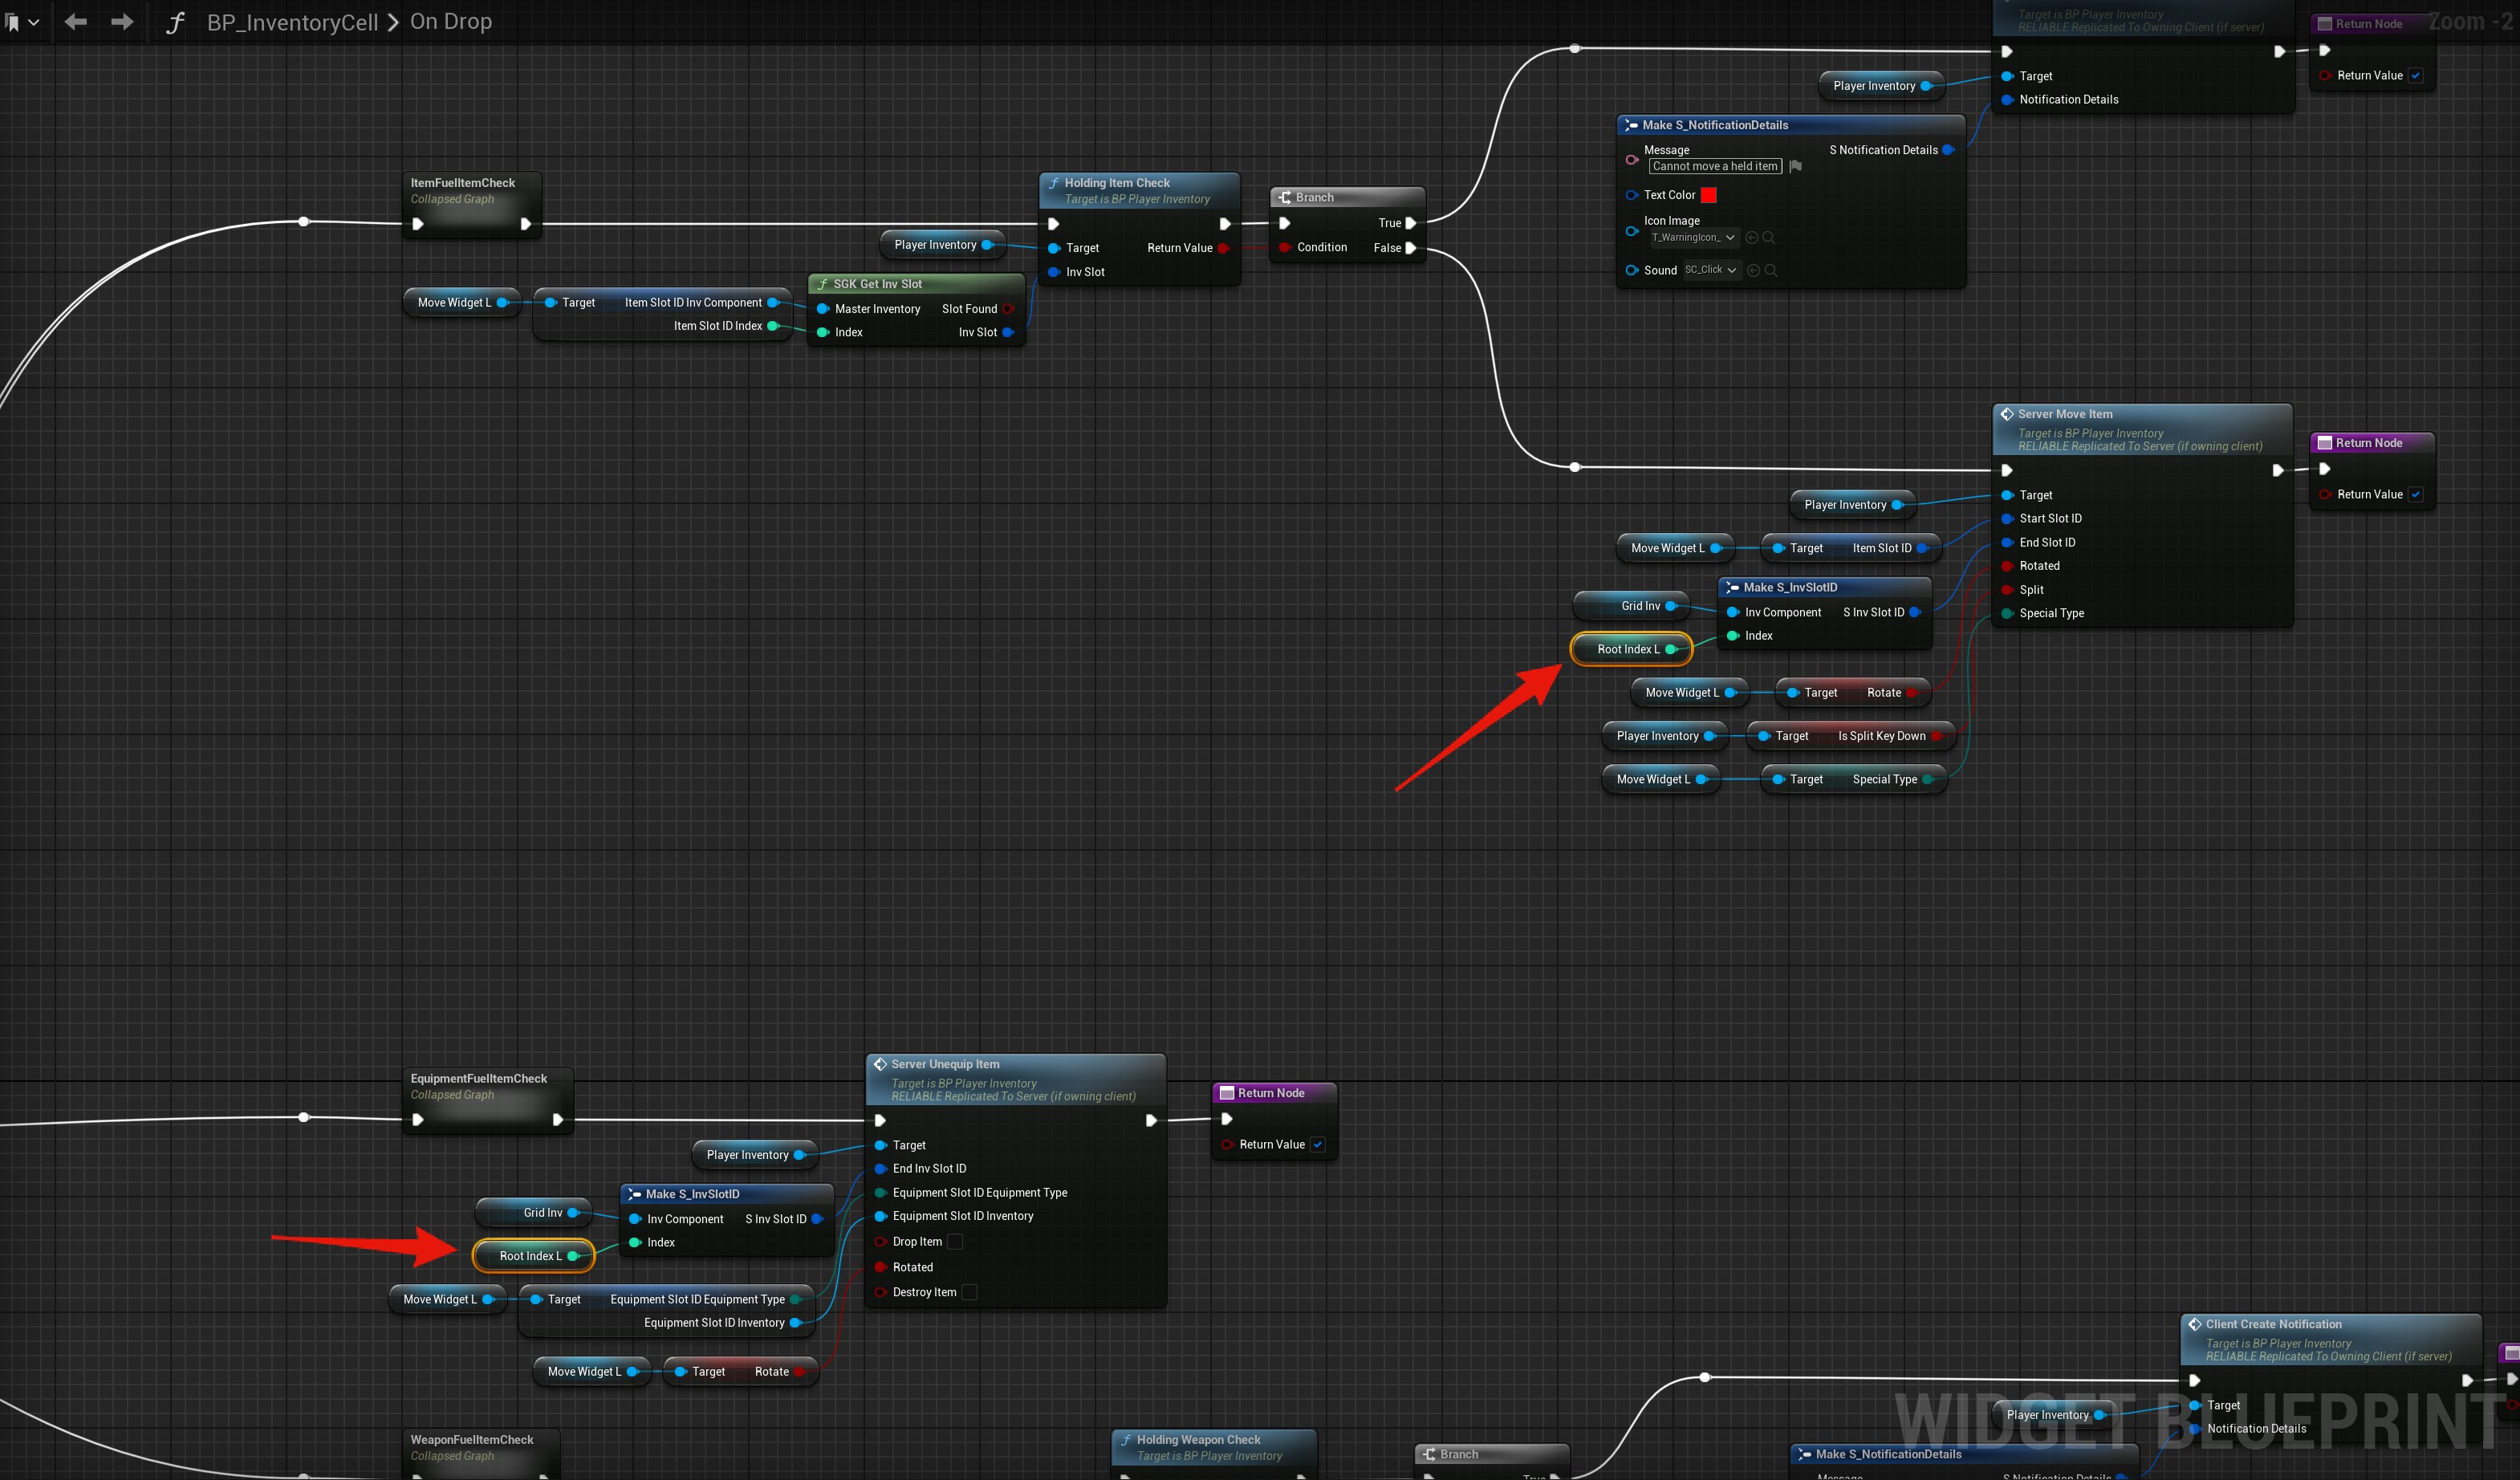
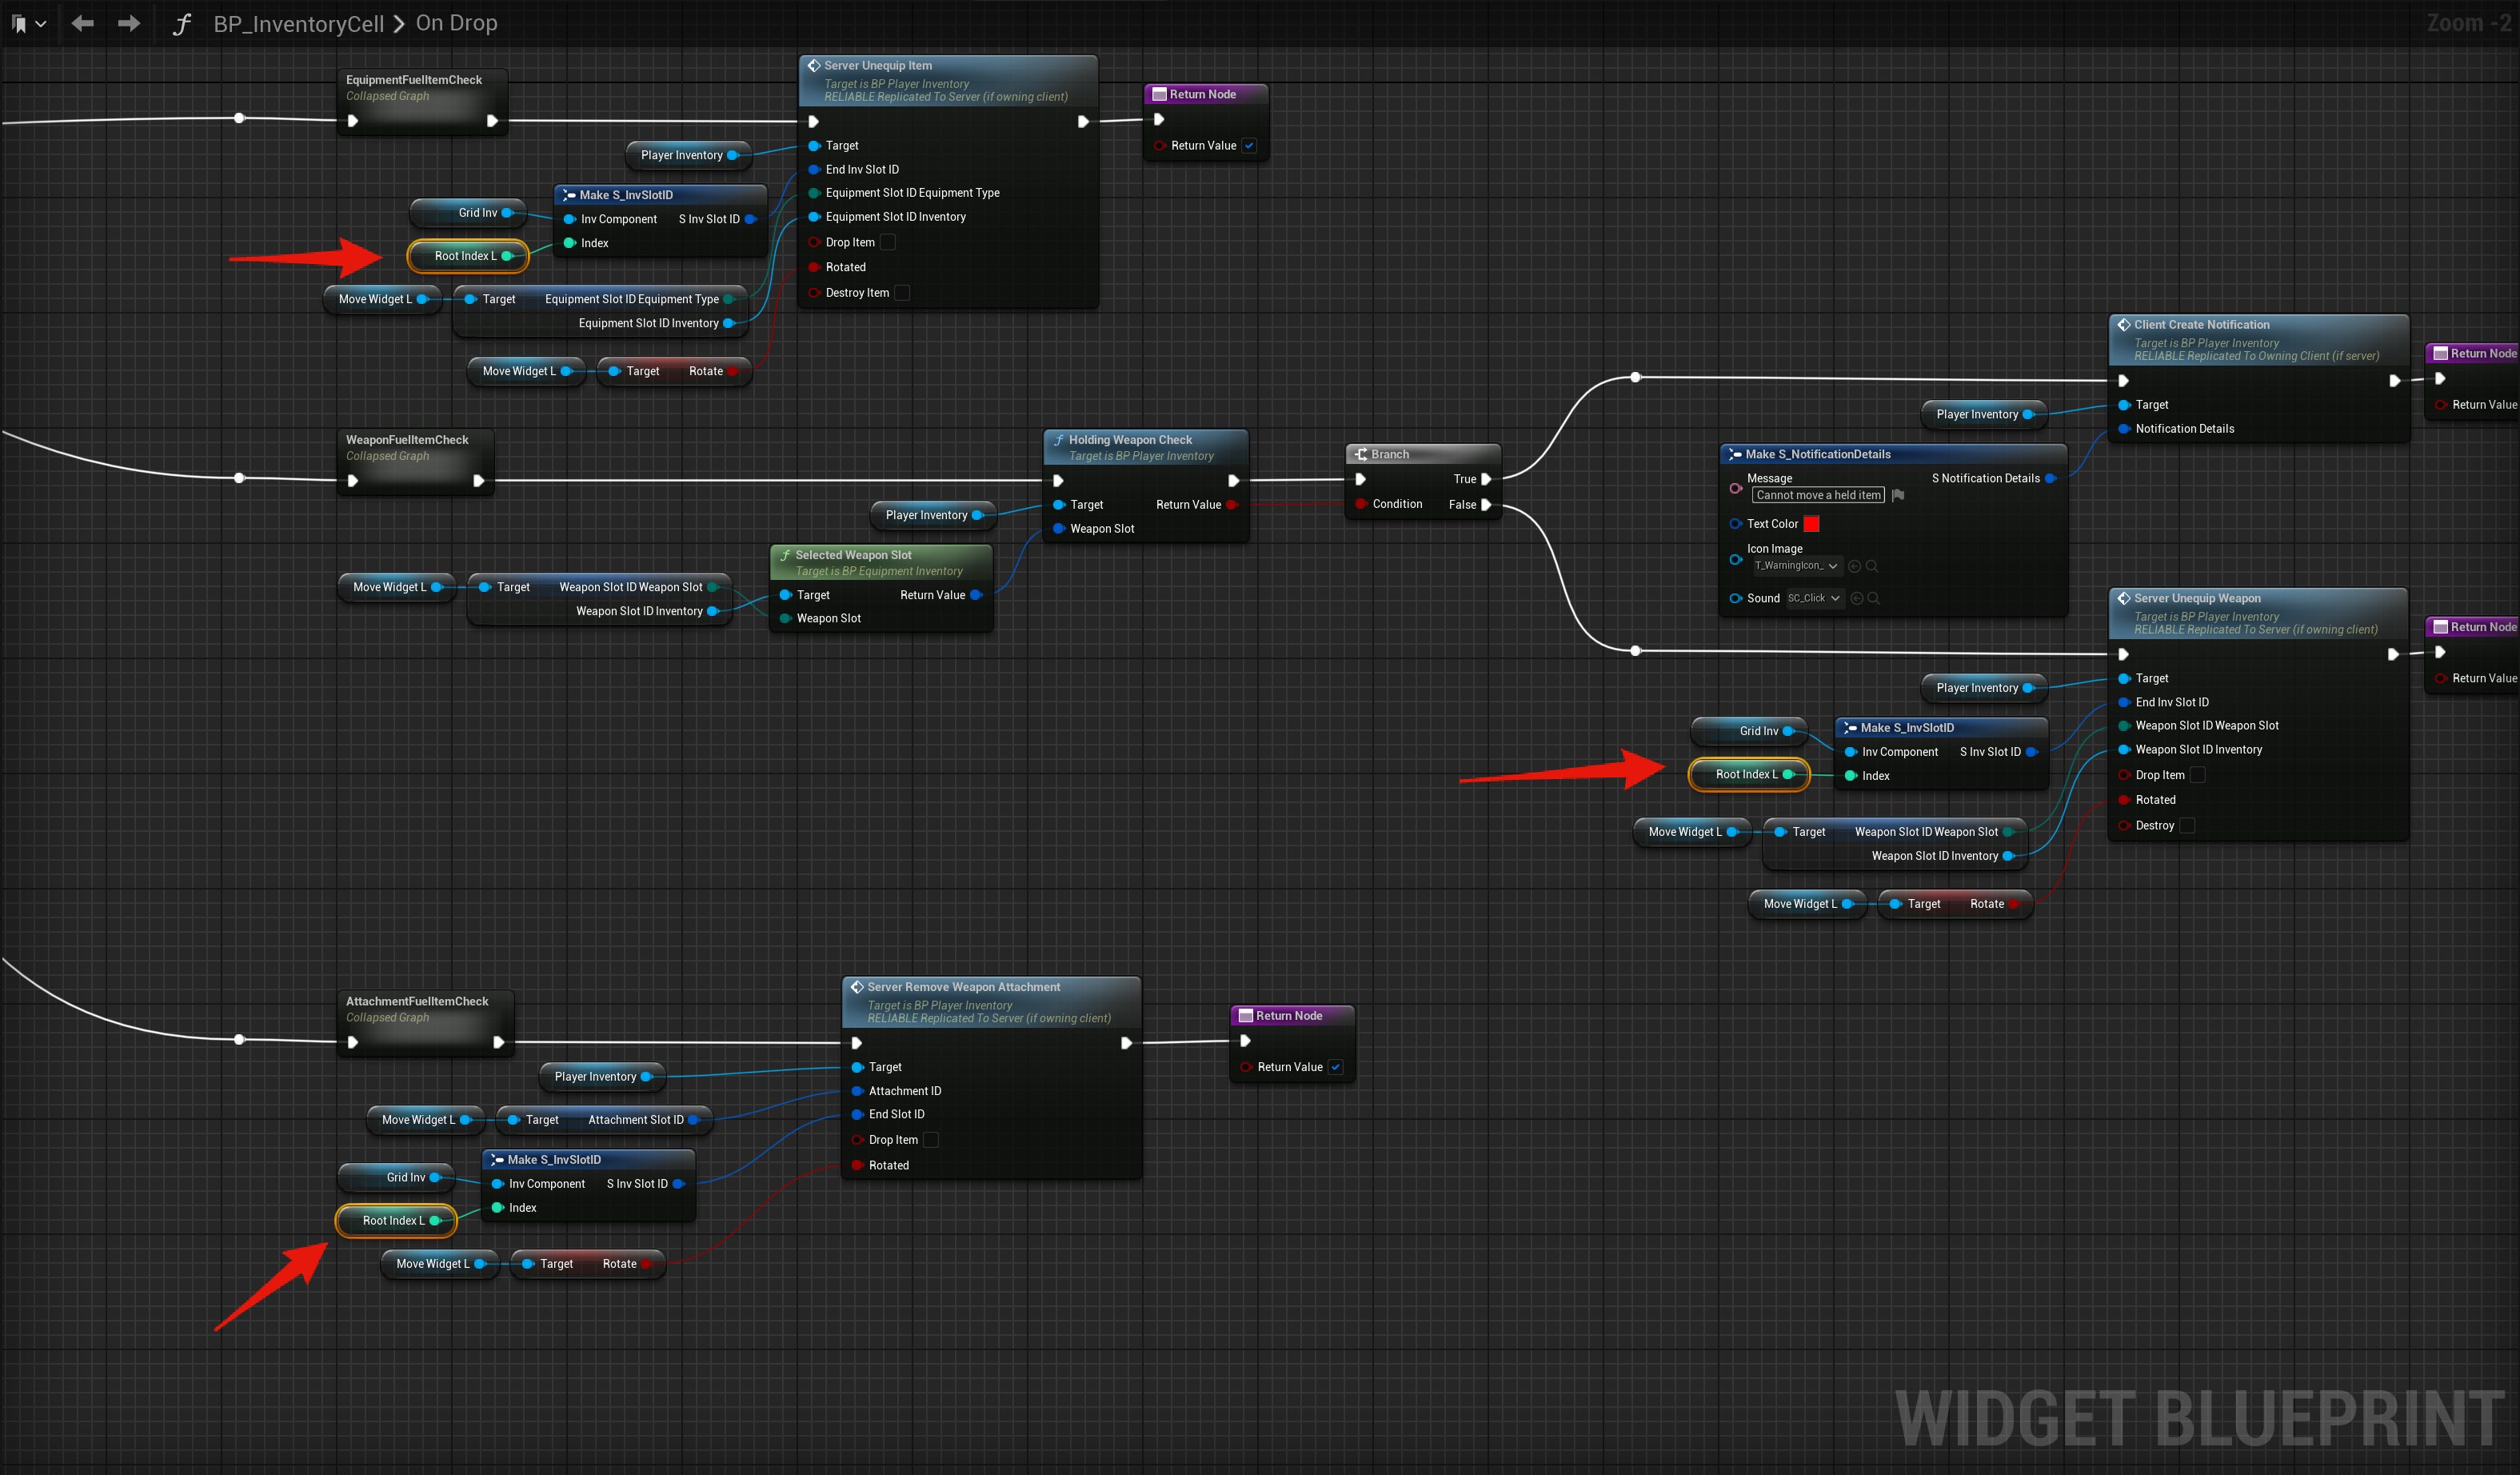
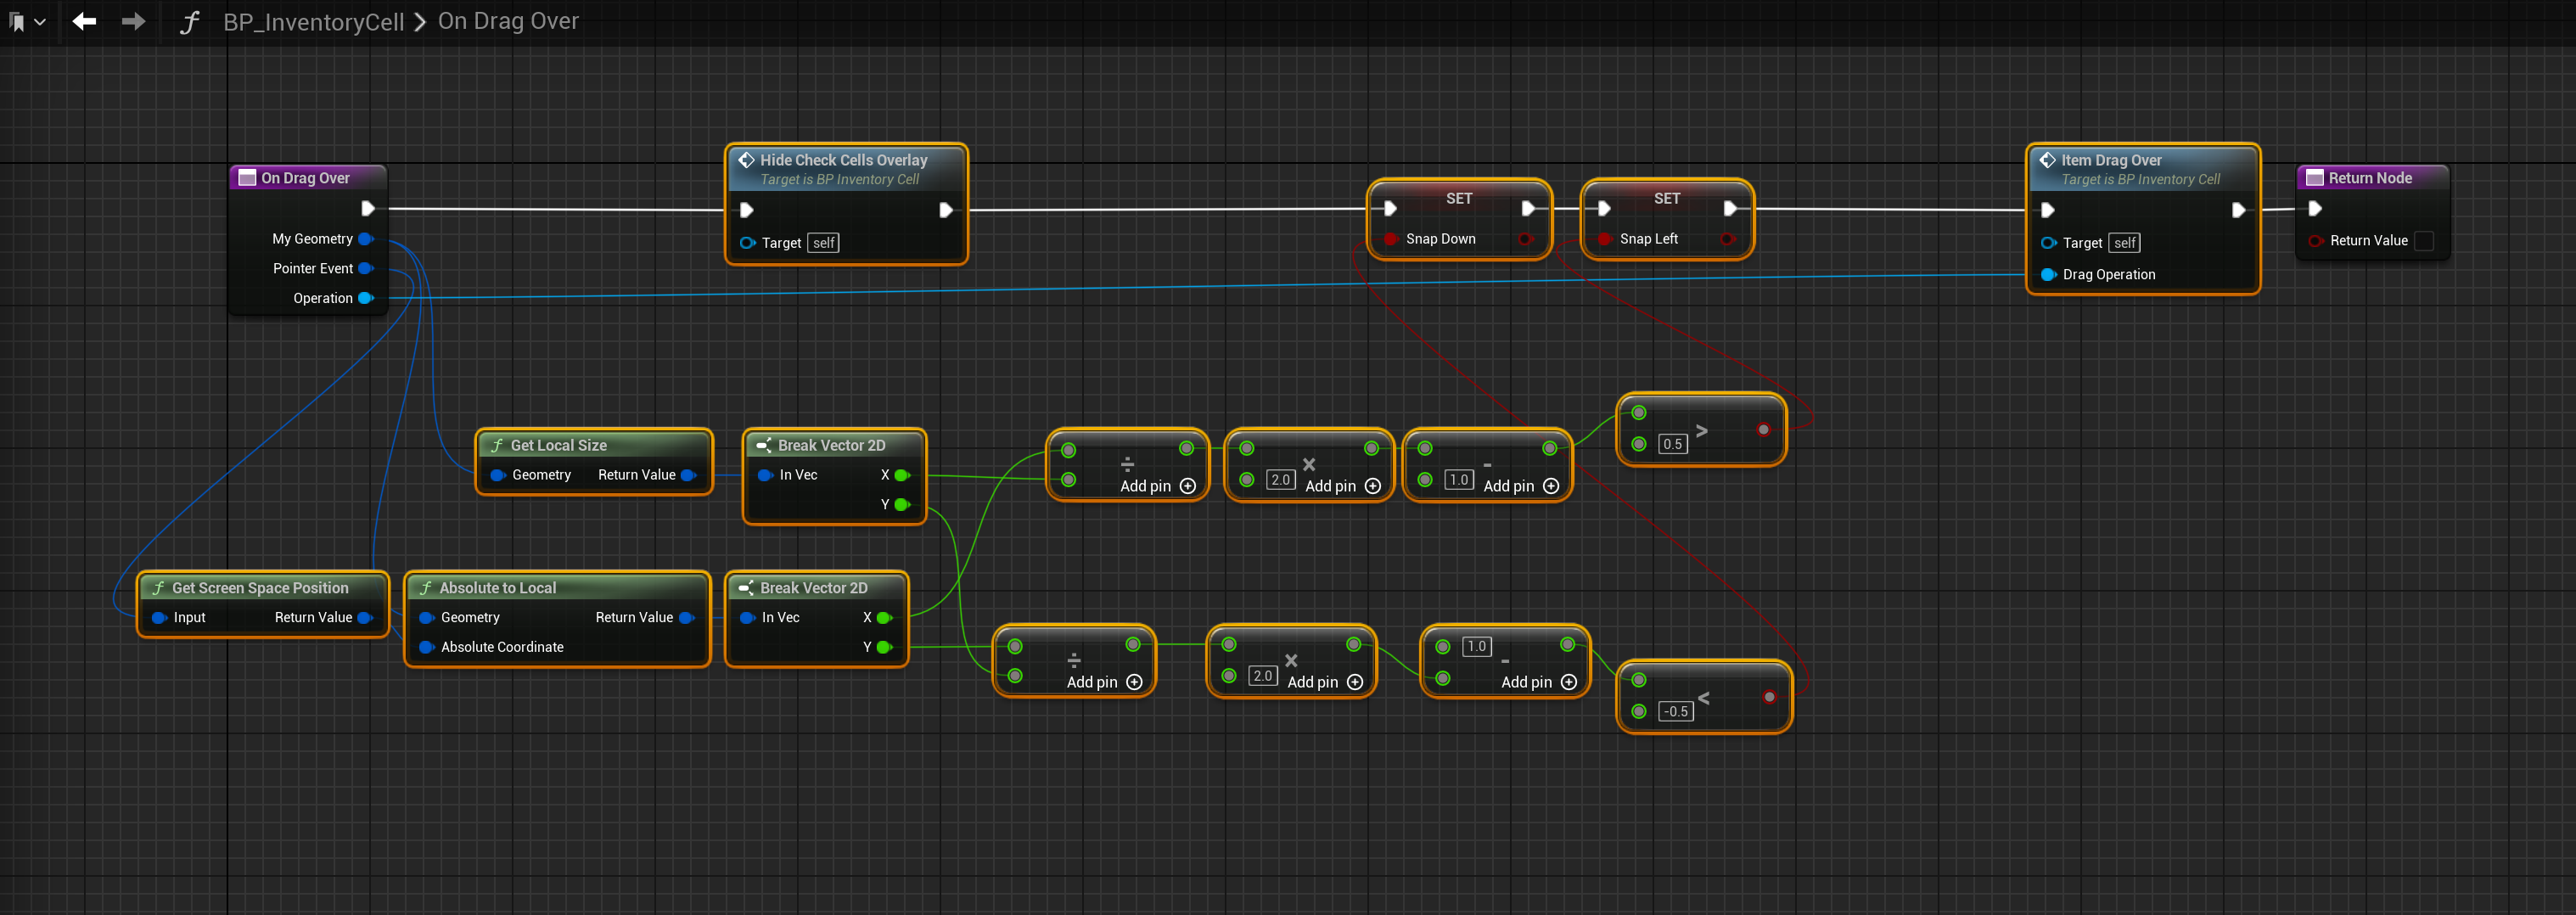
Next open the BP_InventoryCell then open the OnDrop function and create a new local Integer variable called RootIndexL. Then copy the images below.
Next create a new Integer variable called SnapSelectedIndex, then create a new Boolean variable called SnapDown, then create a new Boolean variable called SnapLeft.
Then open the DragOverLayCheck function and add a new local Integer called WidthIndexL and another local Integer variable called VerticleIndexL then copy the images below.
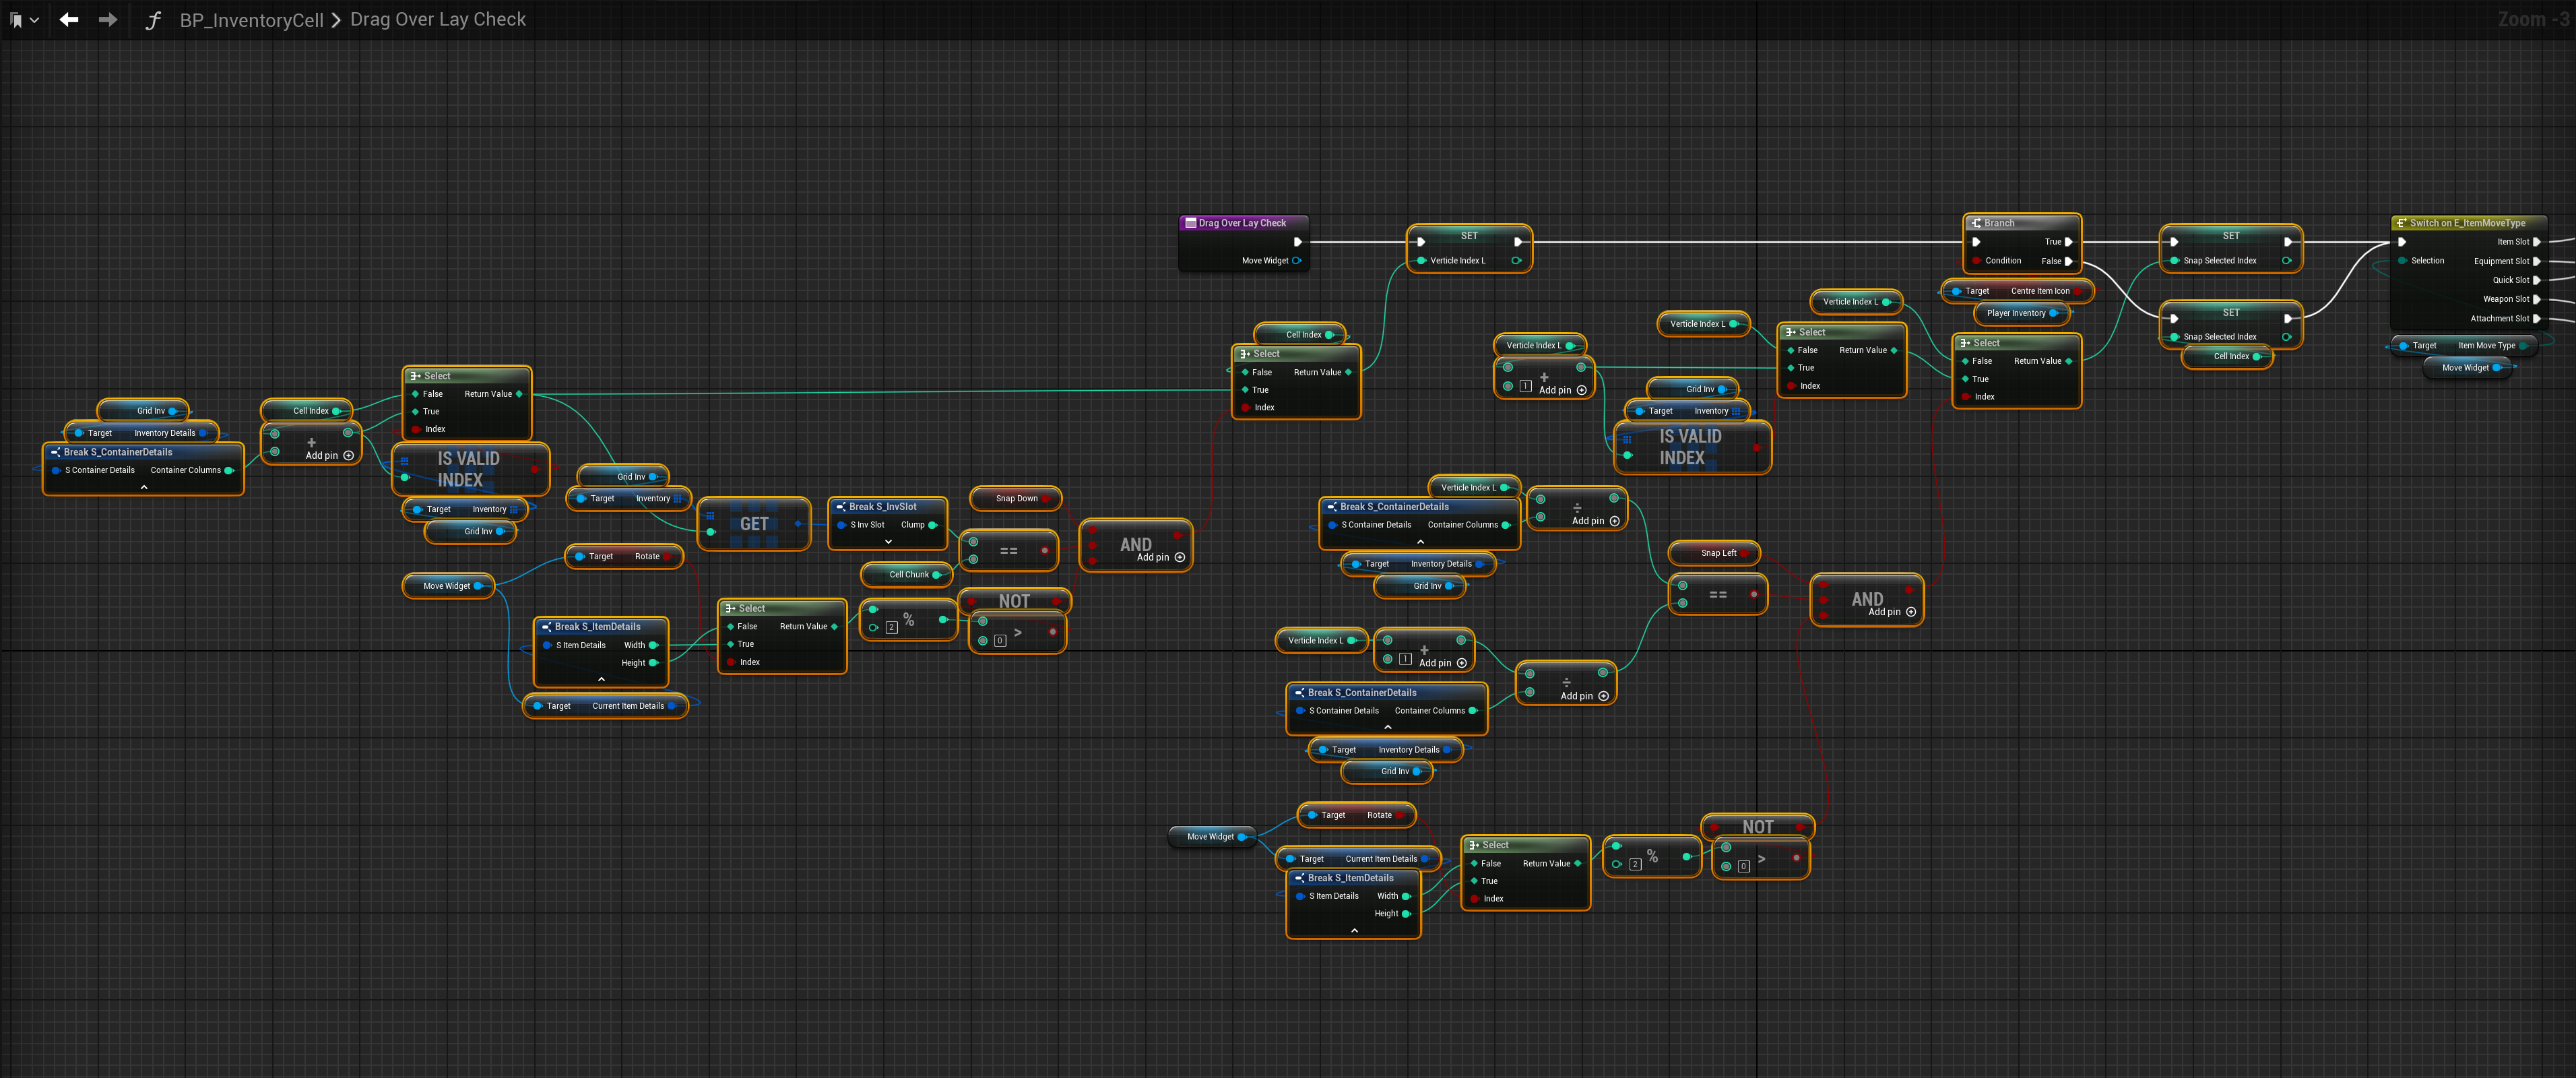
Next copy the video and image below.
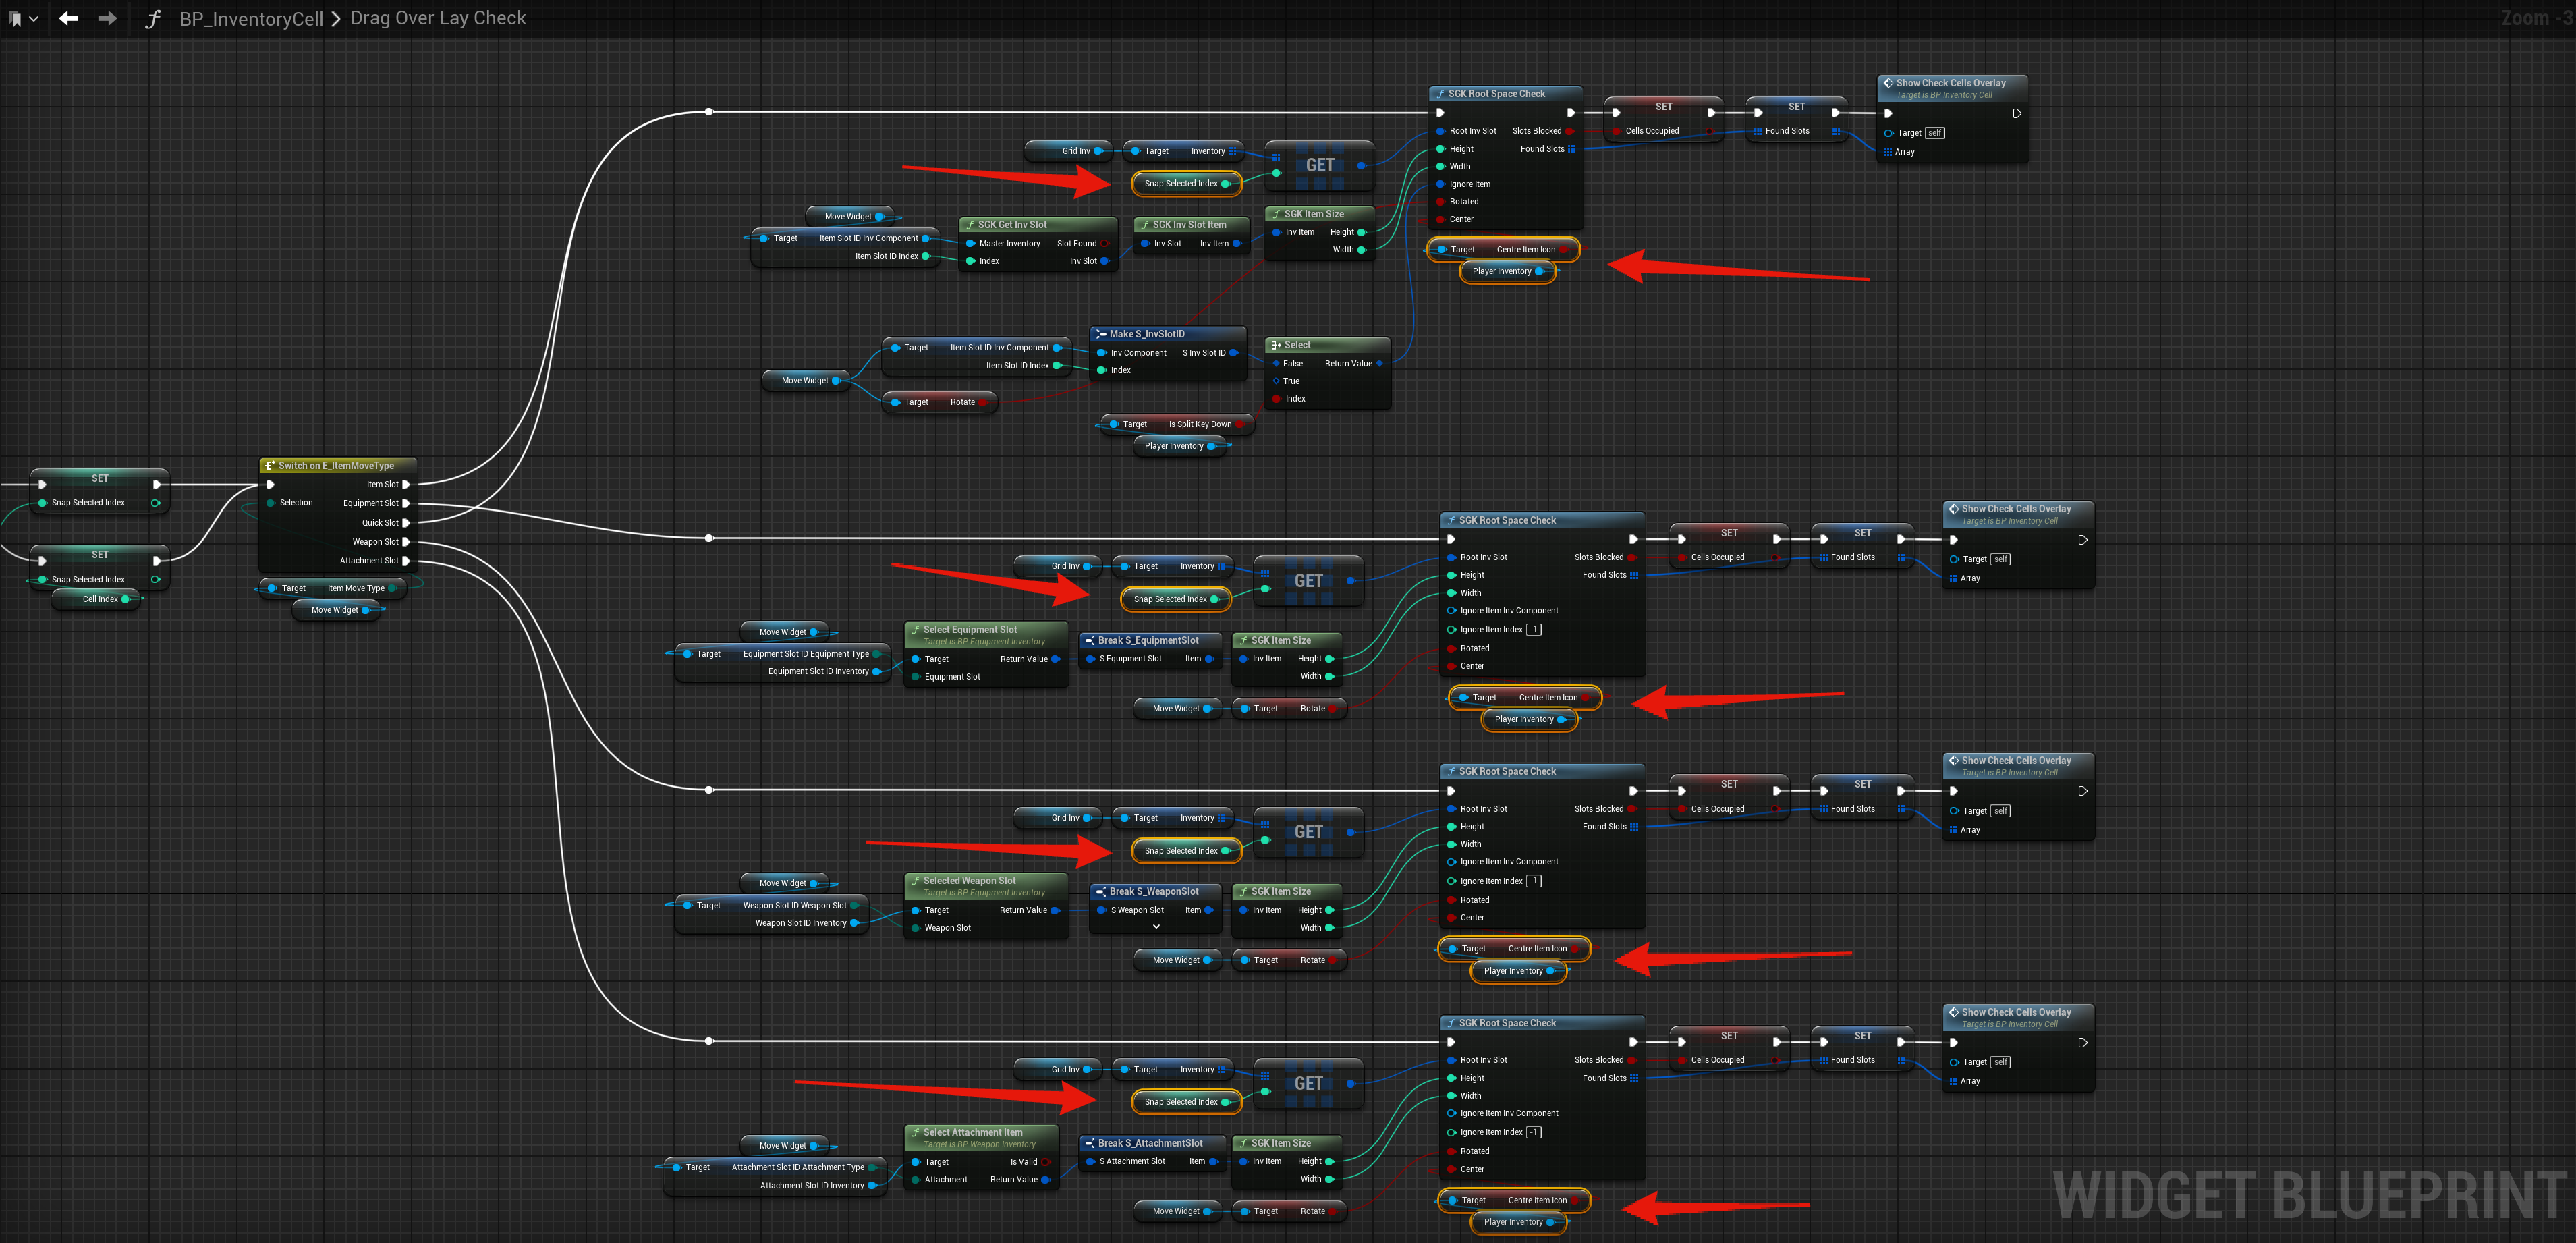
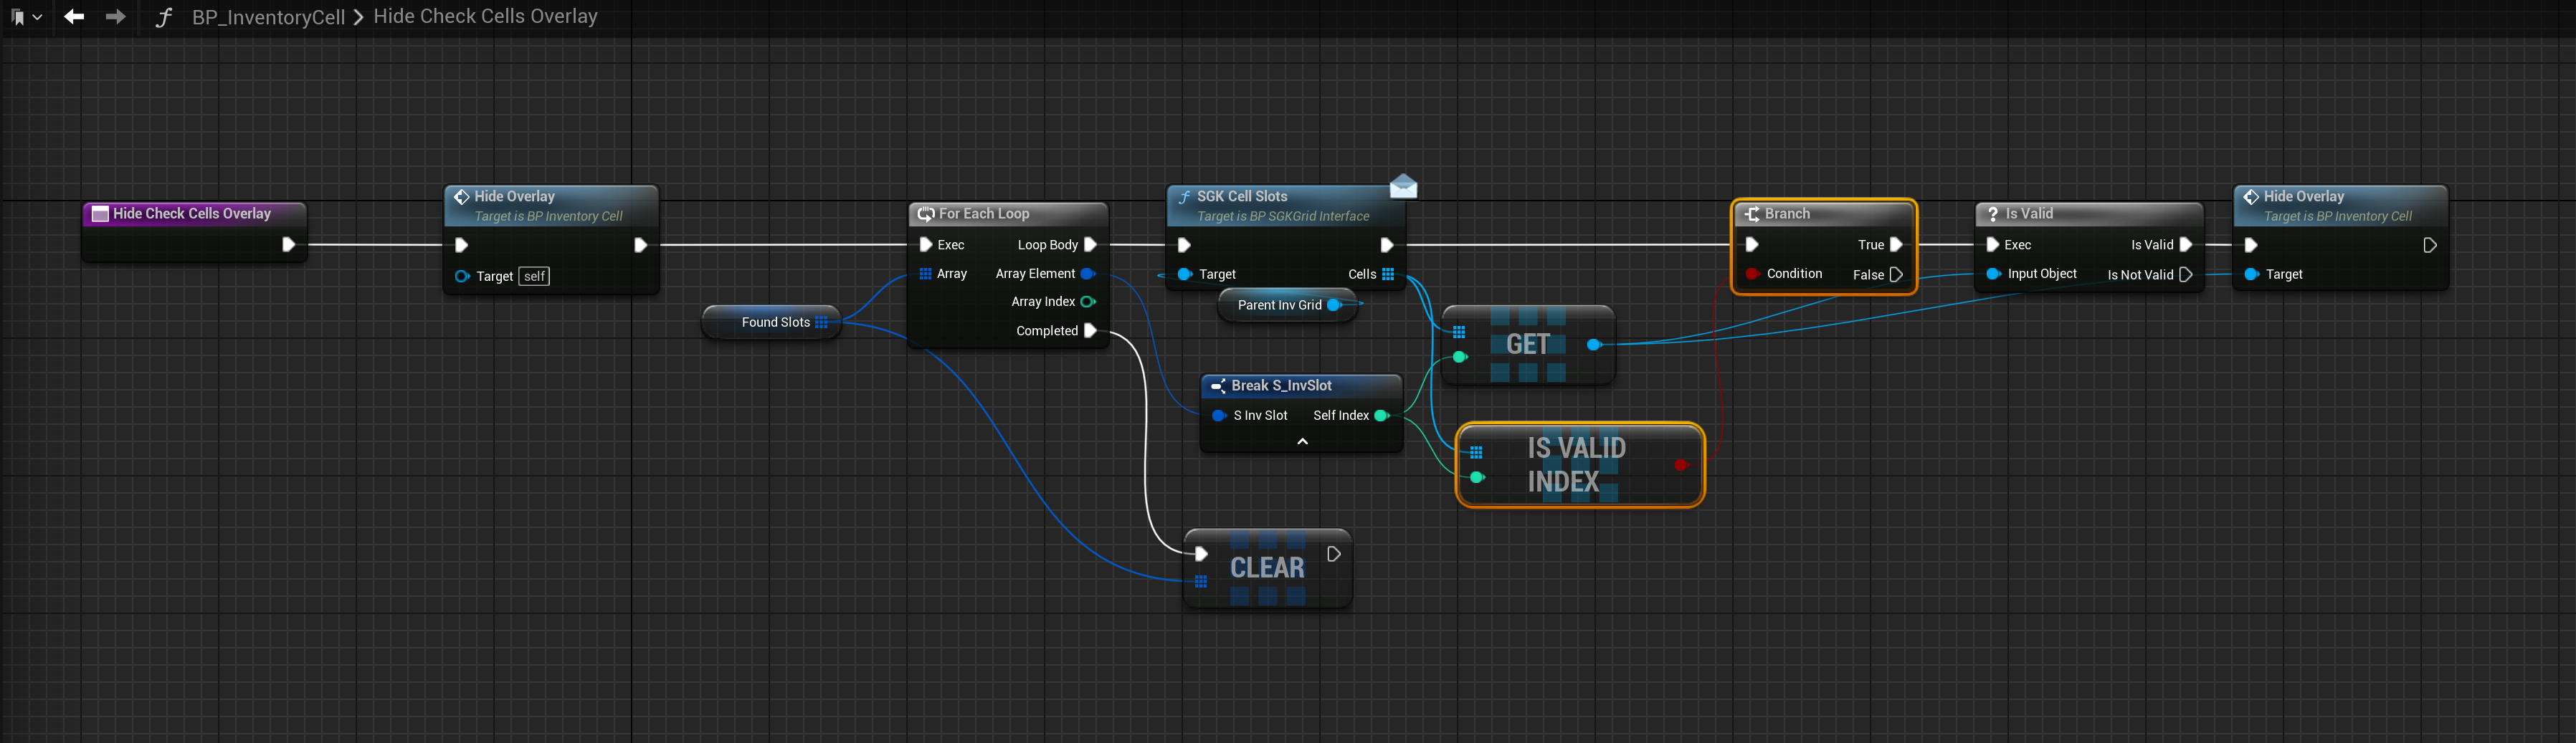
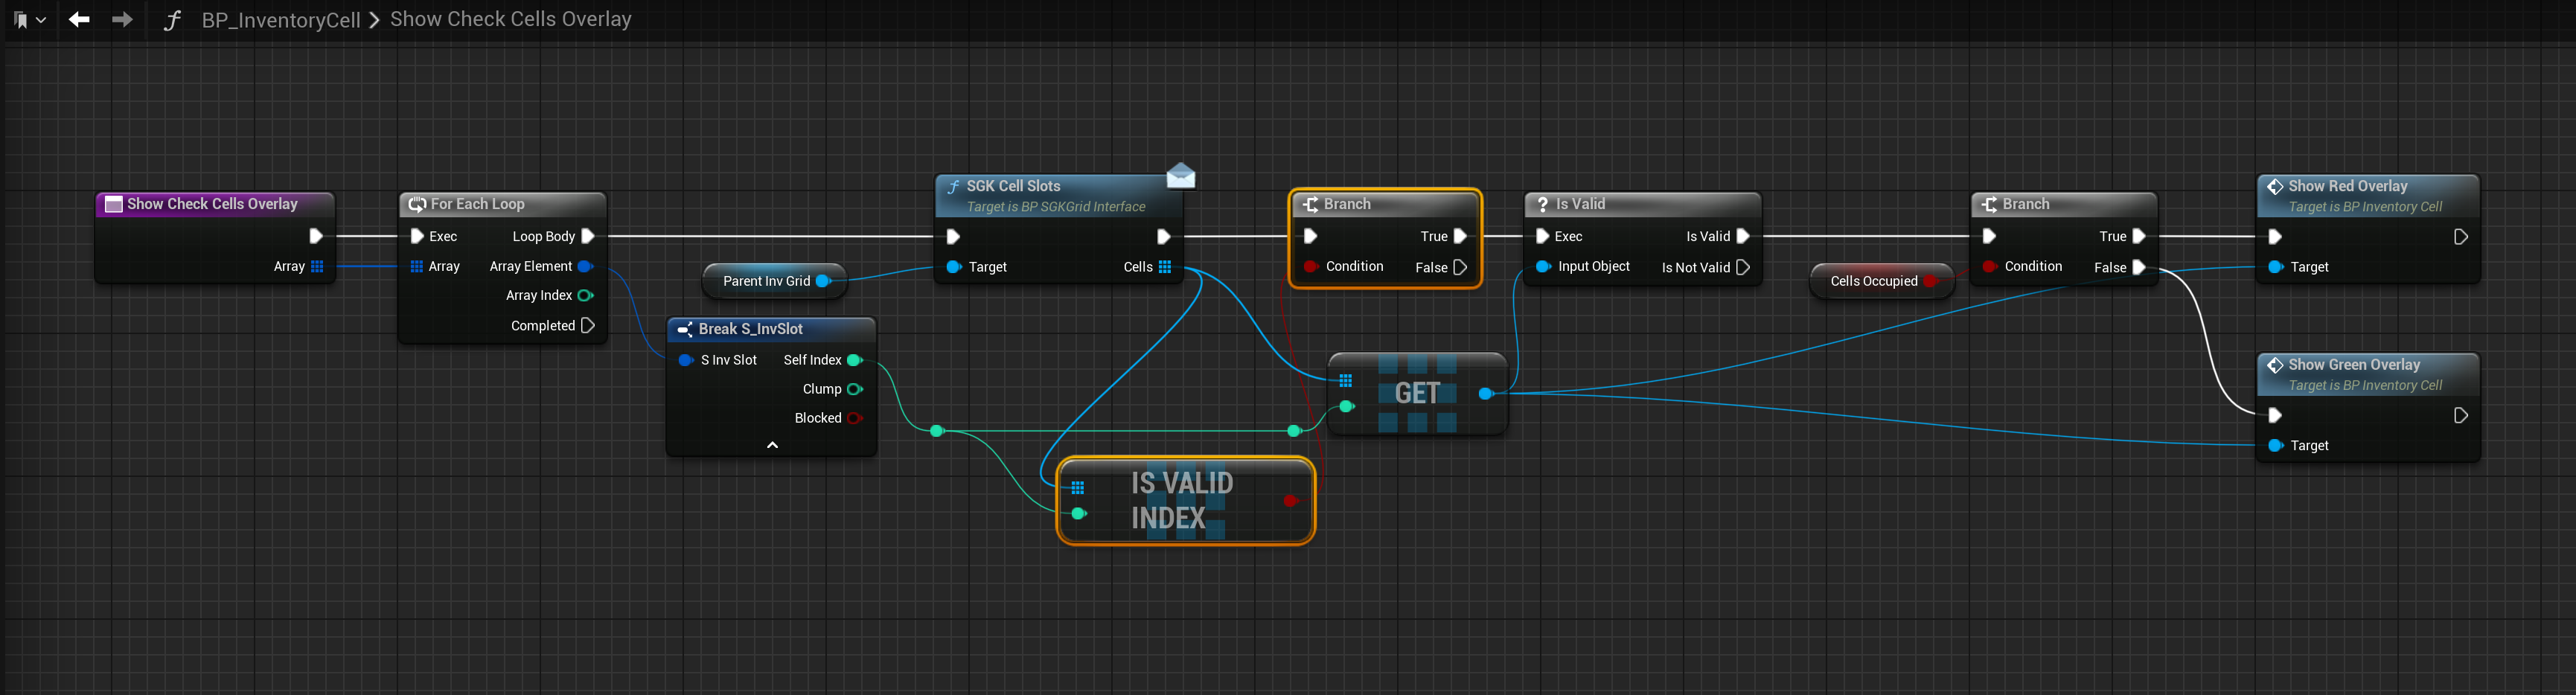
Next go to the functions shown below and add the highlighted nodes, locations at the tops of the screenshots.
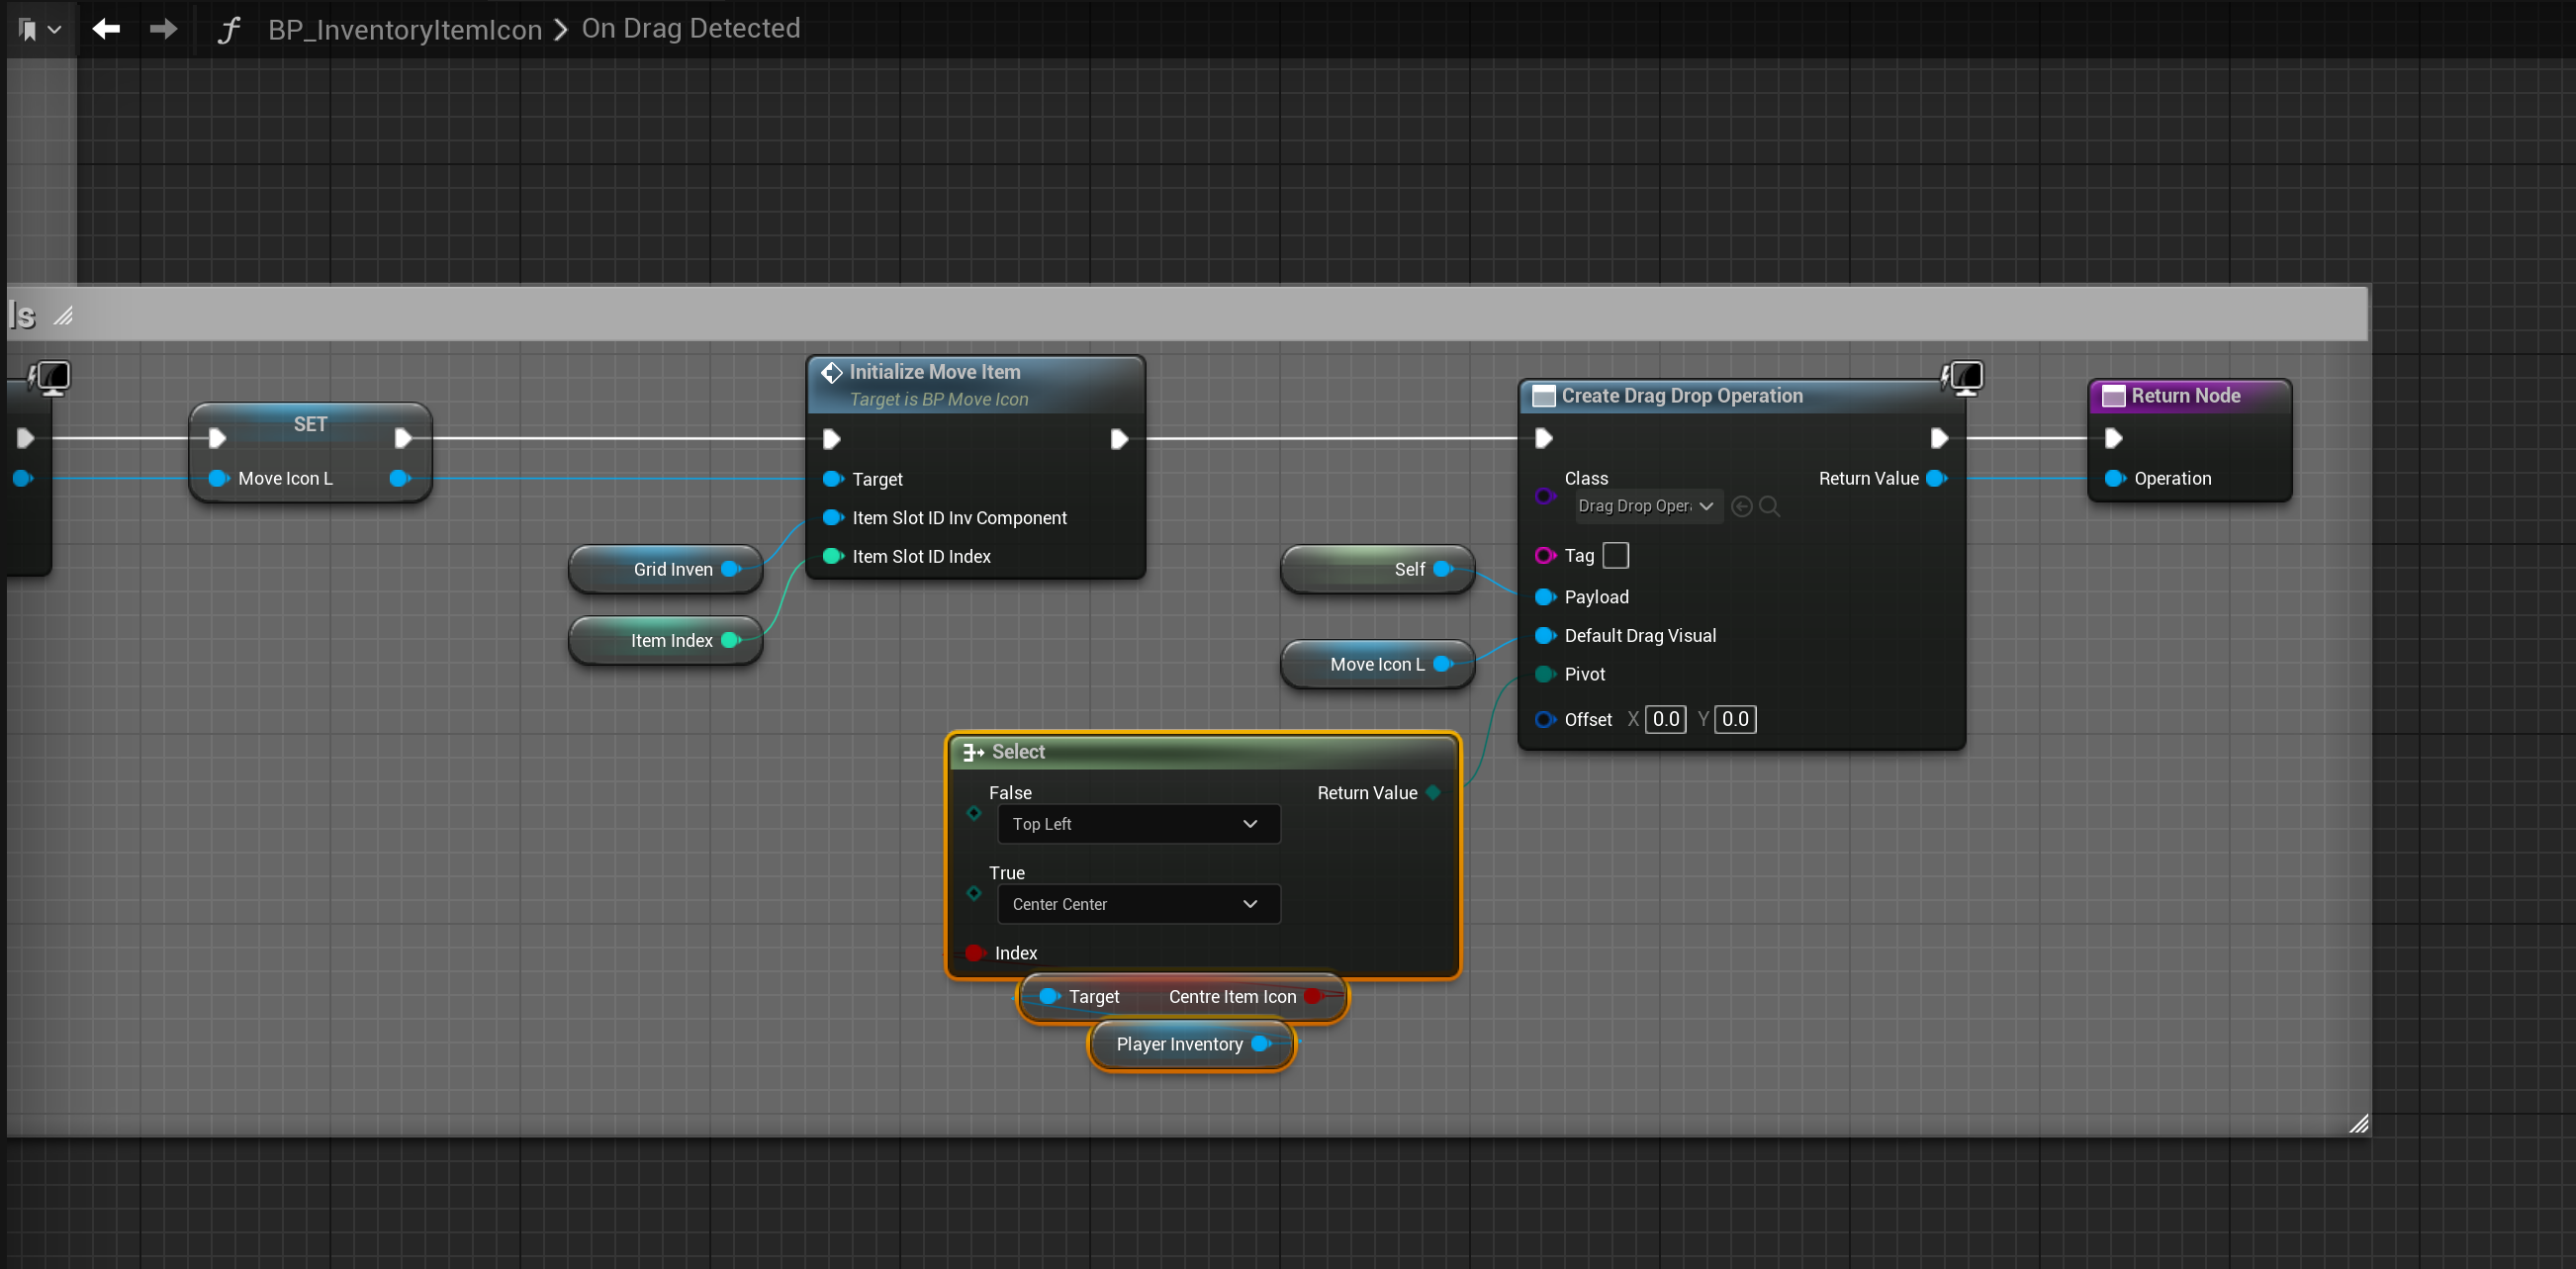
Next go to the BP_InventoryItemIcon then open the OnDragDetect function and copy the image below.
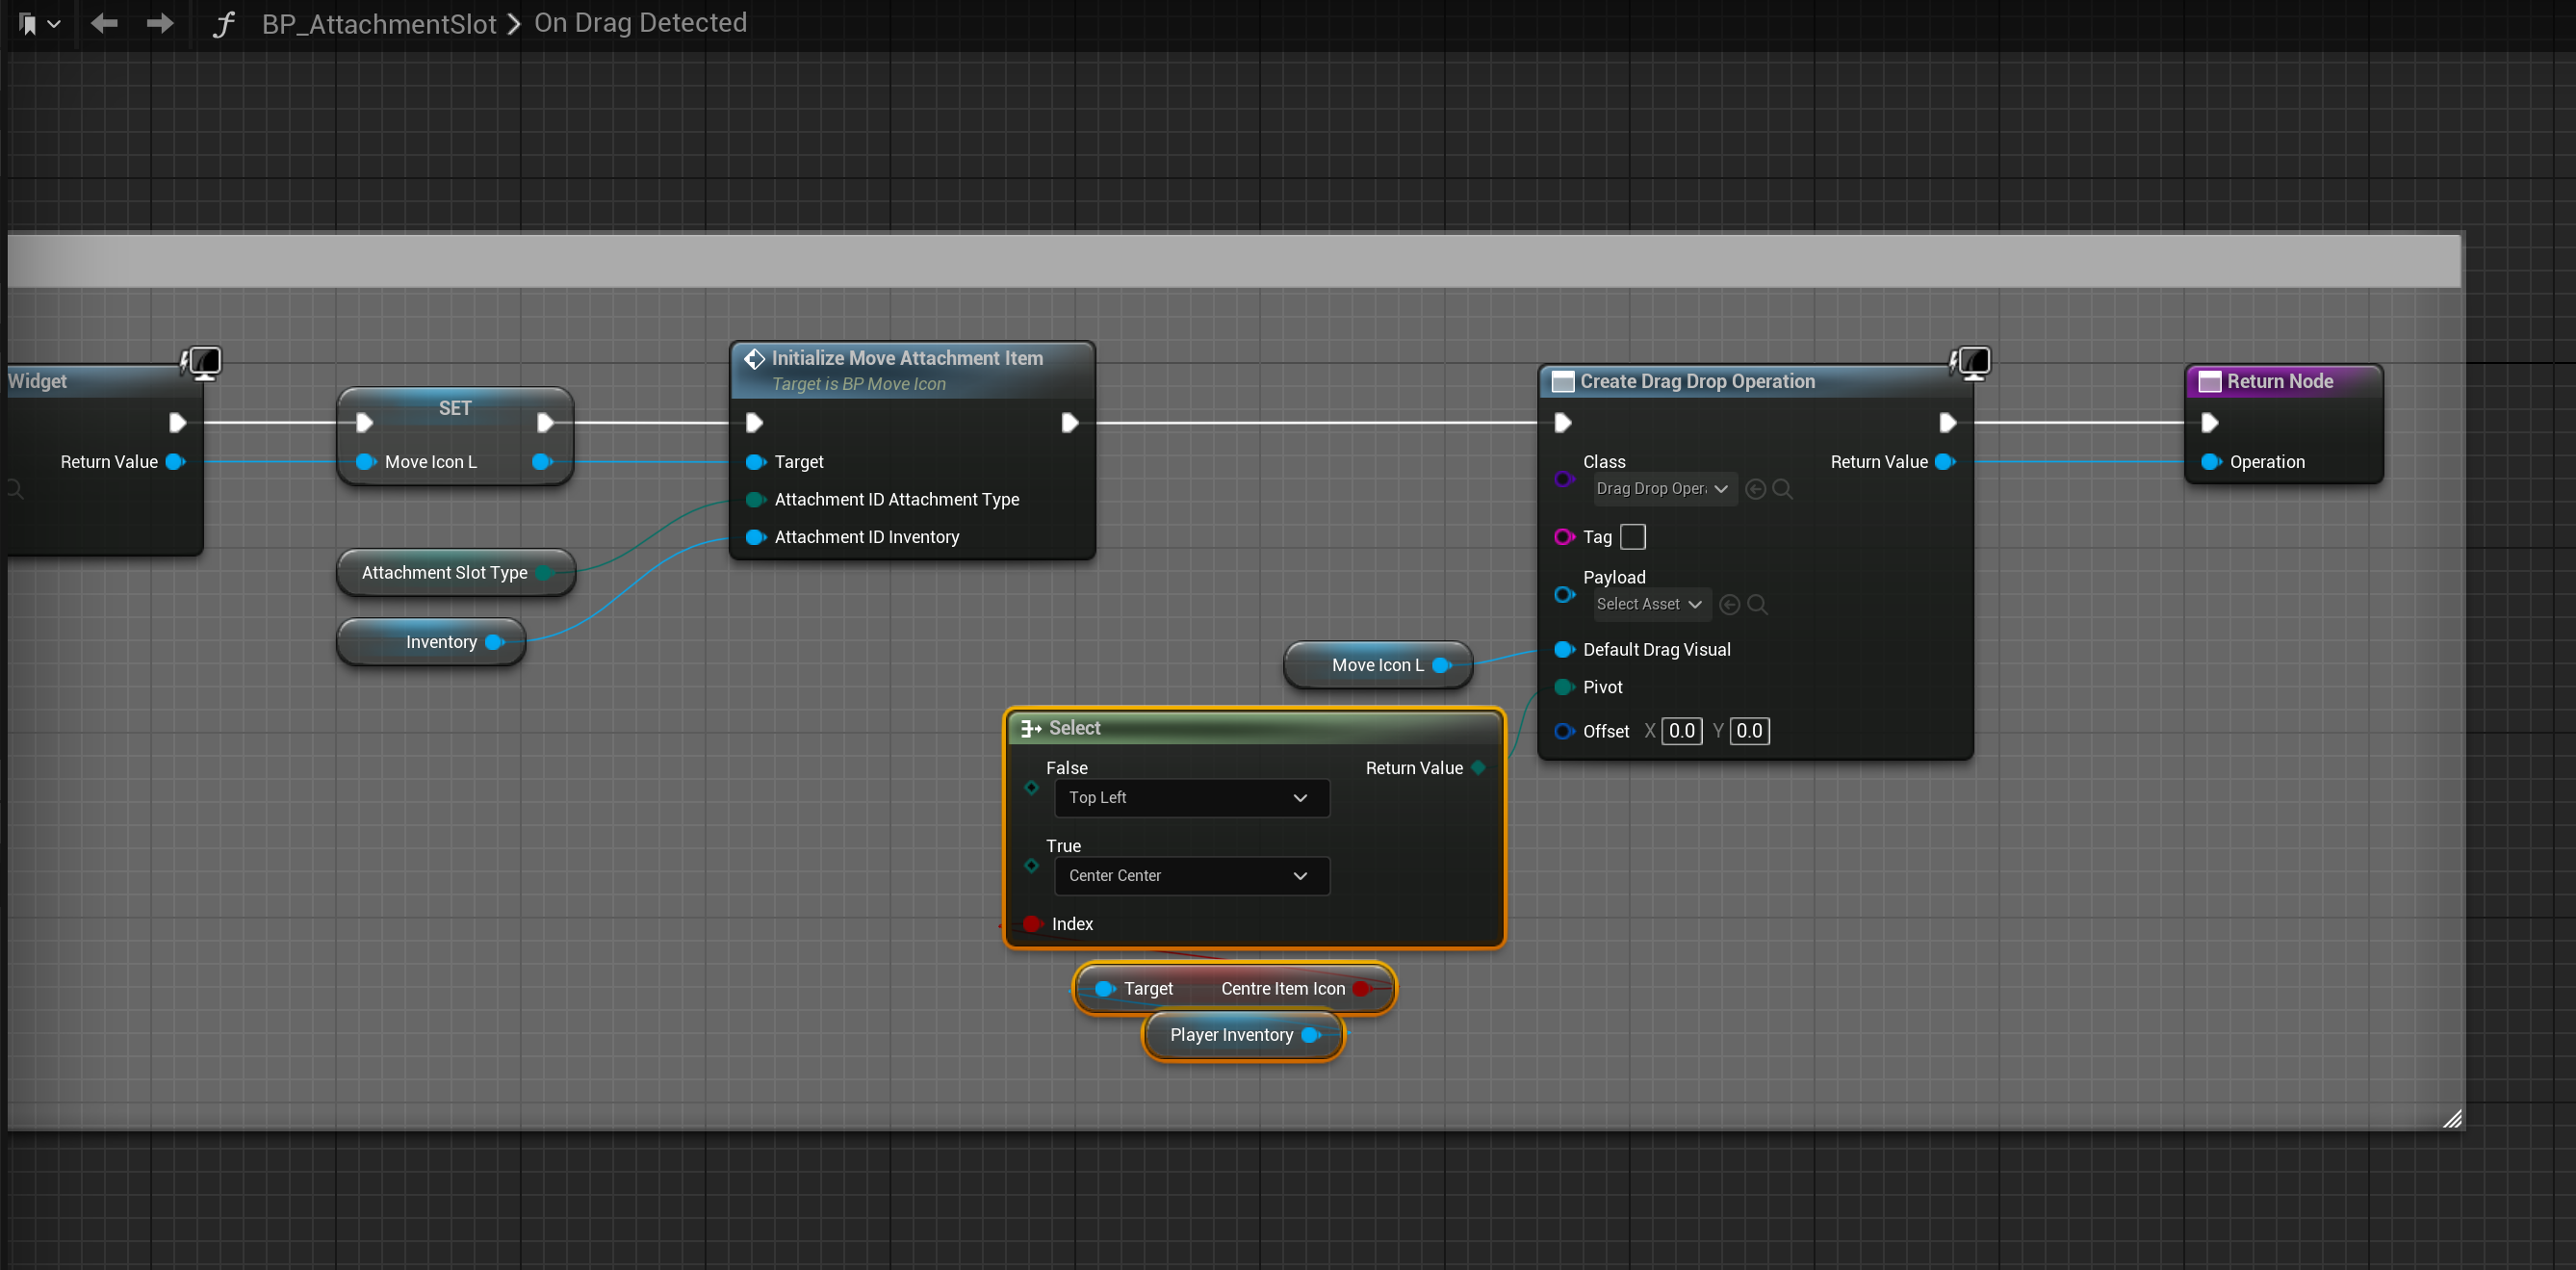
Next go to the BP_AttachmentSlot then open the OnDragDetect function and copy the image below.
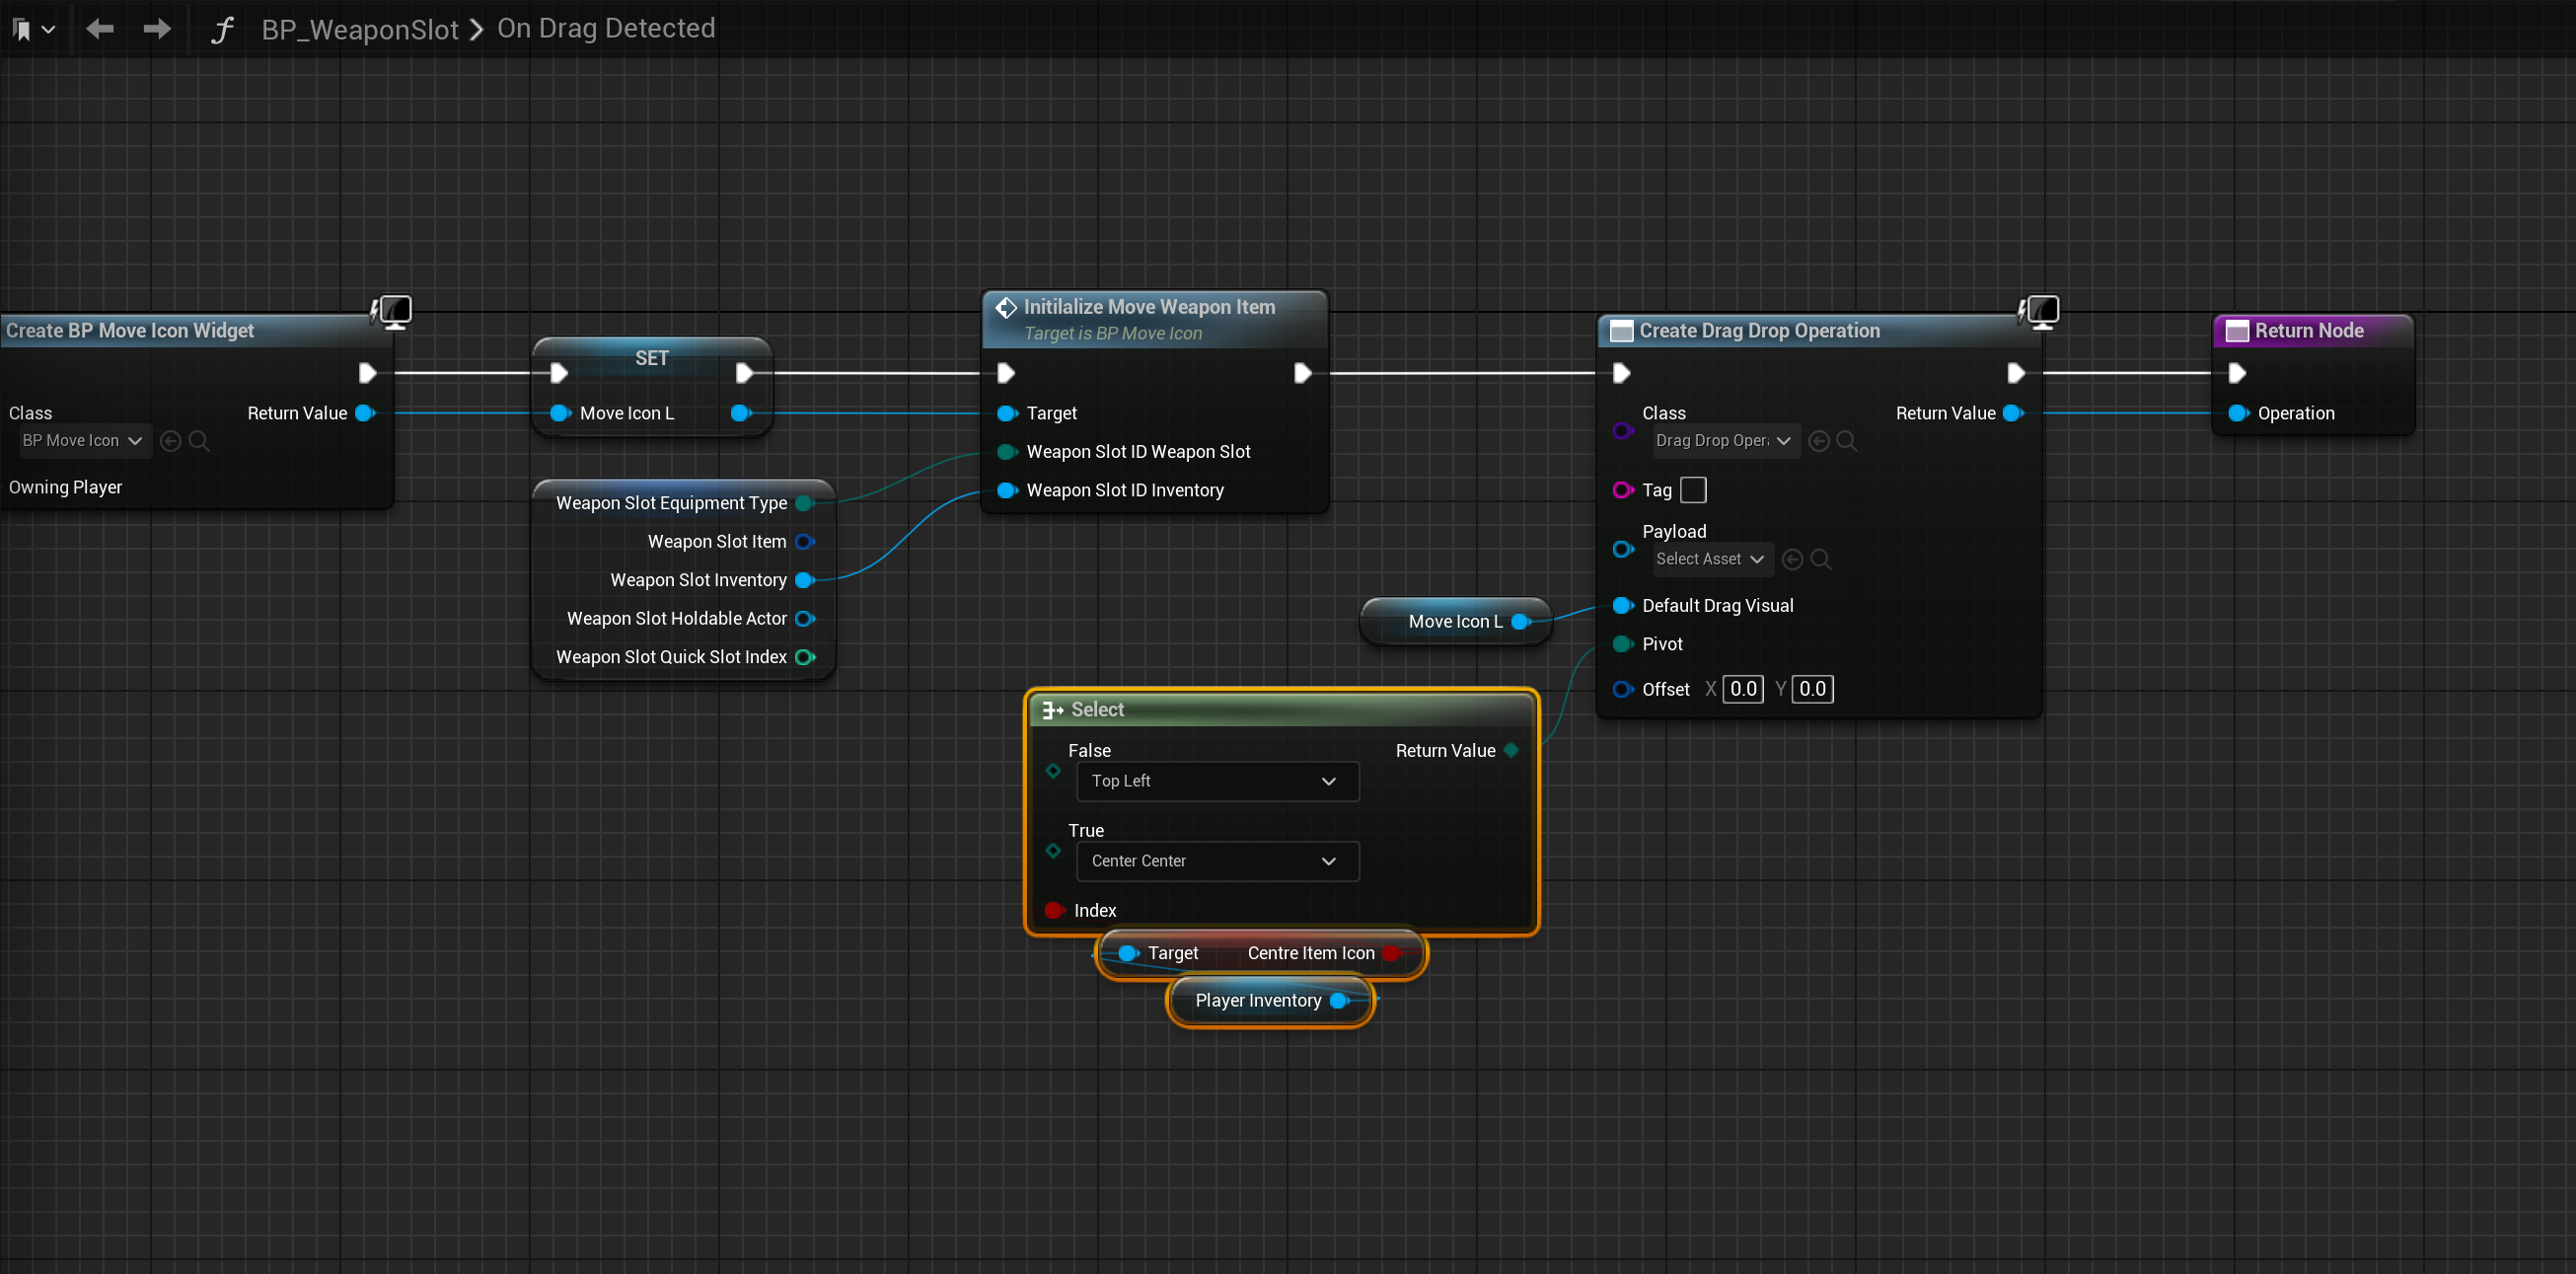
Next go to the BP_WeaponSlot then open the OnDragDetect function and copy the image below.
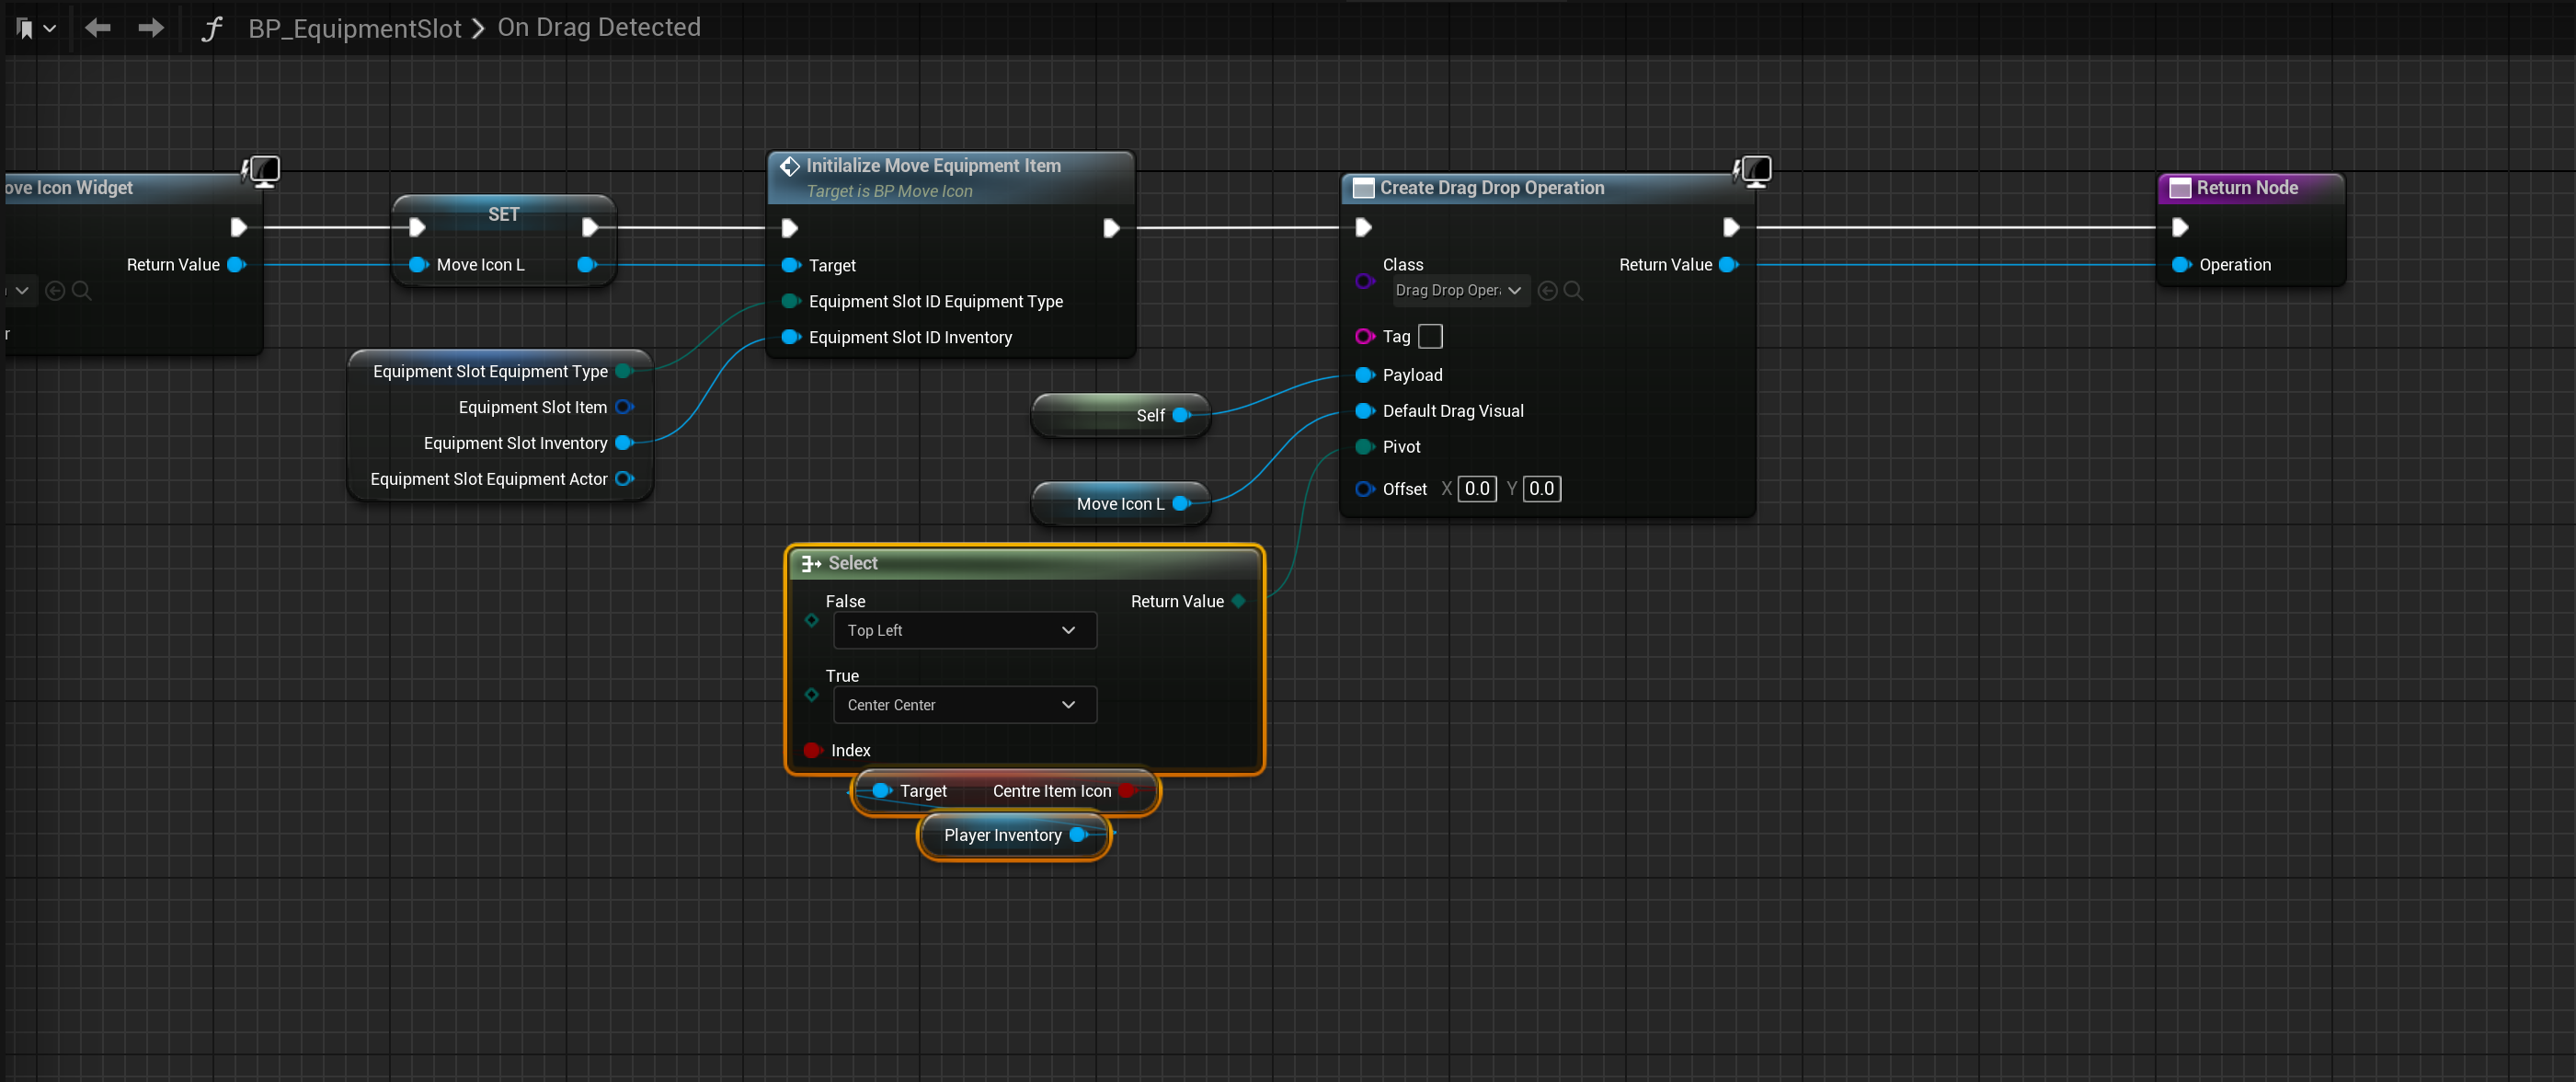
Next go to the BP_EquipmentSlot then open the OnDragDetect function and copy the image below.
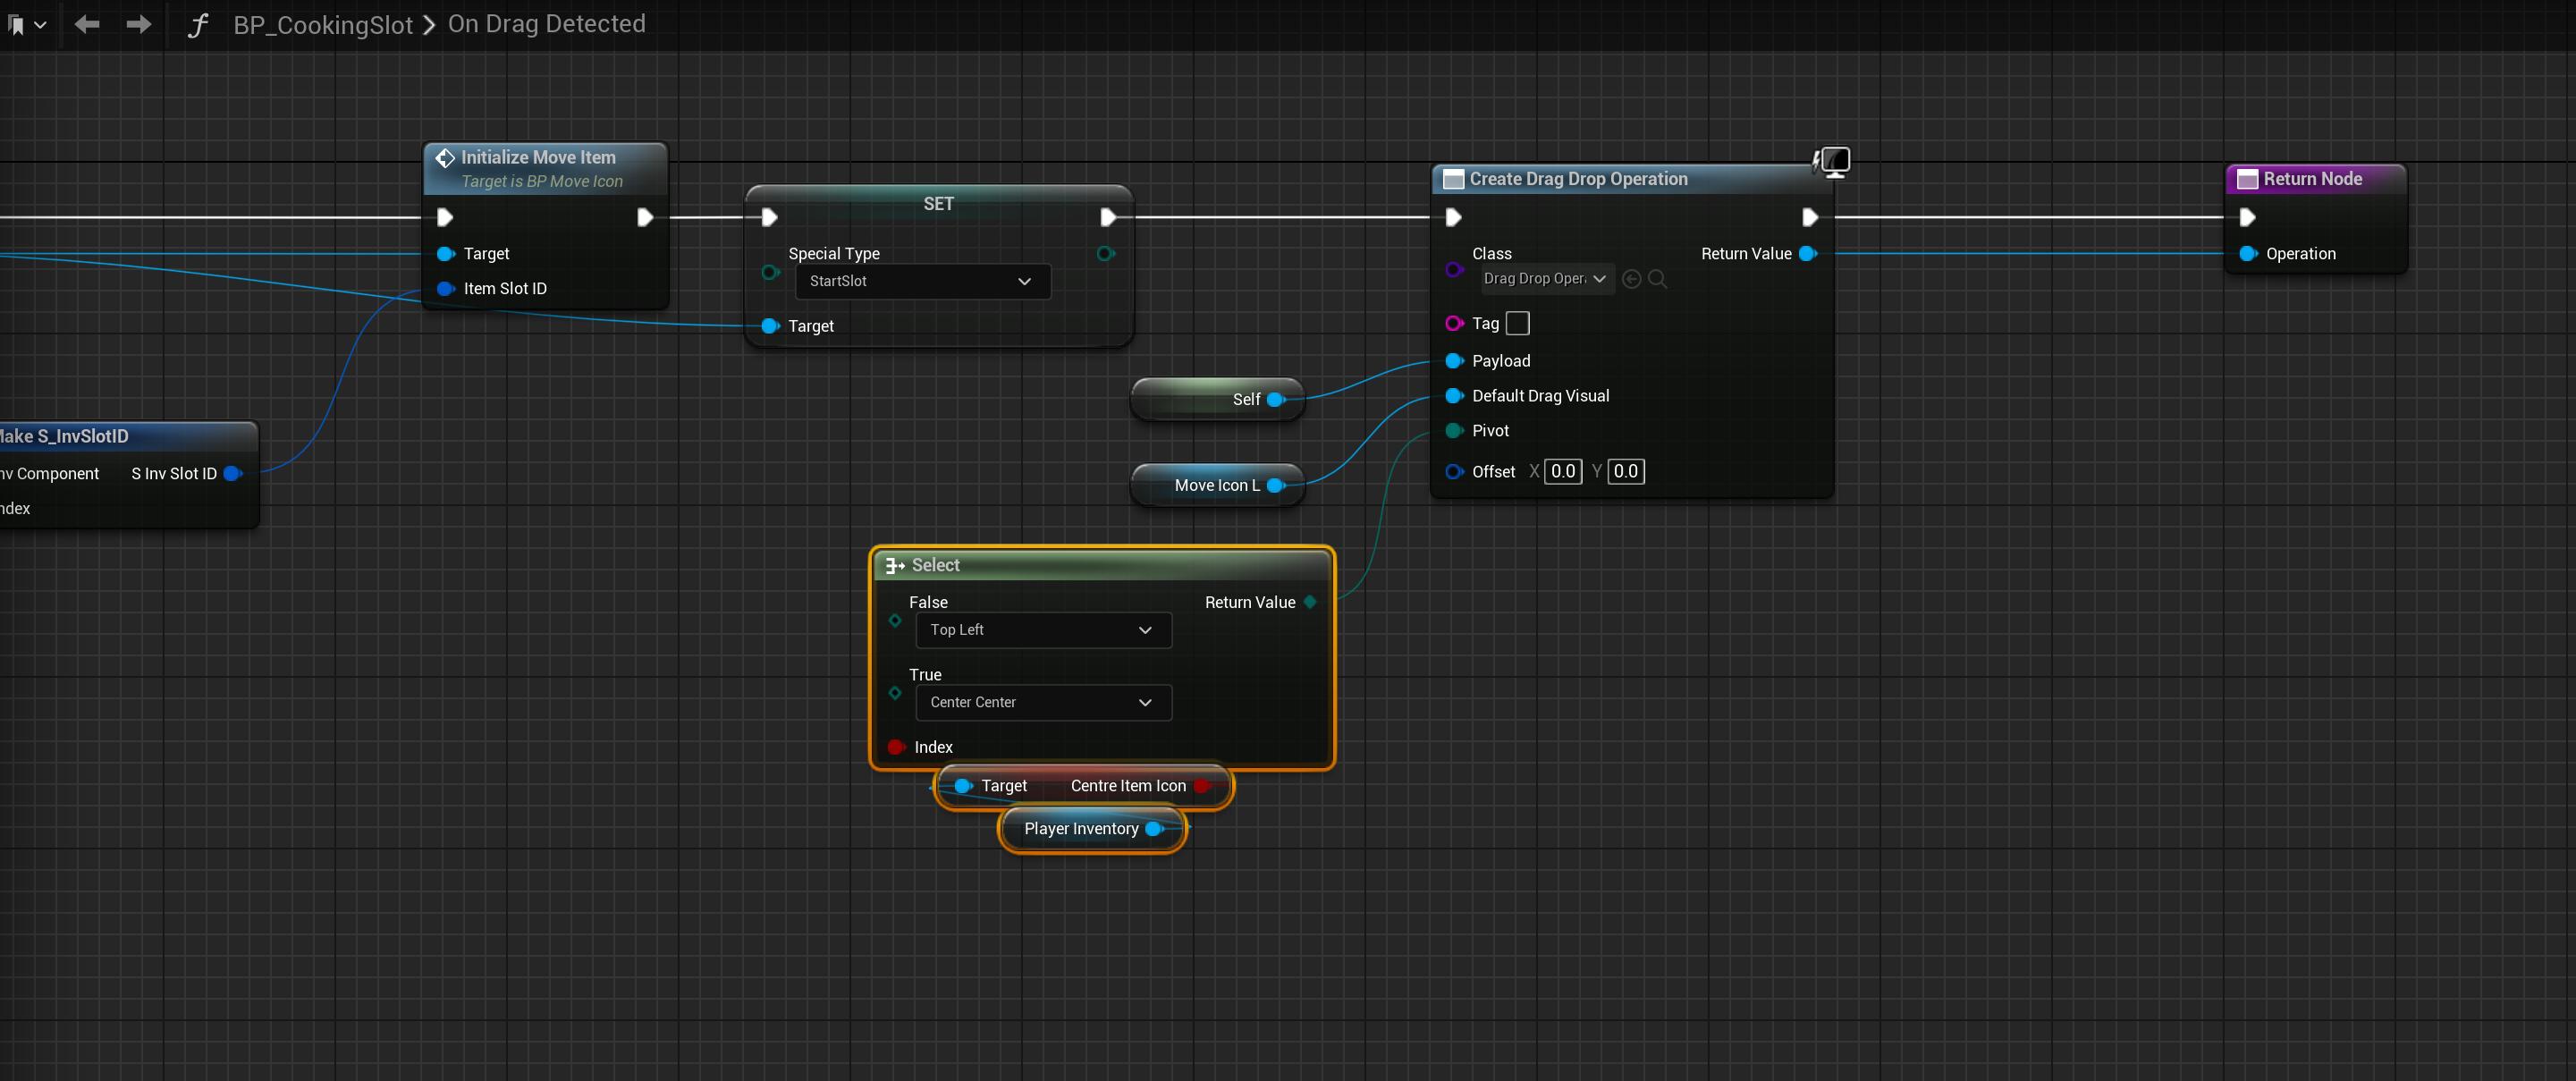
Next go to the BP_CookingSlot then open the OnDragDetect function and copy the image below.
To enable the item drag icon to be centered to the mouse go to the BP_PlayerInventory and in the Class Defaults tick on the CentreItemIcon setting.
