Please make a backup of your project before following this guide.
Sorry for the glitching in the videos, there is a bug with Gyazo causing it.
If you are using a SGK V2 version older then 2.0.6 then you must have followed the below DIY Guides before following this guide.
- https://defusestudios.com/sgk-v2-fixed-building-system-not-checking-support-components/
- https://defusestudios.com/sgk-v2-added-wood-and-stone-short-walls/
- https://defusestudios.com/sgk-v2-added-metal-build-parts/
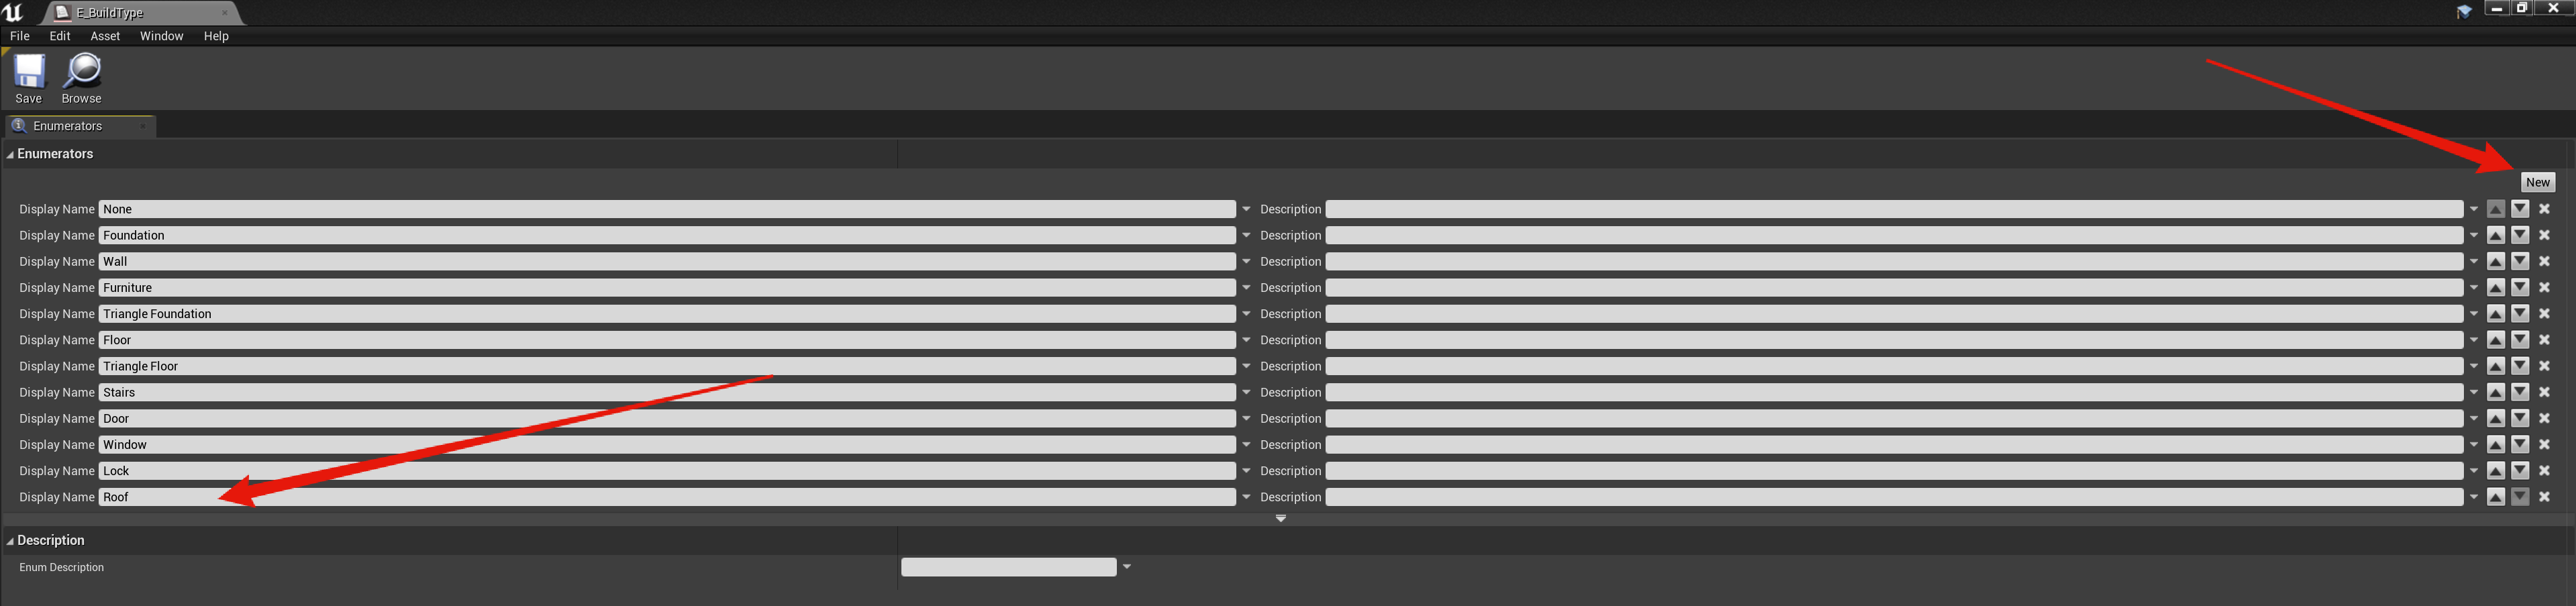
Go to the E_BuildTypes and open it and click the New button, then name the new entry Roof like the image below shows. Then click the Save button.
Next copy the videos below, locations at the tops of the videos.
Go to the BP_SGKFunctions and copy the video below.
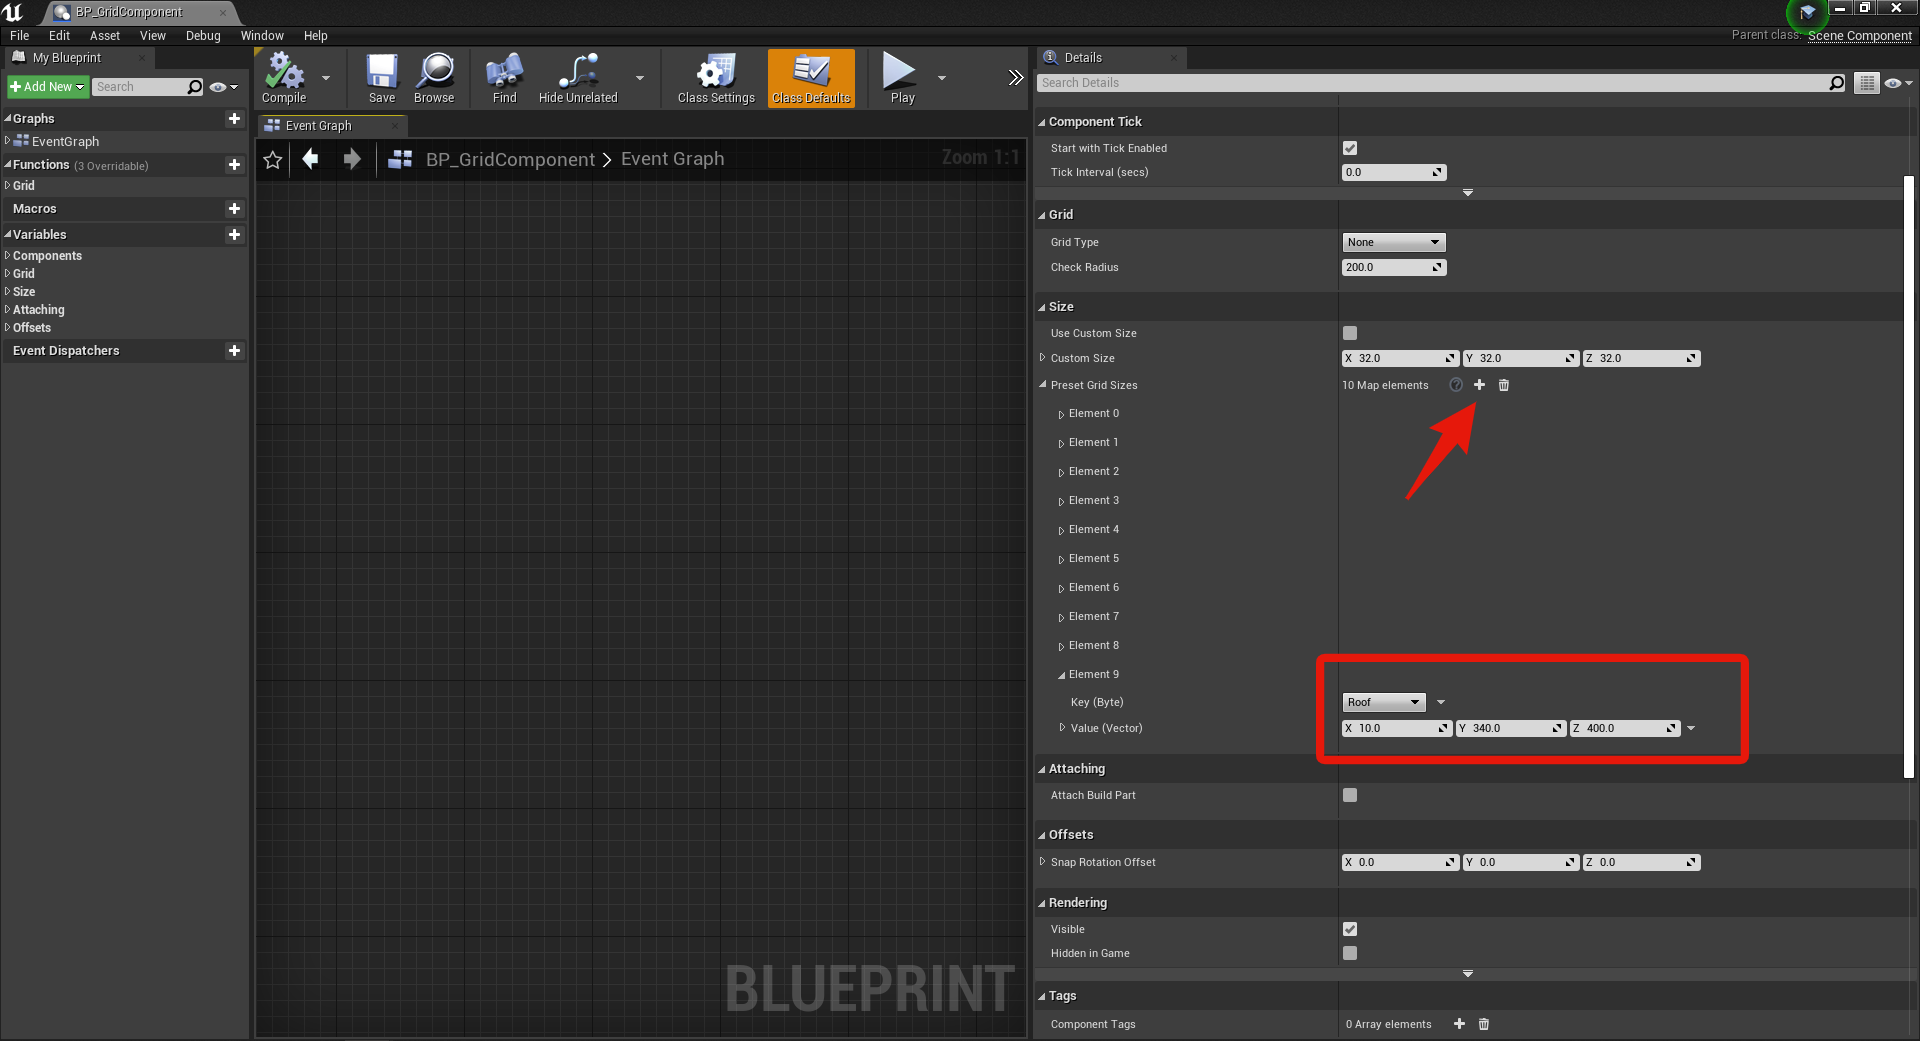
Next go to the BP_GridComponent and in the class defaults find the Preset Grid Sizes and click the + button and set the new elements settings to the values shown in the image below.
Copy the video below.
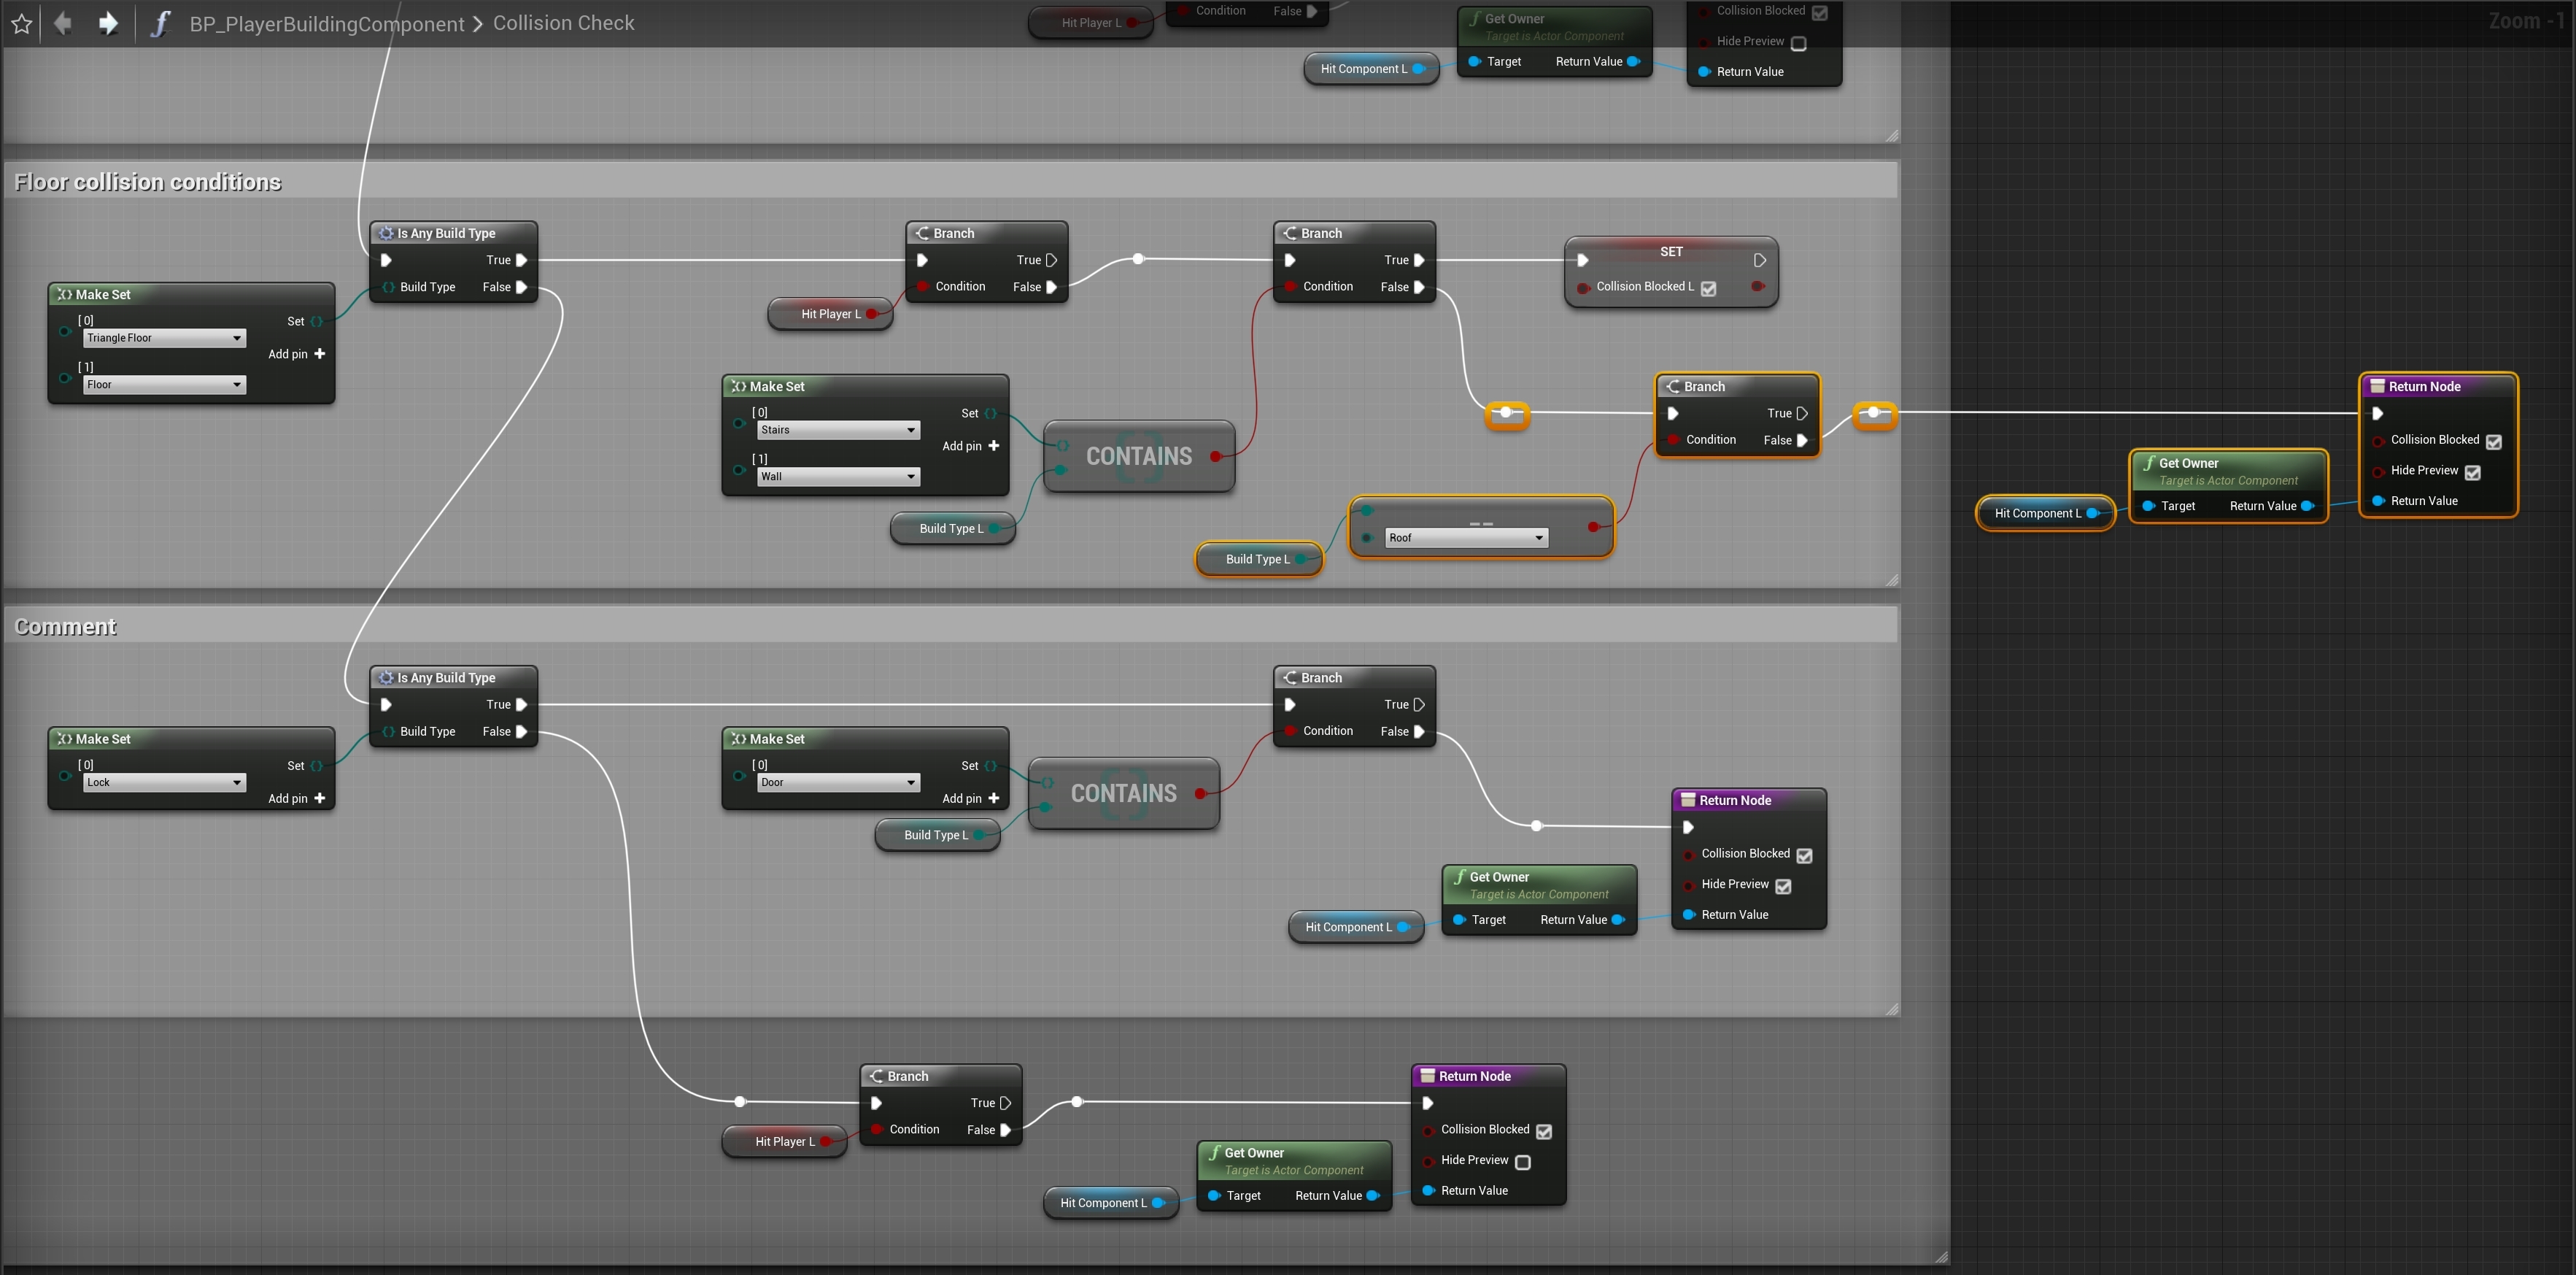
Add the highlighted nodes shown in the image below, location at the top of the image.
Next copy the videos below.
Then open the new BP_RoofGrid and copy the video below.
Next go to the BP_WoodWall blueprint and copy the video below.
Now do the exact same thing in the blueprints listed below.
- BP_StoneWall
- BP_MetalWall
- BP_WoodWindowFrame
- BP_StoneWindowFrame
- BP_MetalWindowFrame
- BP_WoodDoorFrame
- BP_StoneDoorFrame
- BP_MetalDoorFrame
Next go to the BP_WoodFloor blueprint and copy the video below.
Now do the exact same thing in the BP_StoneFloor and the BP_MetalFloor blueprints.
Next copy the videos below. Make sure you name the blueprints the exact same as the videos.
Next download the files linked below, in those files you will find the following images, import them into your project.
https://www.dropbox.com/s/q8c398e0j2wtk7t/AddingRoofParts.zip?dl=0
- T_TriangleWallL_UI
- T_TriangleWallR_UI
Then open both images in the engine and set the Texture Group setting to UI then save.
Next go to the BuildPartList and copy the videos below. Follow them careful and make sure you use the same row names in your project. Note – I don’t change the descriptions in these videos but you can change them to anything you like.
Next go to the BP_BuildingMenuPageTwo and copy the video below.
Next close save all and close your project. Then go to your projects folder, this is the one that has the Content folder in it and copy the video below by copying and pasting the Content folder from the file you downloaded earlier into the project, it will ask you to replace files this is fine, select to replace the files like the video.
You can now find the roof and triangle build parts in the page 2 build menu when using the building plan. Roofs can only be placed on walls and square floors.
