Please backup your project before following this guide!
Build Parts
Start by going to the S_BuildPartDetails then copy the video below.
Then play in editor, this will compile the effect blueprints and give you a list of blueprints with errors, click Cancel and open the BP_MasterBuildPart blueprint.
Add the highlighted nodes shown in the image below, location at the top of the image.
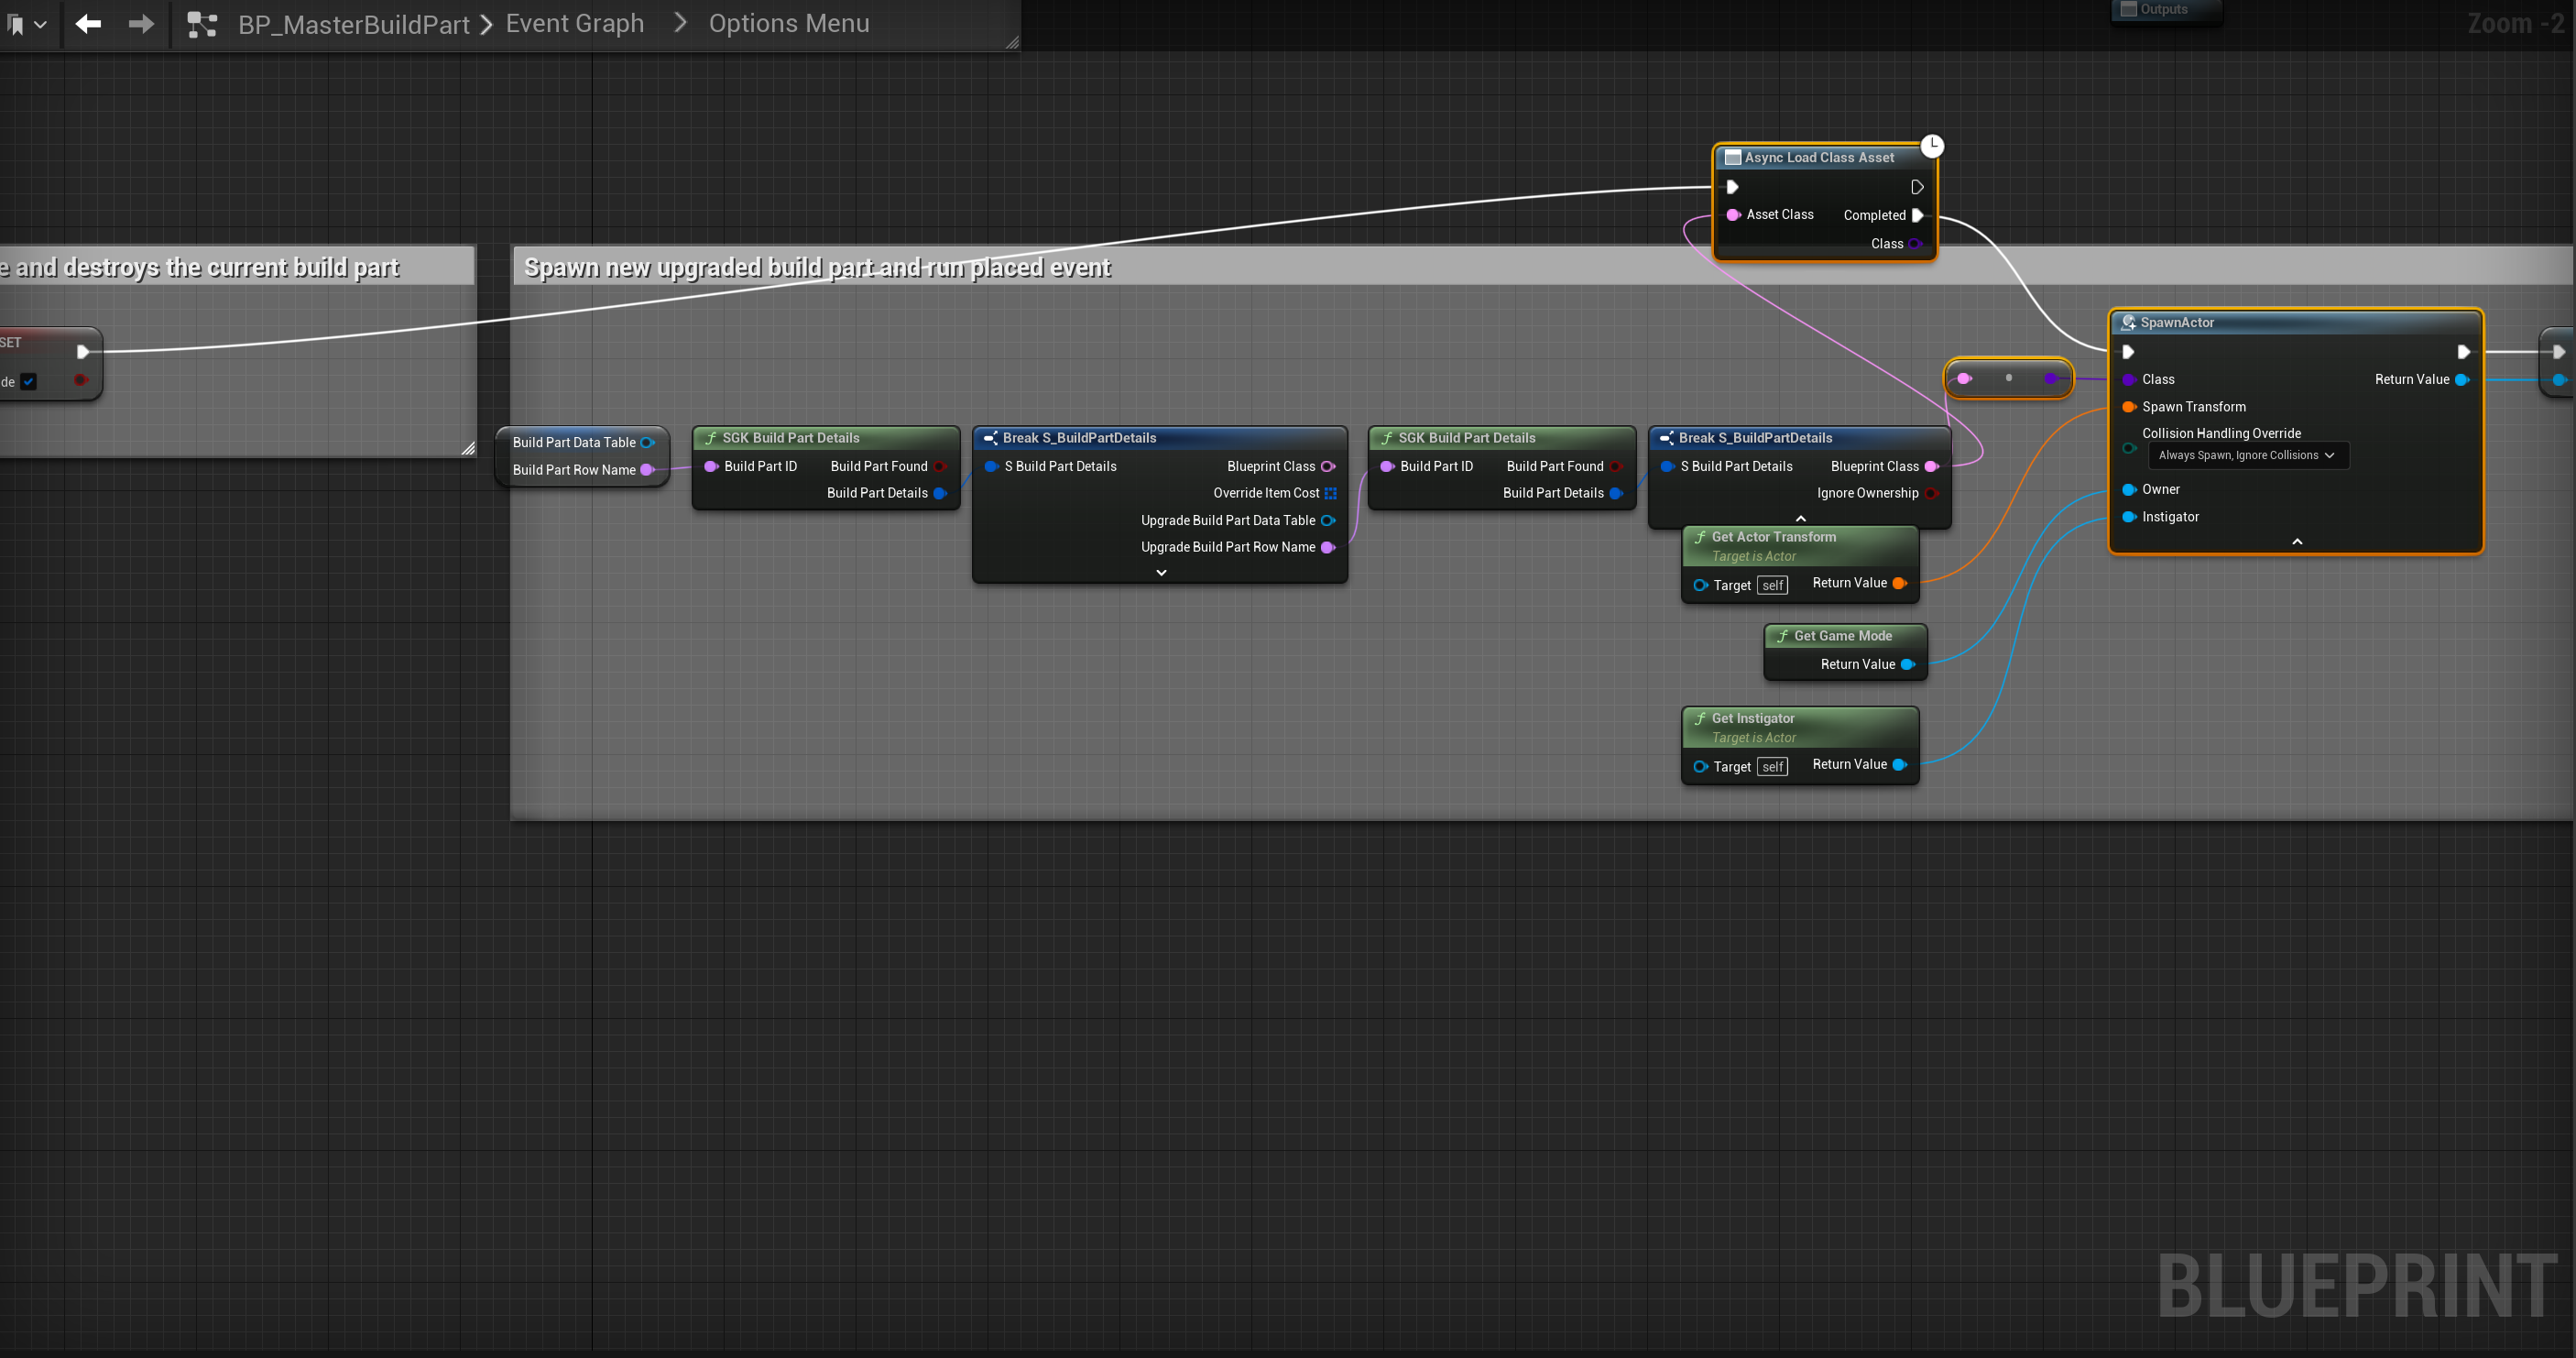
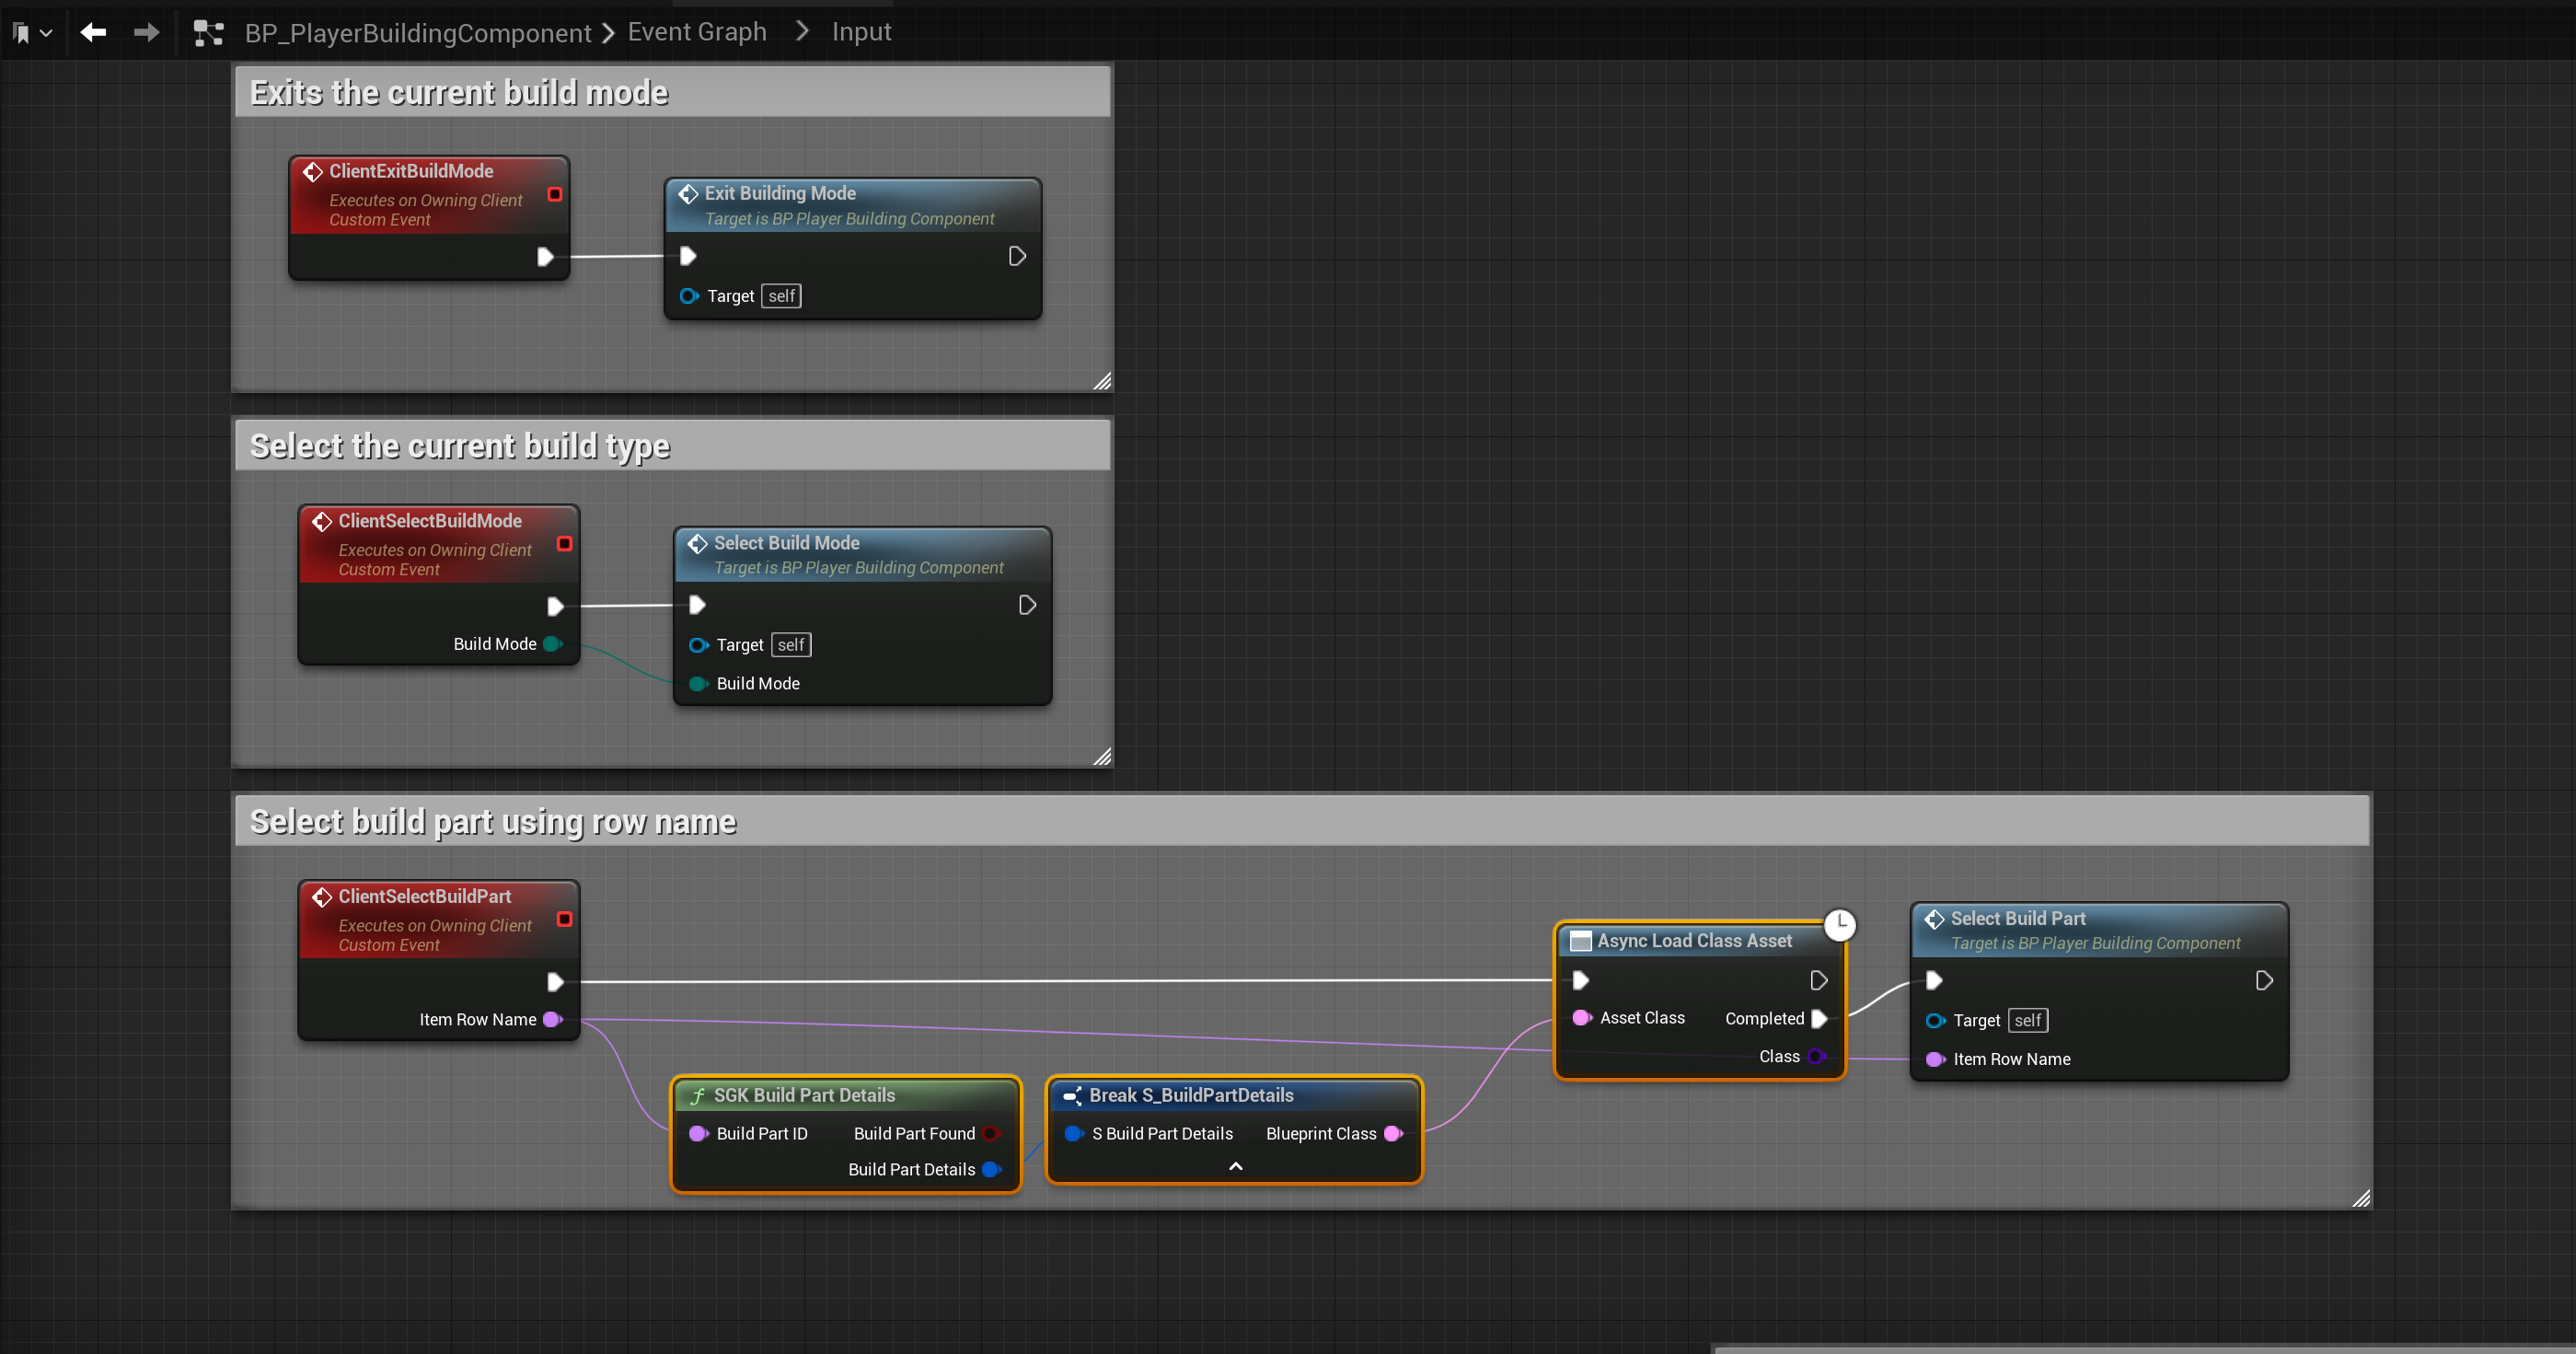
Then compile and save the blueprint. Then go to the BP_PlayerBuildingComponent. Add the highlighted nodes shown in the images below, location at the top of the images. The convert nodes are created automaticly when you connect the Blueprint Class to the Class pins.


Next play in editor, once the player character loads exit, then click the Save All button in the Content Browser.
You may have an error in the BP_MasterItemSpawner blueprint, just open it and compile and this should resolve the error.
Static Items
Open the S_ItemDetails and copy the video below.
Then play in editor, this will compile the effect blueprints and give you a list of blueprints with errors, click Cancel
Open the BP_StaticMasterItem and copy the video below.
Next connect the nodes shown below, location at the top of the screenshot.

Next go to the Construction Script and copy the code below.
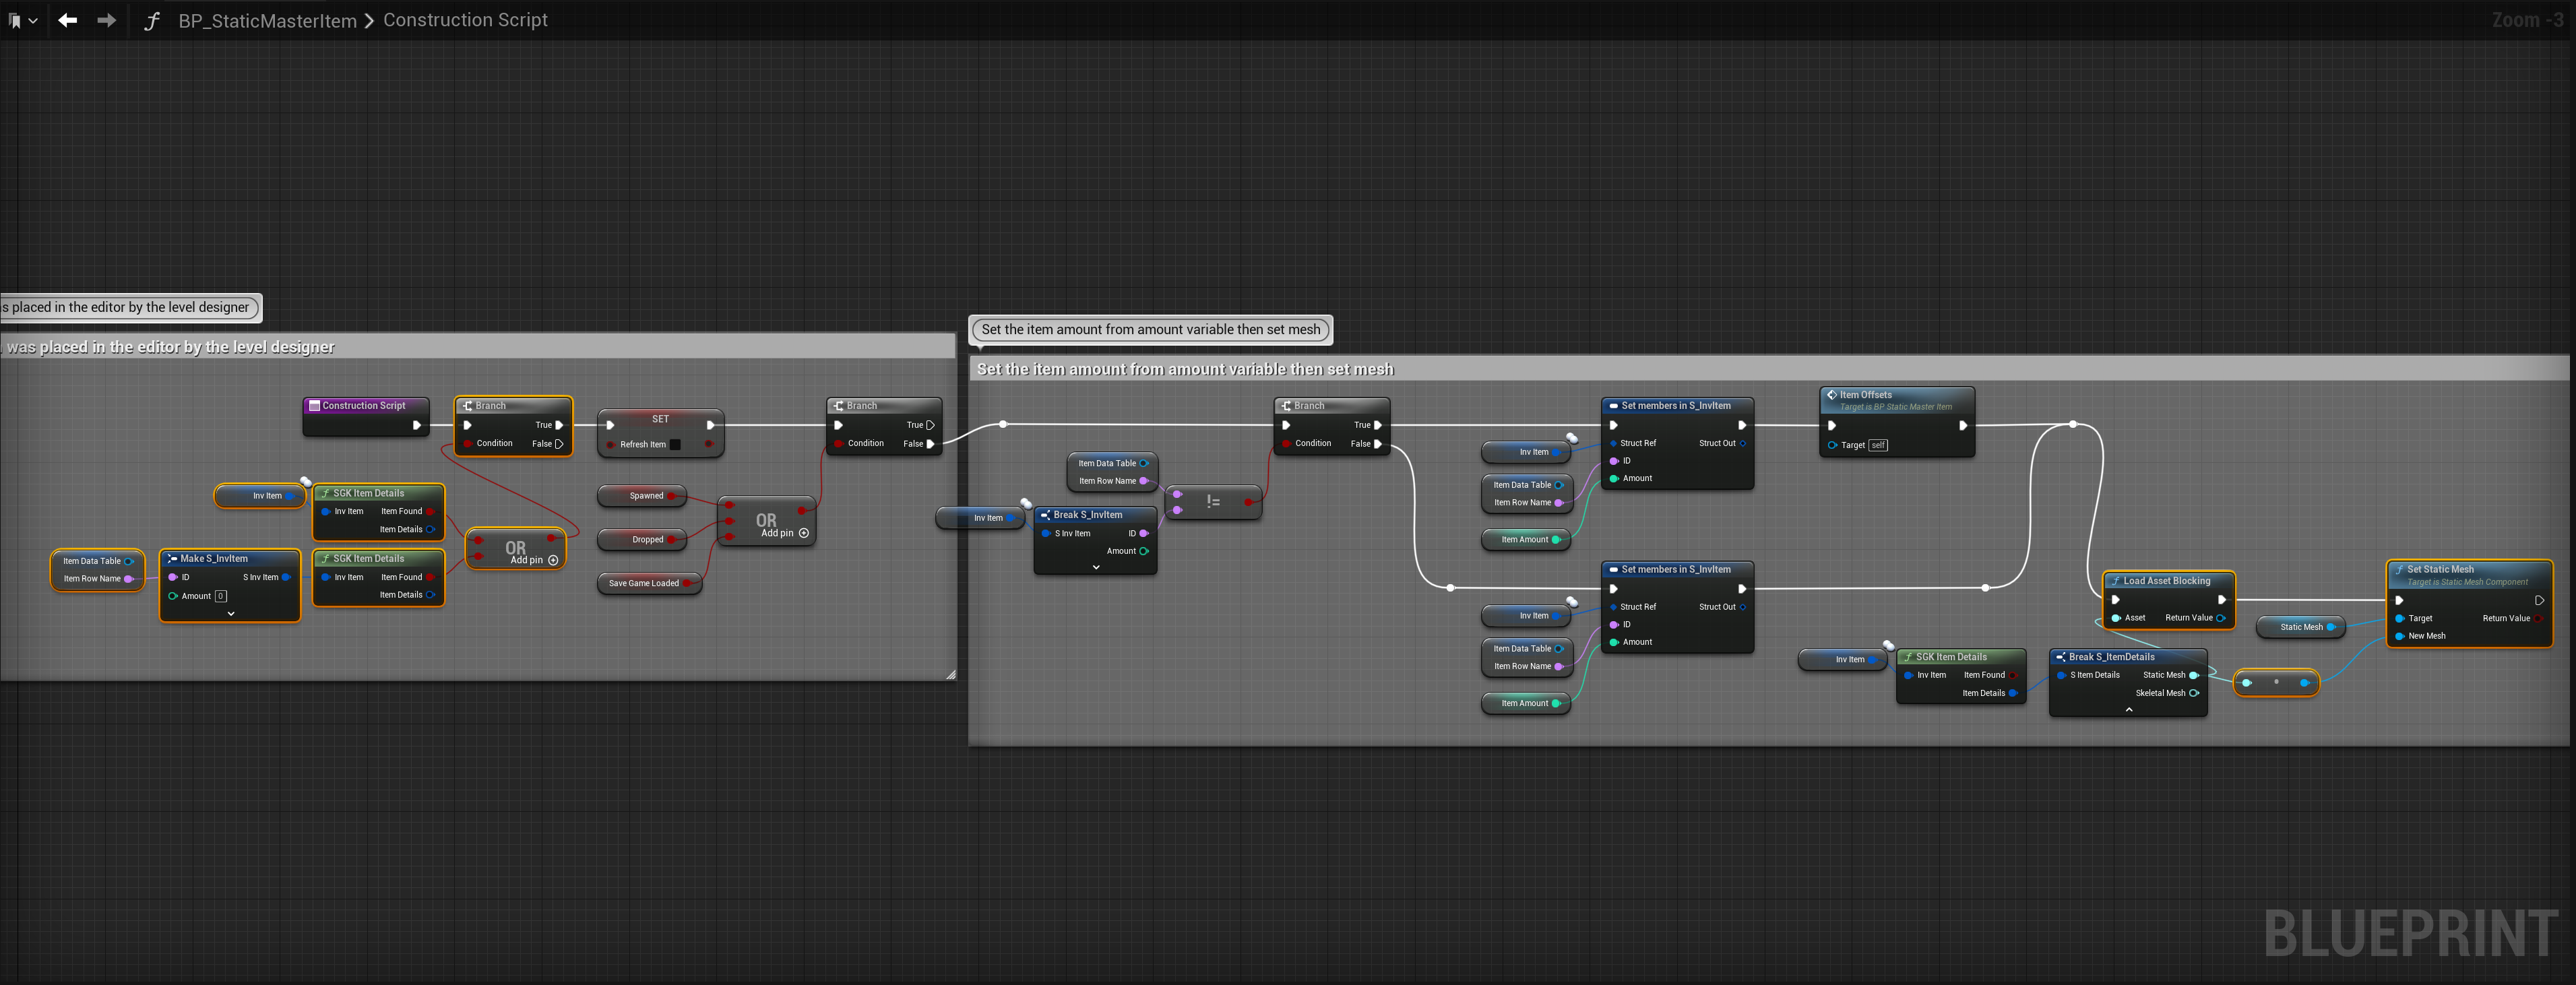
Add the highlighted nodes shown in the images below, location at the top of the images.


Skeletal Items
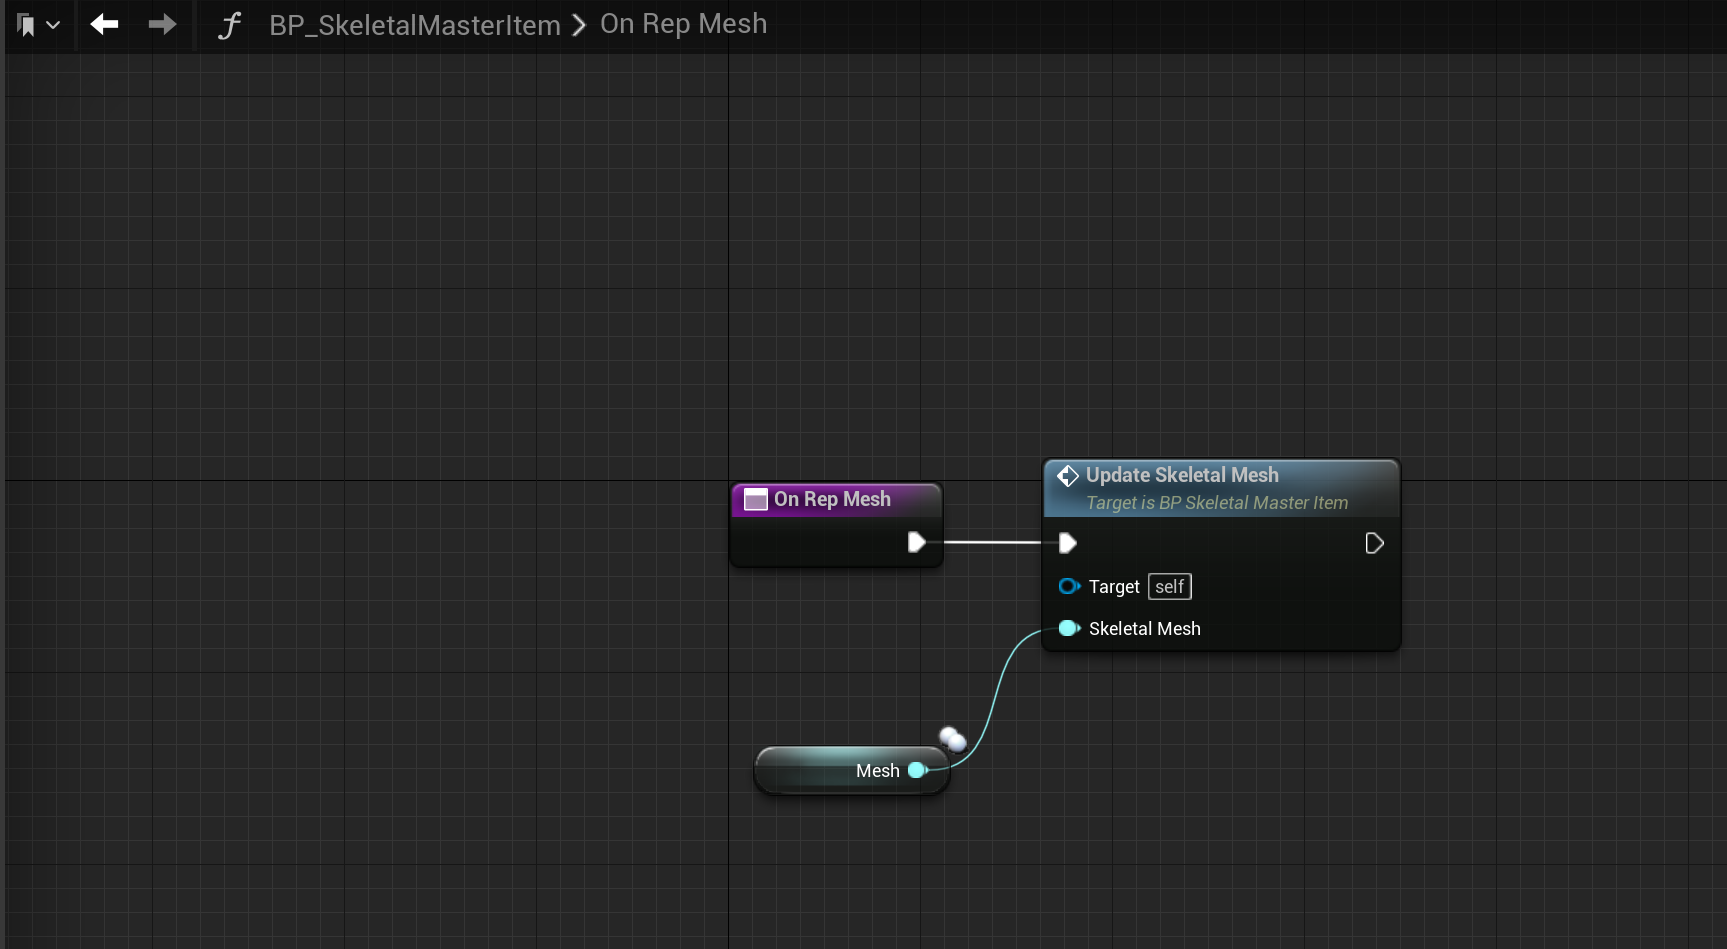
Next go to the BP_SkeletalMasterItem and copy the video below.
Next in the Begin Play collapsed node copy the image below.

Next go to the Construction Script and copy the image below.

Add the highlighted nodes shown in the images below, location at the top of the images.

You may have an error in the BP_MasterItemSpawner blueprint, just open it and compile and this should resolve the error.
Equipment Meshes
Go to the S_EquipmentMeshes and copy the video below.
Next go to the S_SocketAttachments and copy the video below.
Next play in editor, this may take a while to load. You will get a window saying a blueprint has an error click cancel.
Next go to the BP_MasterClothingAttachment and create a new function called GetAllSkeletalMeshes
Then add an output called FoundMeshes set its type to Boolean, then create another output and called it SkeletalMeshes and set its type to Skeletal Mesh Soft Object Reference and set it to an Array.
Then create a new local variable called SkeletalMeshesL and set its type to Skeletal Mesh Soft Object Reference and set it to an Array. Next copy the image below.

Next go to the BP_MasterClothingAttachment and create a new function called GetAllStaticMeshes
Then add an output called FoundMeshes set its type to Boolean, then create another output and called it StaticMeshes and set its type to S_SocketAttachments
Then create a new local variable called StaticMeshesL and set its type to S_SocketAttachments and set it to an Array. Next copy the image below.

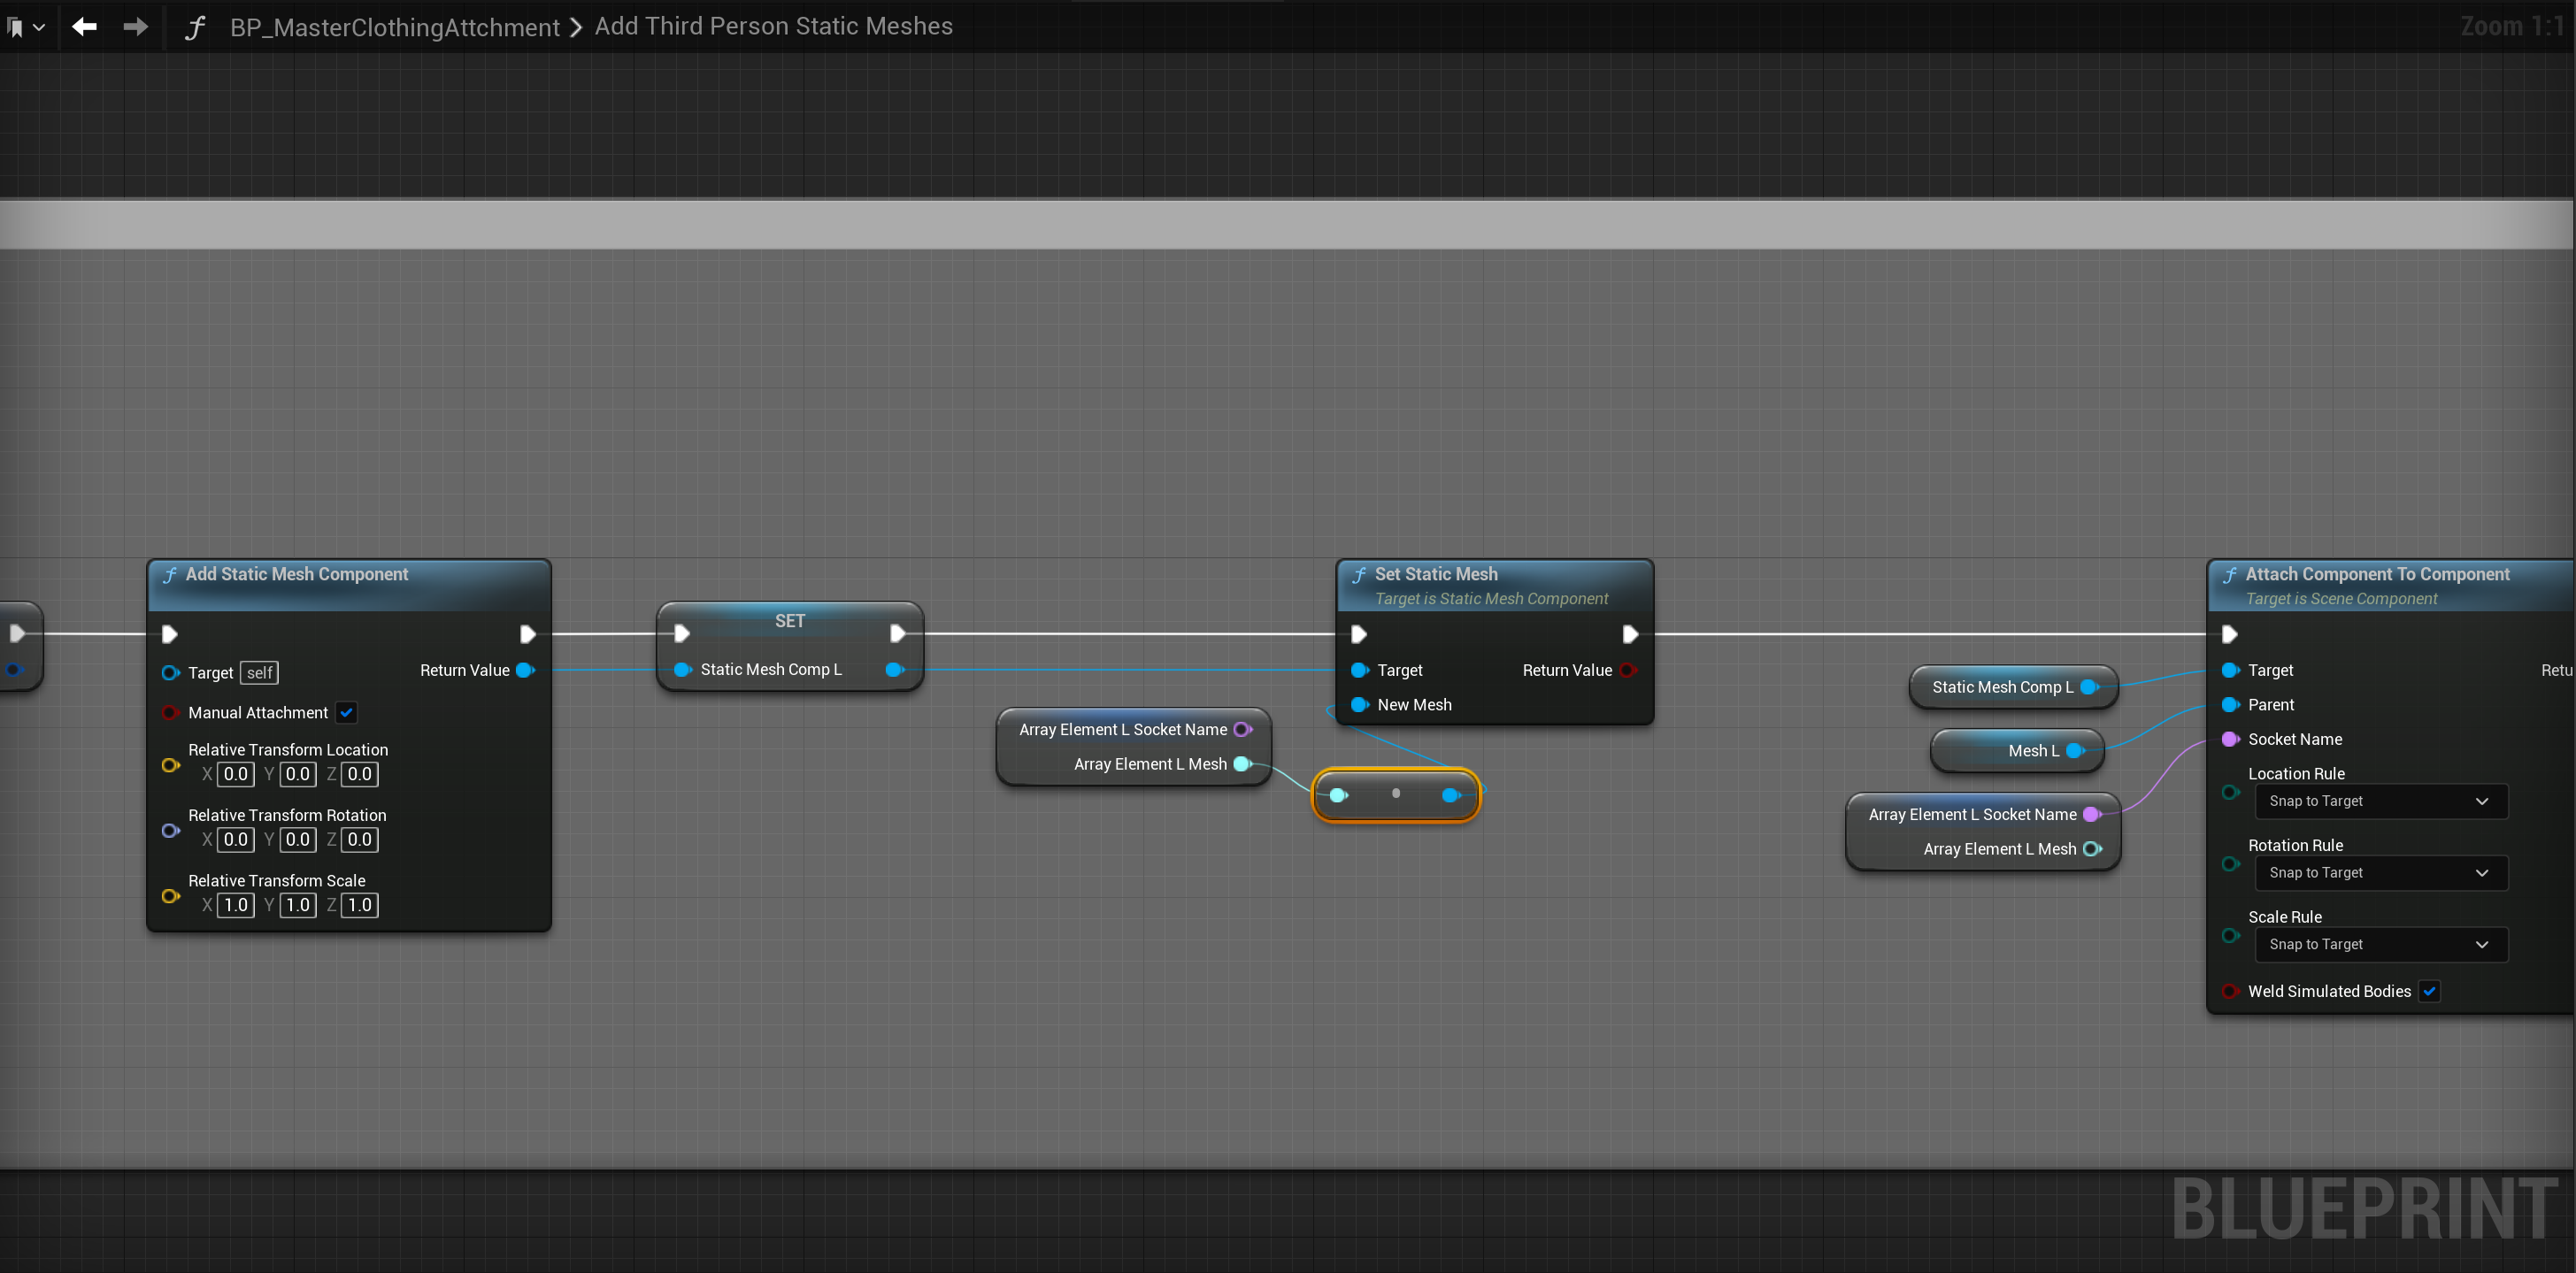
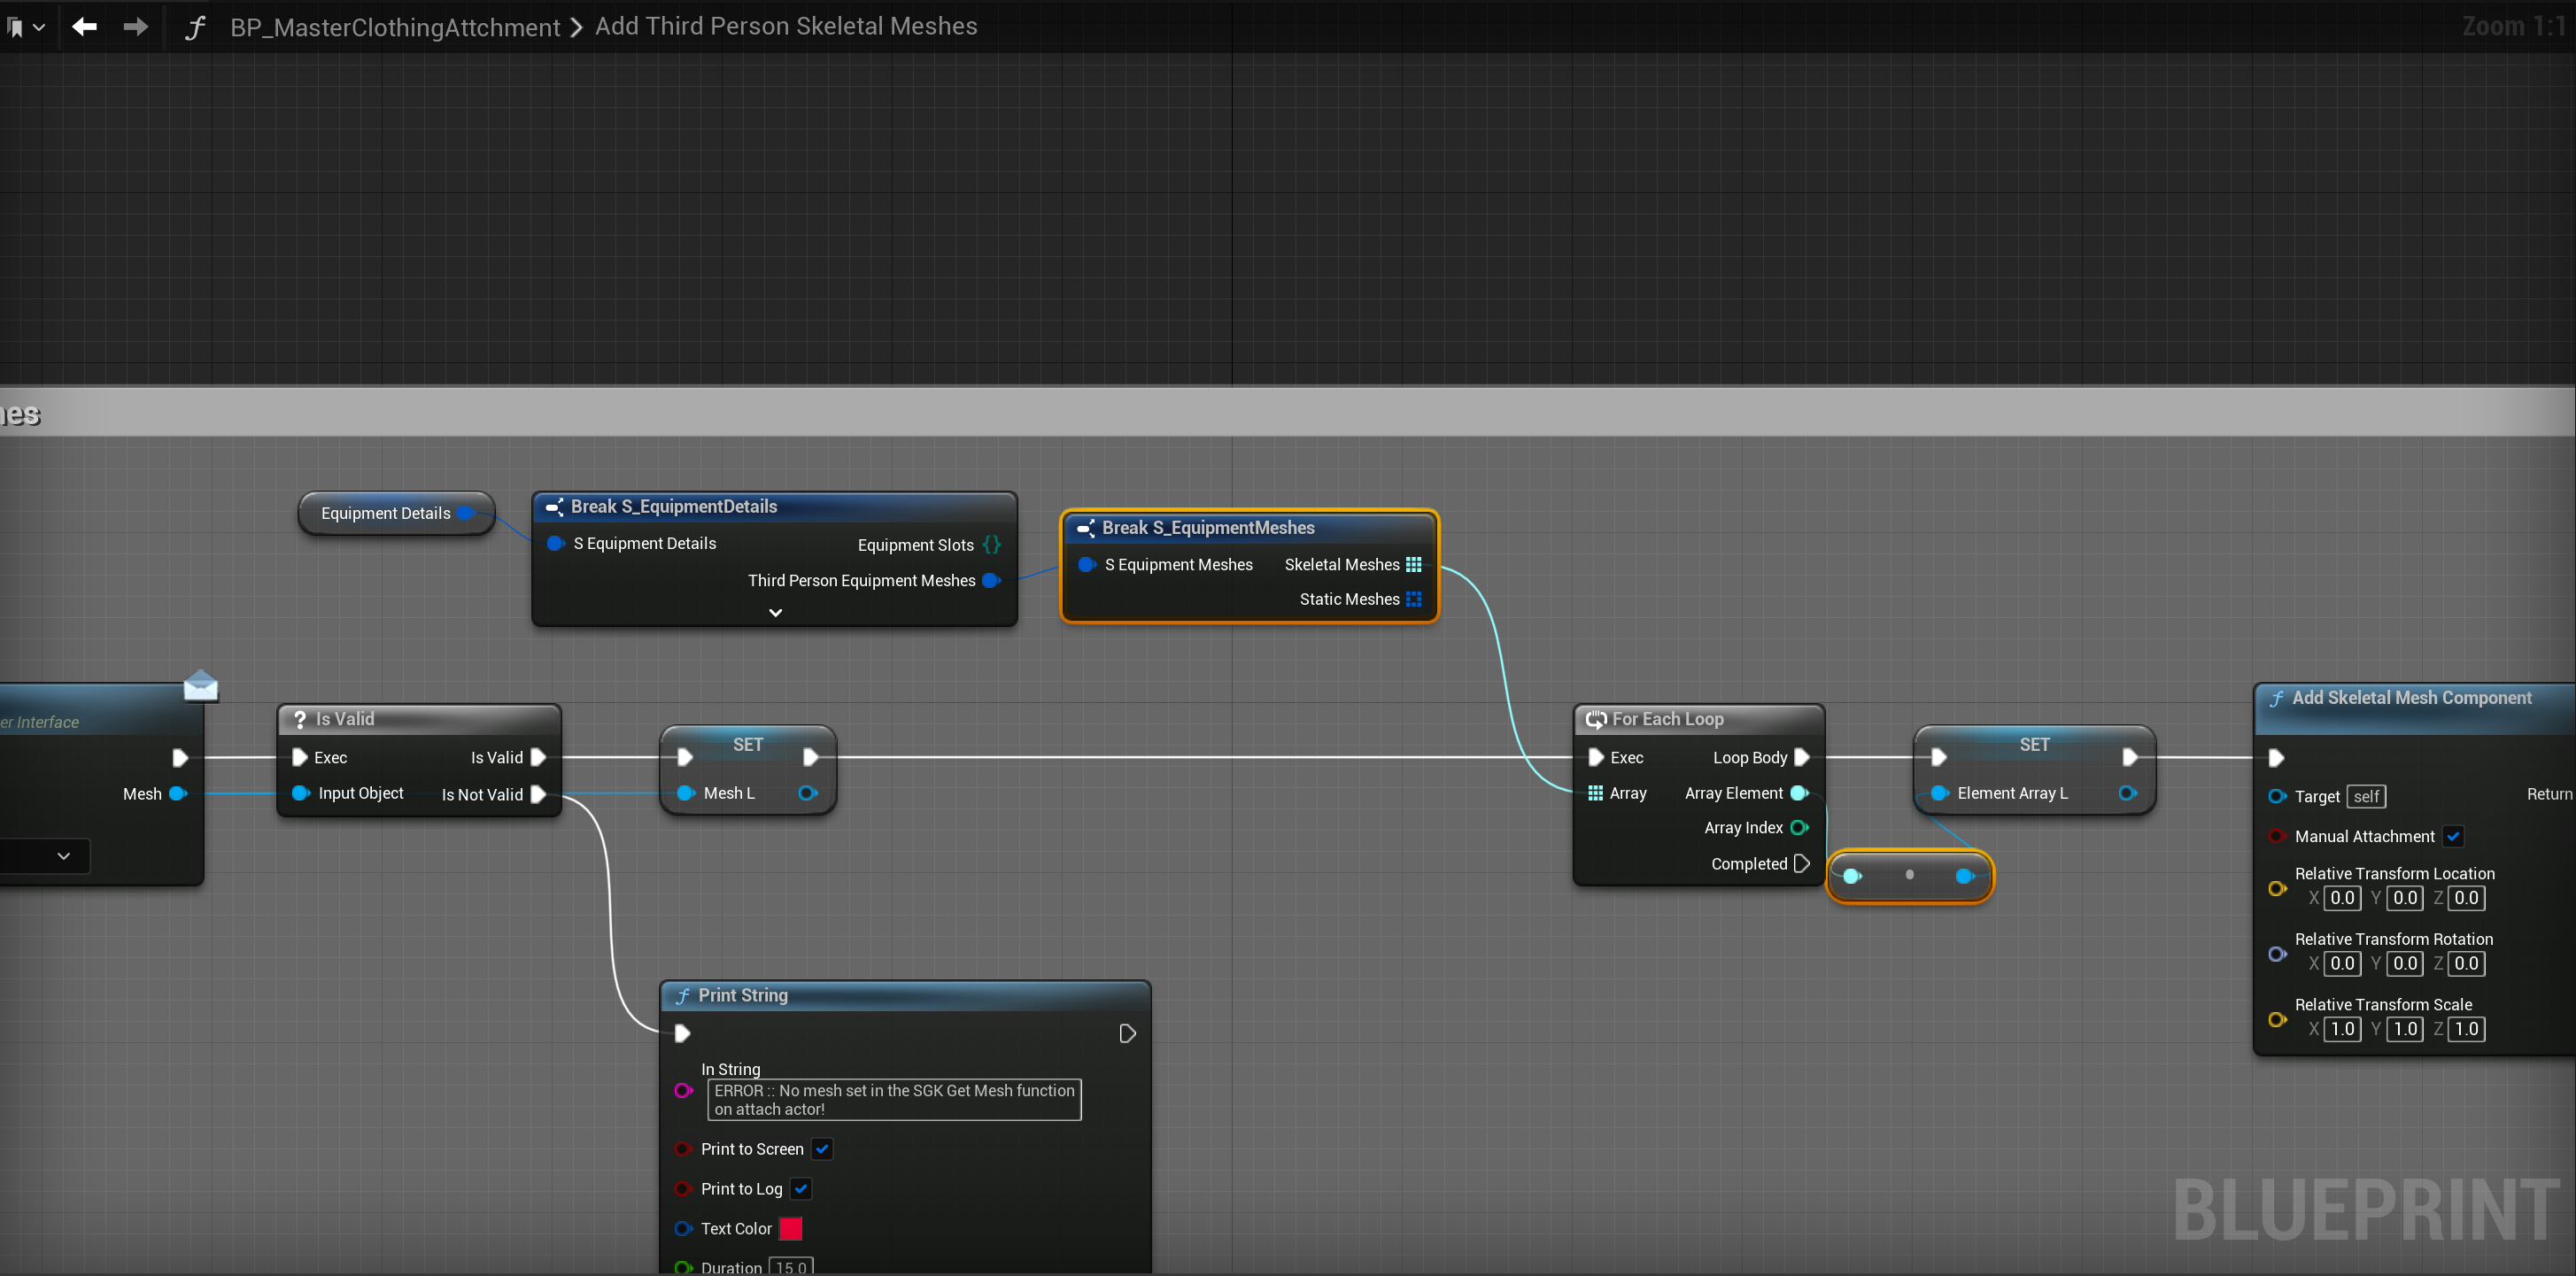
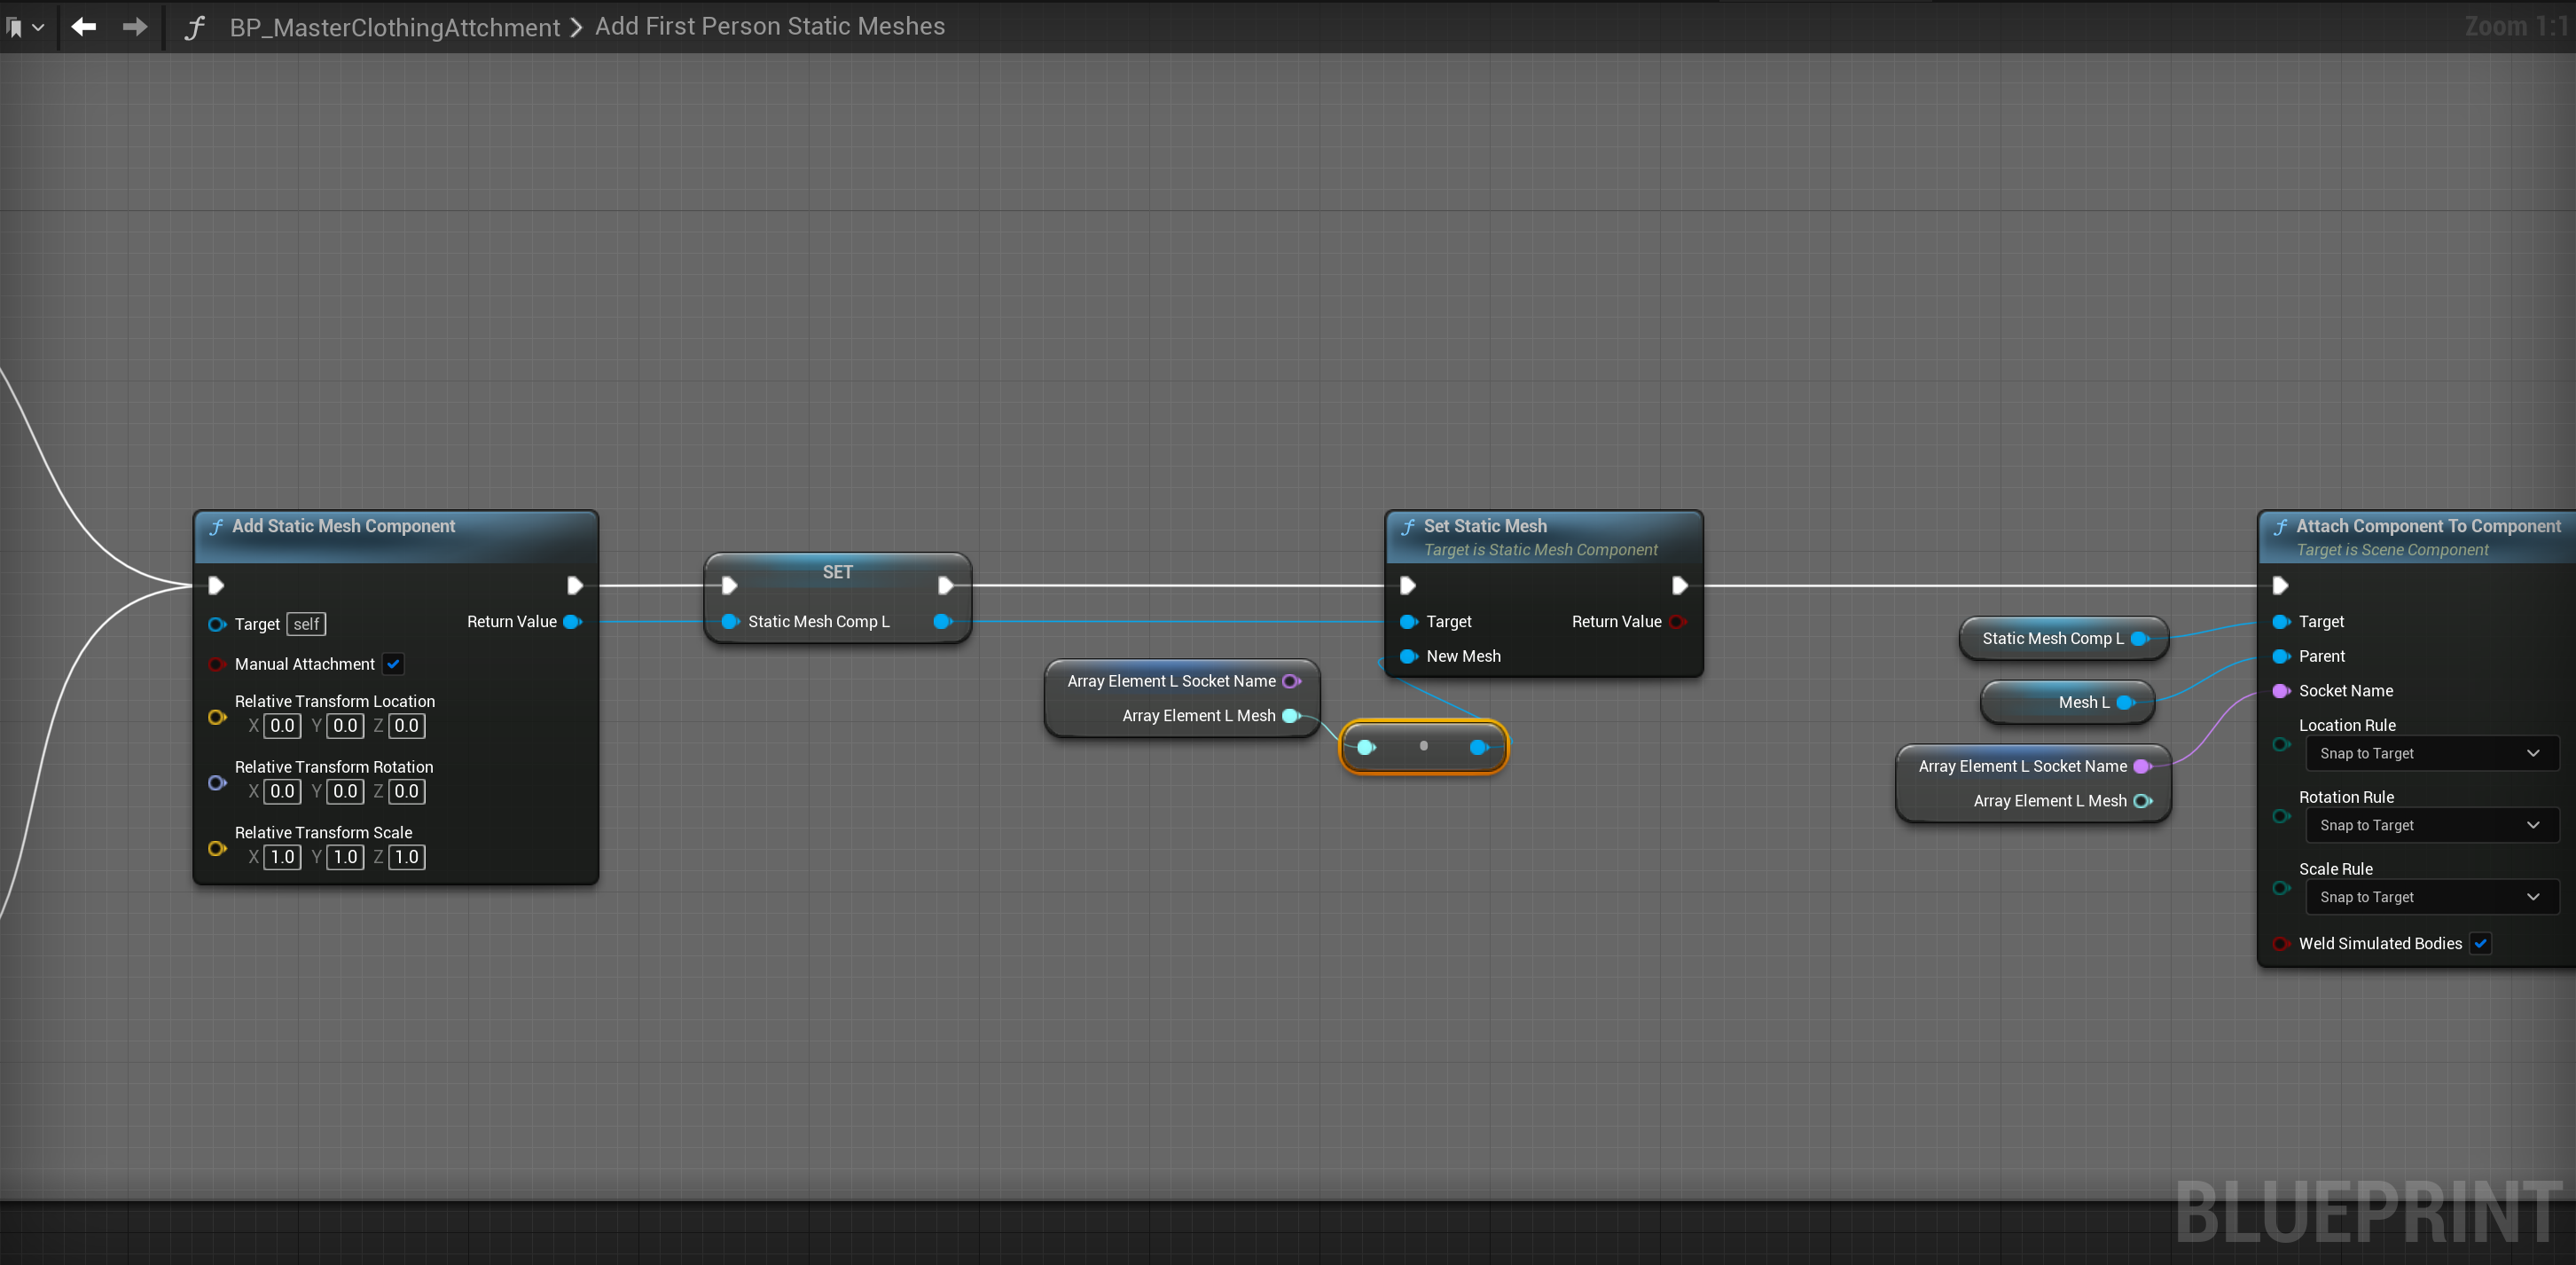
Next copy the images below, locations at the tops of the screenshots.

Next compile the BP_MasterClothingAttachment and create a new variable called LoadIndex and set its type to Integer.
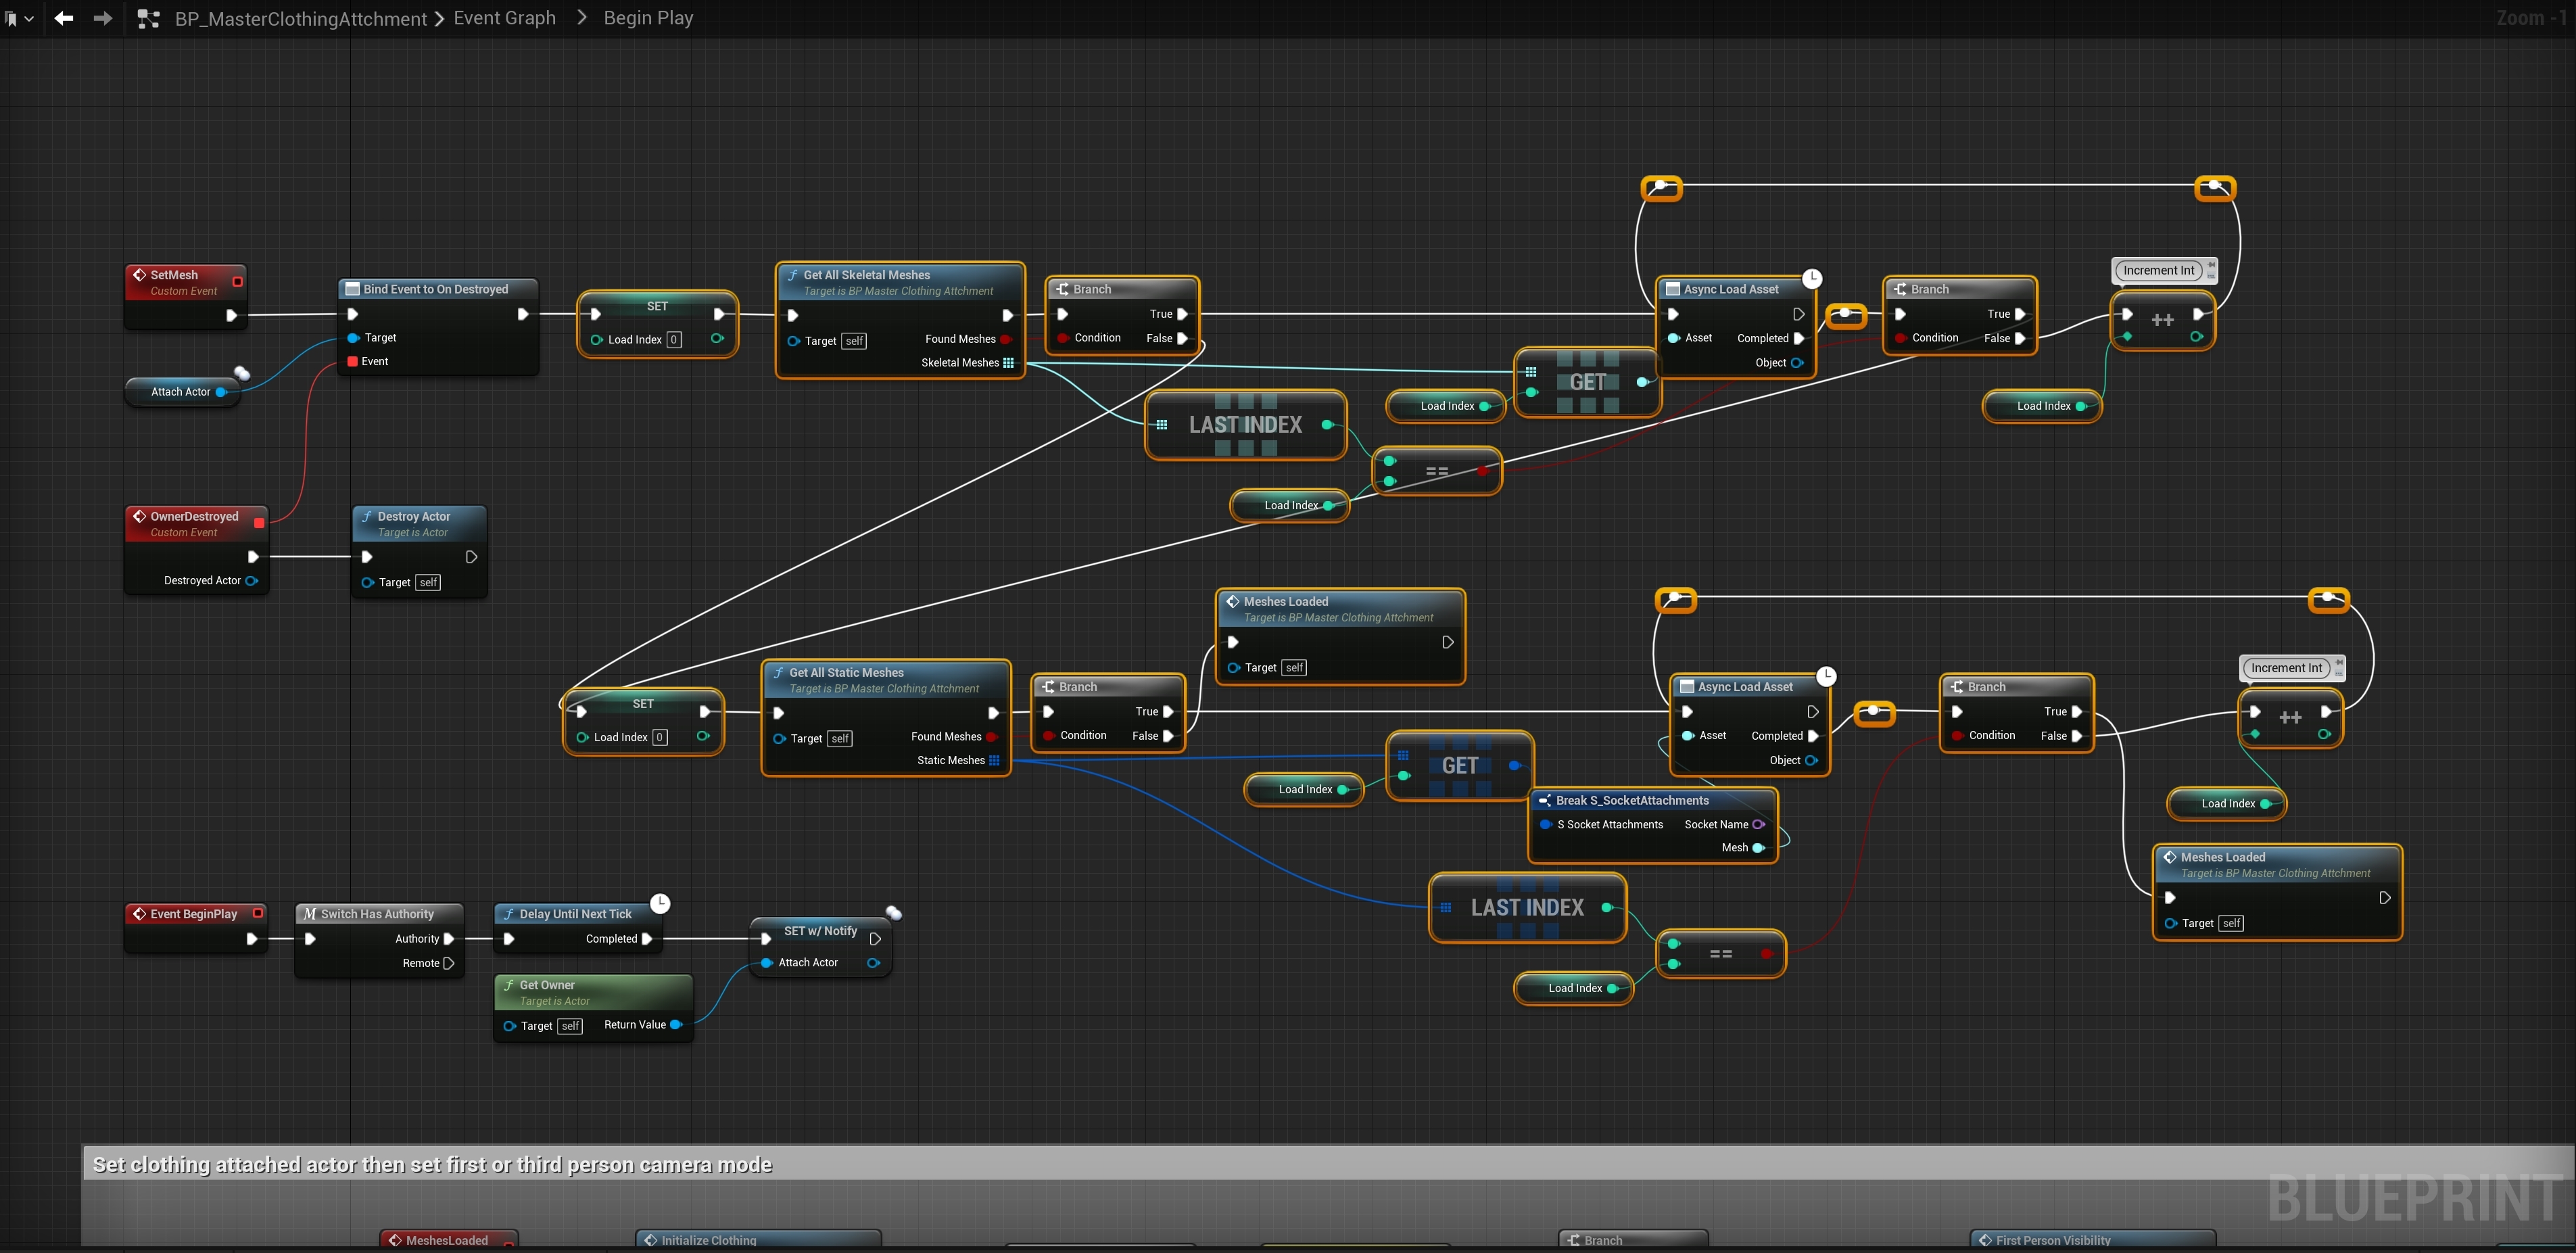
Then copy the video below in the Begin Play collapsed node.
Next create a new variable called LoadIndex and set its type to integer.
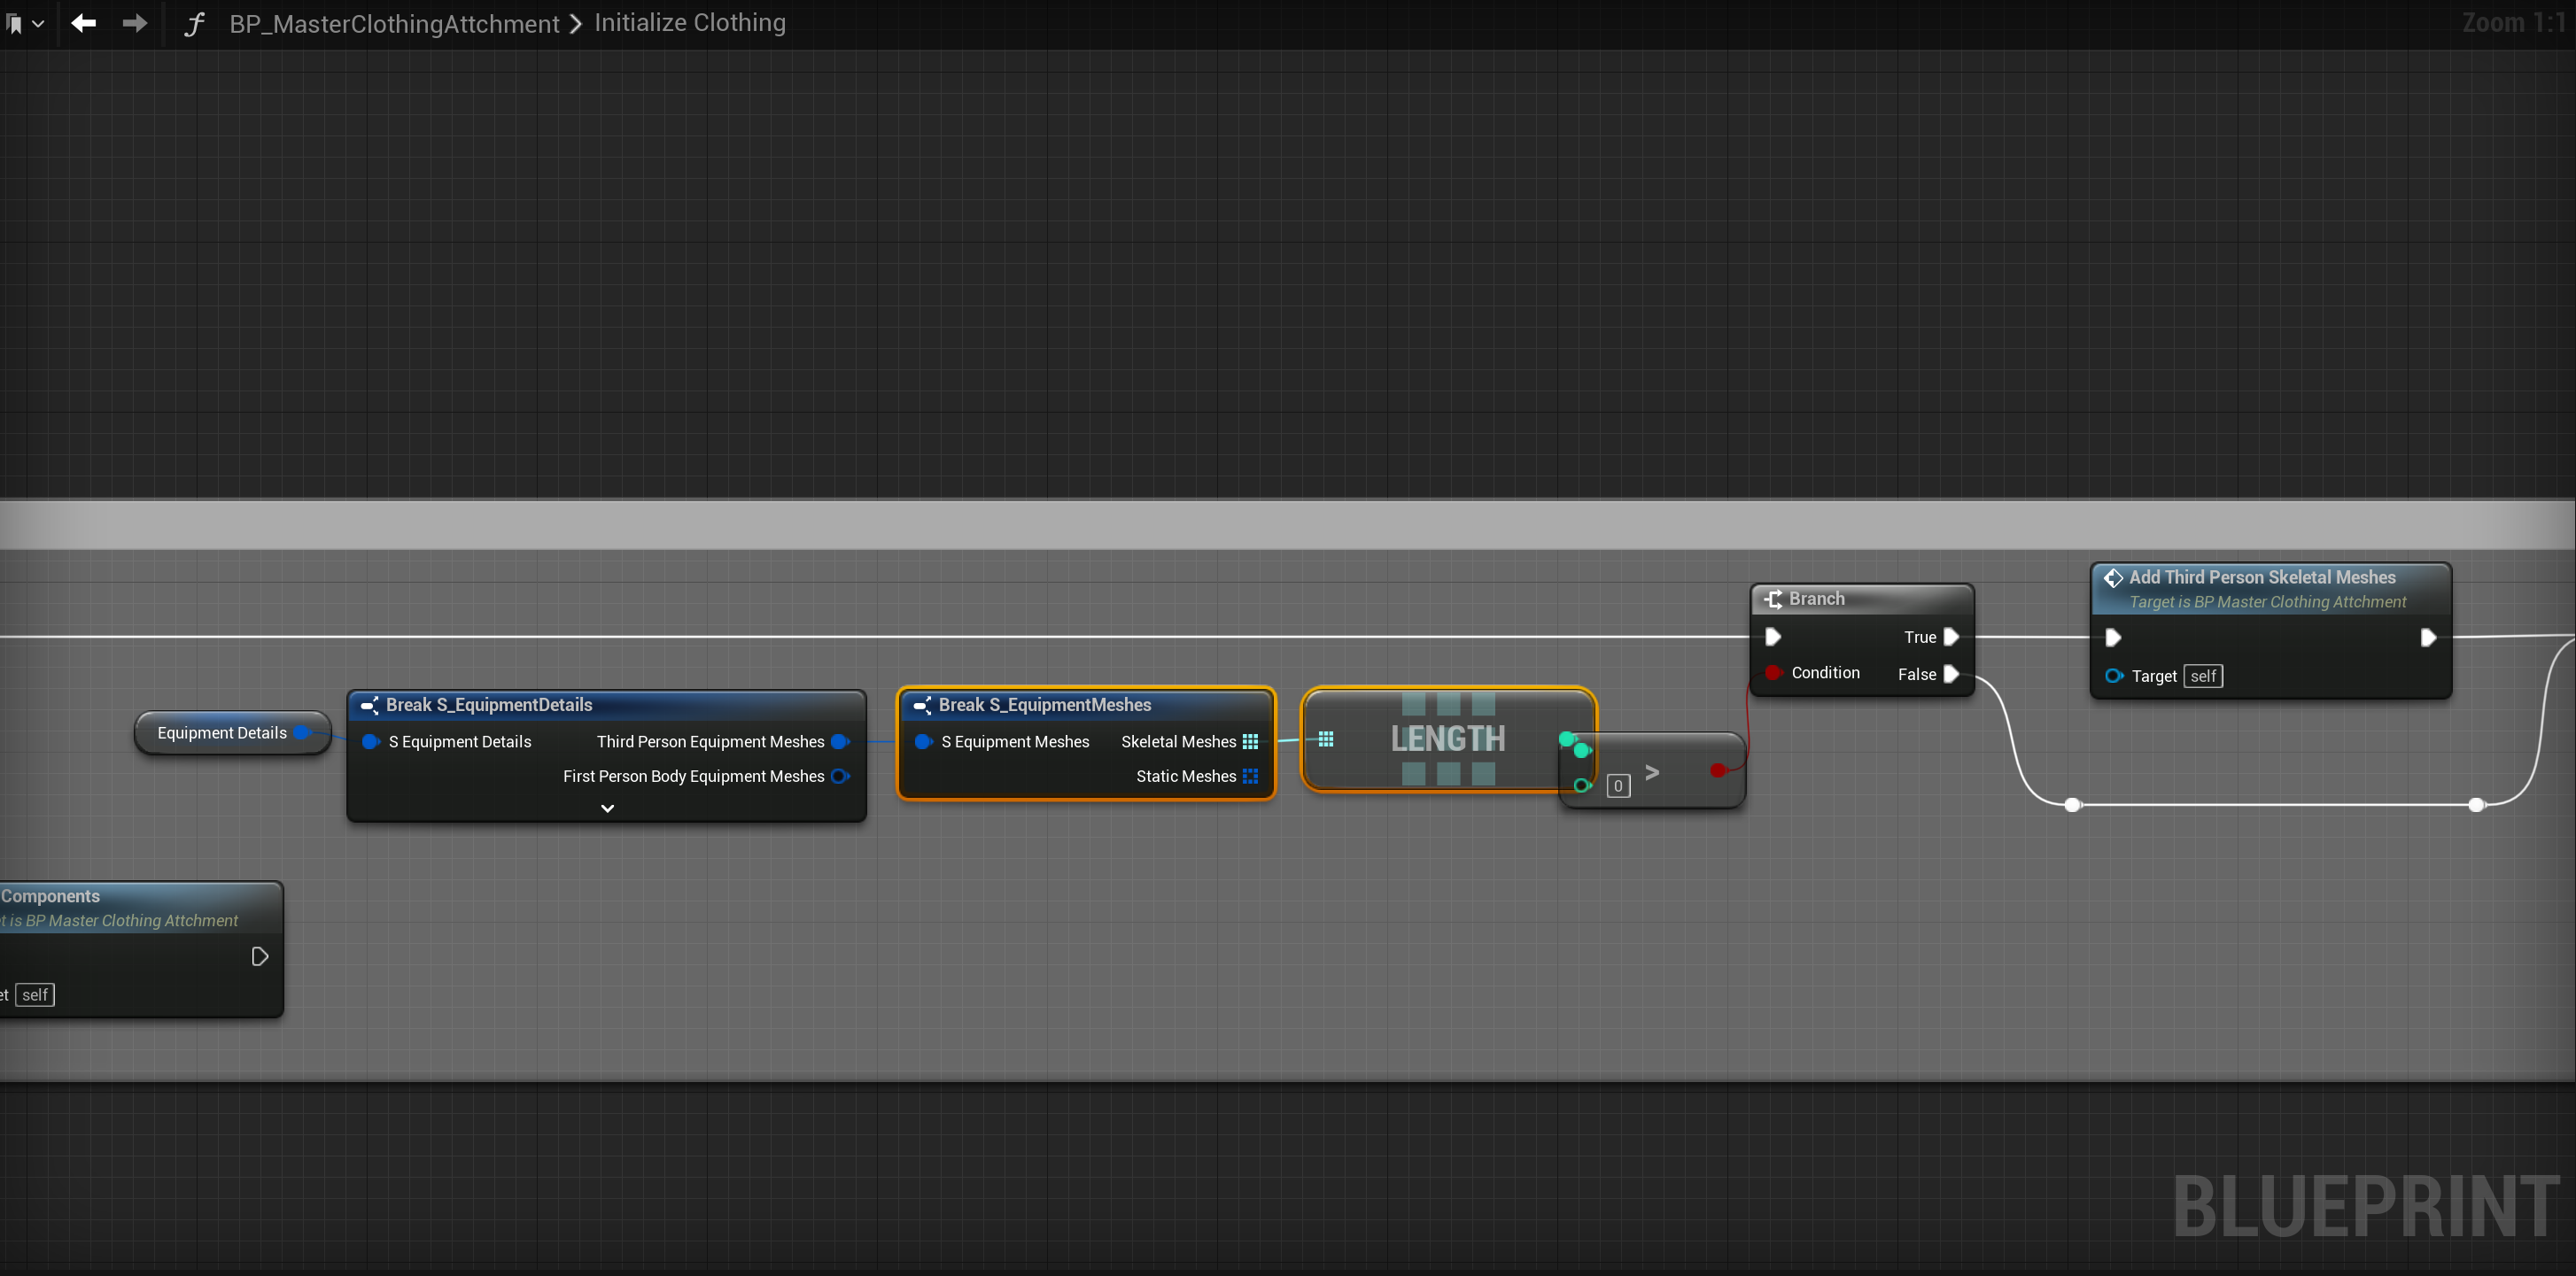
Next copy the image below, be careful to make sure you connect up the execution pins how they are shown in the image.
Then go to the BP_CharacterComponent and compile it, then click save all in the content browser.
Next play in editor, you may get errors from other blueprint referring to the On Rep functions, this is an engine bug, just compile the blueprints you have errors in and these errors should go away.
You may have an issue where some items are not visible in your level, just restart the engine and those items should be visible again
