Projects that use UE4 or are older then version 2.4 you’ll need to follow the guide linked below
https://defusestudios.com/sgk-v2-changing-character-animations/
Changing Animations
To change the unarmed character animations go to the SurvivalGameKitV2/Animations/Layers folder and open the ABP_UnarmedAnimLayers blueprint, this blueprint controls the unarmed animations the character plays.
To change a holdable’s or weapon’s animations go to the SurvivalGameKitV2/Animations/Layers folder and open the weapons anim layers blueprint so for example the ABP_M4A4AnimLayers controls the anims used when the M4A4 weapon is held.
In the animation blueprint select the Class Defaults button and in the Details panel you can find both the third and first person Categories which contain their anim settings categories.

In the anims category you can set the animations used for each character stance these are Standard, Combat and Aimed. To change the first person animations you would edit the anim settings found under the First Person category.

The unarmed character only uses the Standard Anims from the ABP_UnarmedAnimLayers. Weapons use the Comabat Anims as their default animations and the Aimed Anims for when aiming.

Here you can set the Idle, Movement, Jump and Overlay animations that will be used in each character Stance.
Overlay animations are optional they will override the animation played by the arms and head. This can be useful if you have a weapon but don’t have a full set of movement animations for that weapon as you can use other movement and idle anims and override the arms to use an animation that works with your weapon.
Blend Spaces
Blend spaces are used to control the characters direction movement animations so it can blend between different animation when moving in different directions and at difference speeds.
To change the animations used by a blend space you can right click the dots on the graph like the image below shows, this will allow you to change the animation and speed at which that animation is fully played on the character.
I recommend keeping the dots horziontal location in the graph at the same value as this controls which animation is played depending on the direction the character is moving.
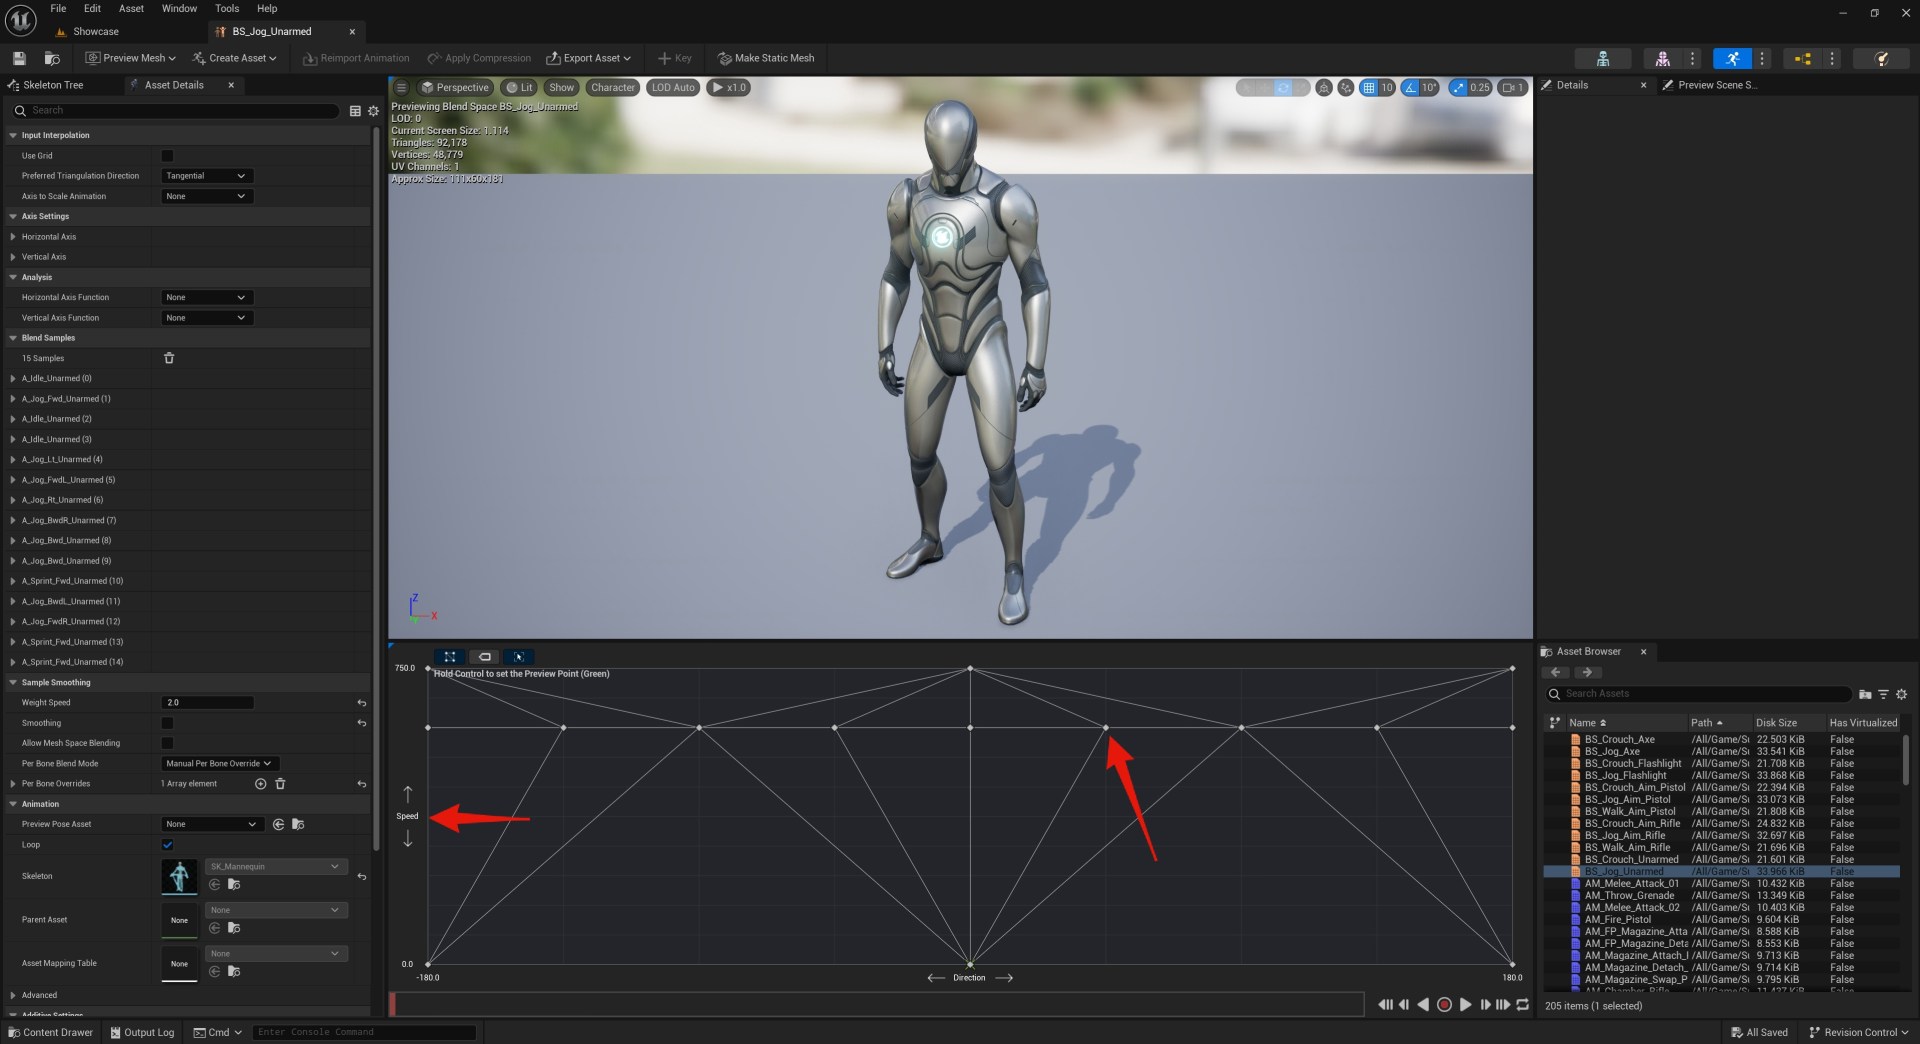
Below is an example of how you can change the speed that an animation will play in a blend space.
If you want to know more about Blend Spaces Epics documentation is linked below.
When changing the blend spaces or animations inside a blend space its recommend to use animation sequences that animate the foot IK bones as they are used by the foot IK system to position the feet on the ground.
If the animations you plan on using don’t animate the foot IK bones or if you’ve changed your character mesh to a mesh that doesn’t have foot IK bones you can follow the foot IK section of the video linked below from 31:56 to 34:02 this will show you how to add virtual bones to your characters skeleton and have the foot IK system use them instead of the IK bones.
Other Settings
Here you can also set the third person turn in place animations, the type of aim offset it uses and how that aim offset is applied to the character.
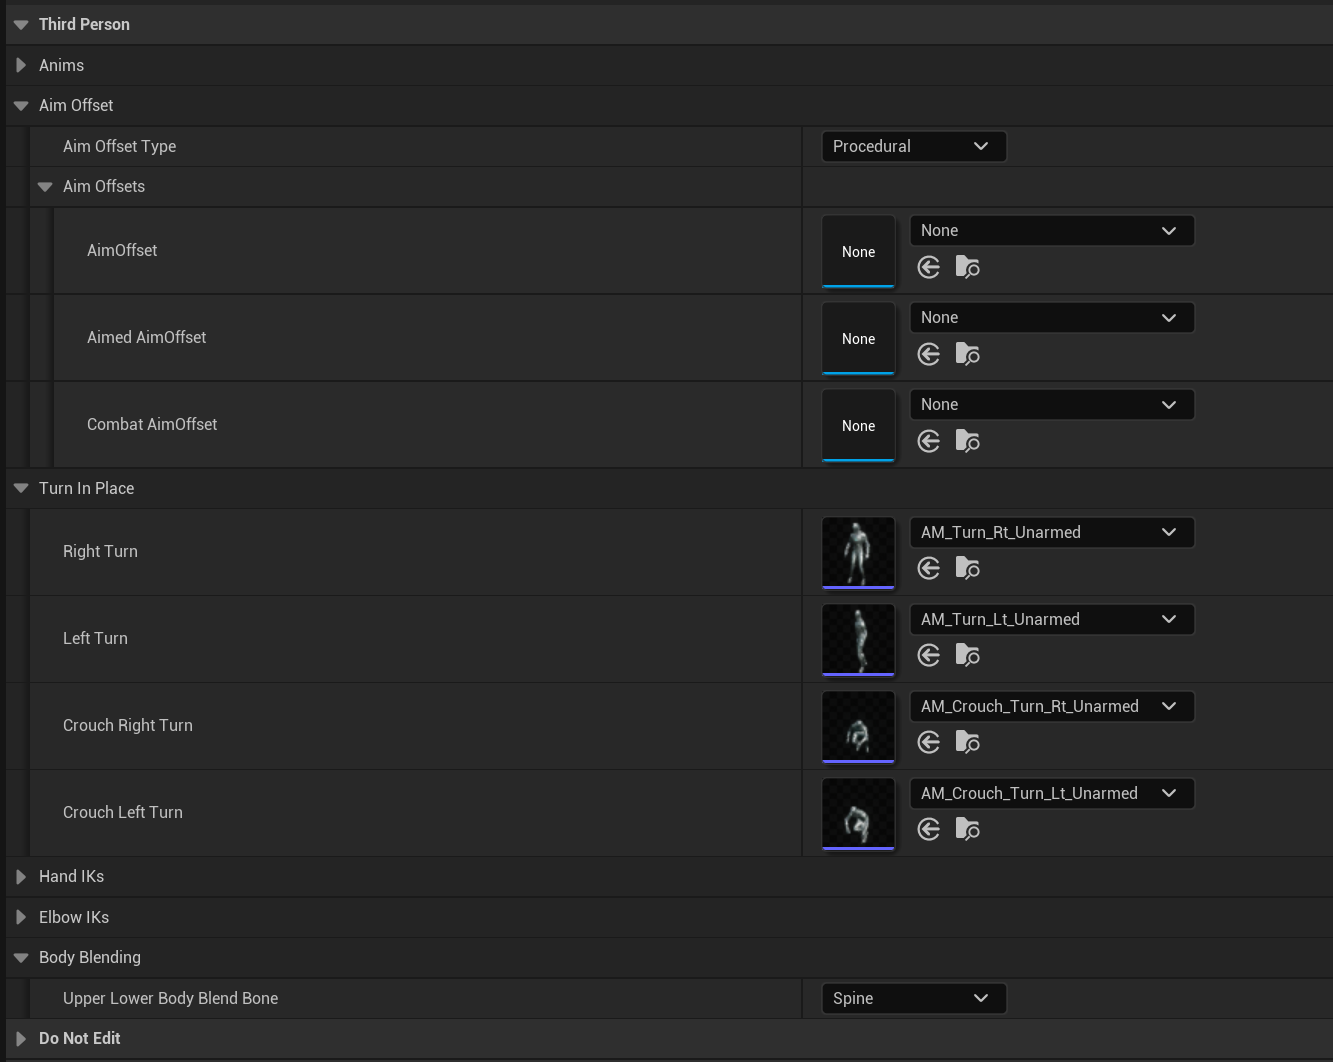
The Aim Offset Type can be set to procedural or you can use premade aim offset animations, by default only procededual aim offsets are used this uses code to determine what direction the character looks.
The Upper Lower Body Blend Bone determines where the aim offset it applied, so for example the BP_UnarmedAnimLayer uses the Neck option so the aim offset is only applied to the neck and head bones, weapons use the Spine option so the whole upper body looks in the camera direction.
The anim layer blueprint also includes some other settings for things such as Disable Right Hand IK Sprinting, left hand socket names, bone names and debug settings shown below.

Disable right hand IK sprinting will disable the right hand IK effects while the character is sprinting if the anim layer uses the right hand IK.
The Left Hand Weapon Sockets control the socket the left hand will follow on the weapon if Use Left Hand IK is enabled.
You can also enable the Debug Mode, this will print useful info to the screen about the anim blueprint when playing, the Debug Type is which debug data is used, 0 = Third Person, 1 = First Person Arms, 2 = First person Body.
The Adjust Right Hand IK and Adjust Elbow IK can be enabled so the changes you make to the IKs can be seen in game, more info about that in the IK section of this guide. These should only be enabled when you are activley adjusting the IK values.
You should only need to change the bone name variables when retargetting to a character with a different bone names, and this should be done in the ABP_BaseHoldableAnimLayer Class Defaults as this will update all the other anim layer blueprints.
IK Settings
For more info on the IK settings found in the anim layer blueprint check out the guide linked below.
