Before following this guide make a backup of your project! You should also follow the guide linked below before this one if you haven’t already.
Start by going to the BP_WeaponInventory, create a new function called ClearAttachmentReferences and copy the image below.

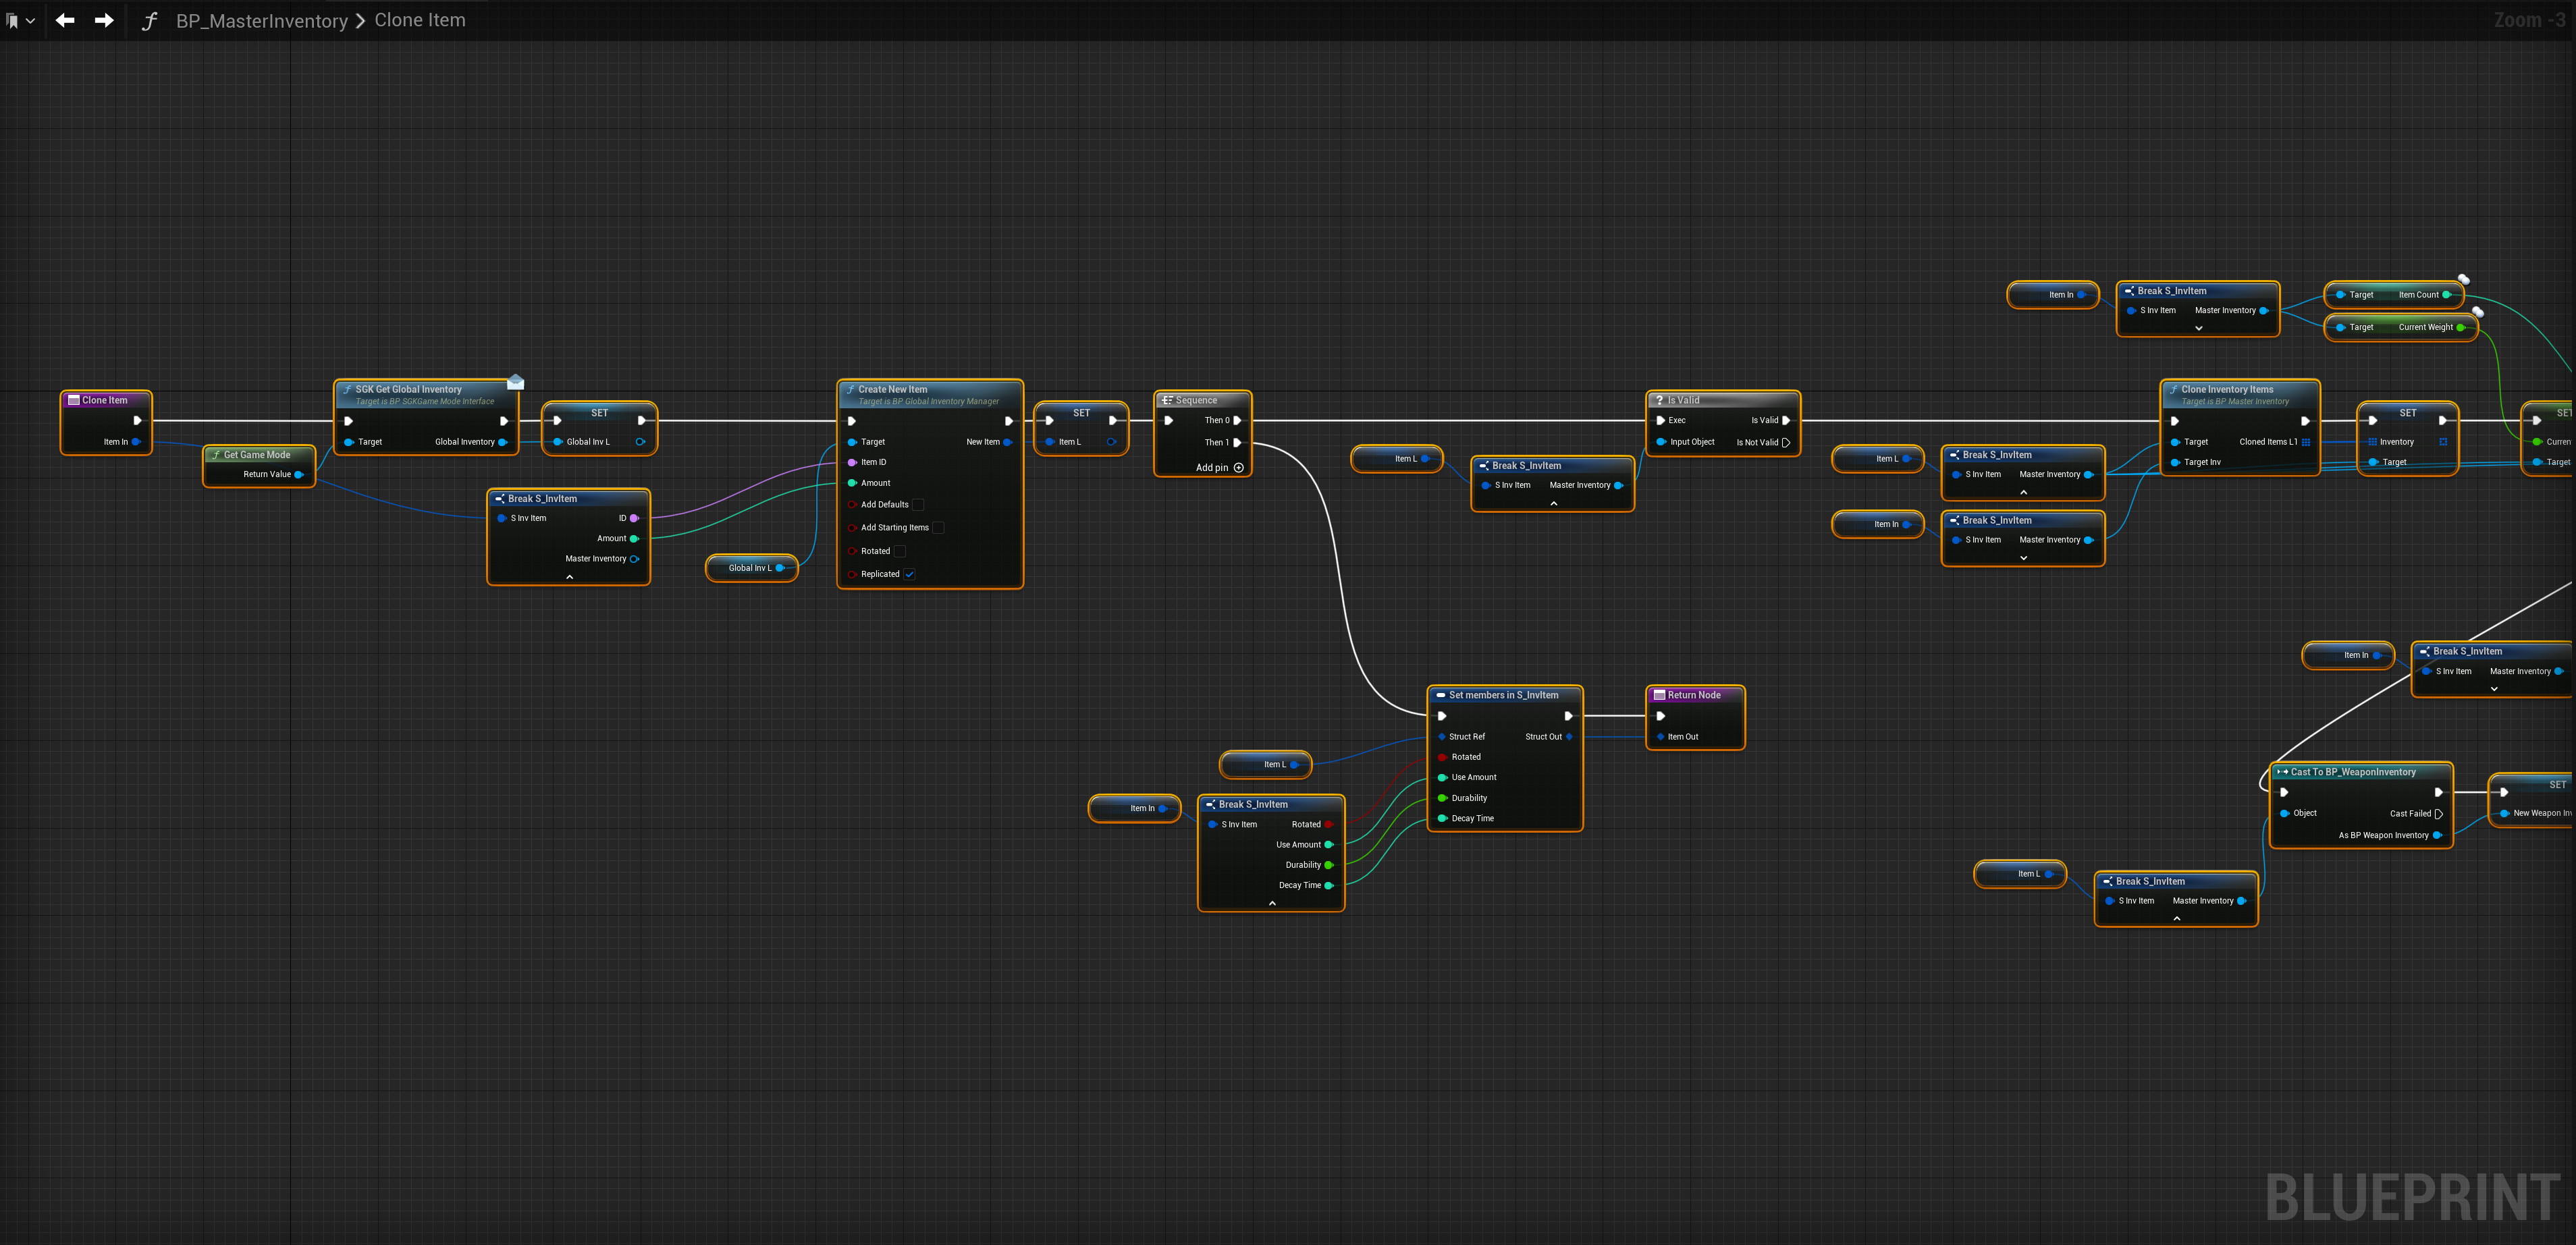
Go to the BP_MasterInventory and create a new function called CloneItem. Add a new input called ItemIn and set its type to S_InvItem create a new output called ItemOut and set its type to S_InvItem.
In the CloneItem function create the following local variables.
Name: GlobalInvL Type: BP_GlobalInventoryManager
Name: ItemL Type: S_InvItem
Name: NewWeaponInvL Type: BP_WeaponInventory
Name: TargetWeaponInvL Type: BP_WeaponInventory
Now create another new function called CloneInventoryItems and add a new input called TargetInv set its type to BP_MasterInventory. Then add an output called ClonedItemsL1 set its type to S_InvSlot and set this output to an array.
In the CloneInventoryitems function create the following local variables.
Name: GlobalInvL Type: BP_GlobleInventoryManager
Name: ClonedItemsL Type: S_InvSlot (Set this variable to an Array)
Name: SlotL Type: S_InvSlot
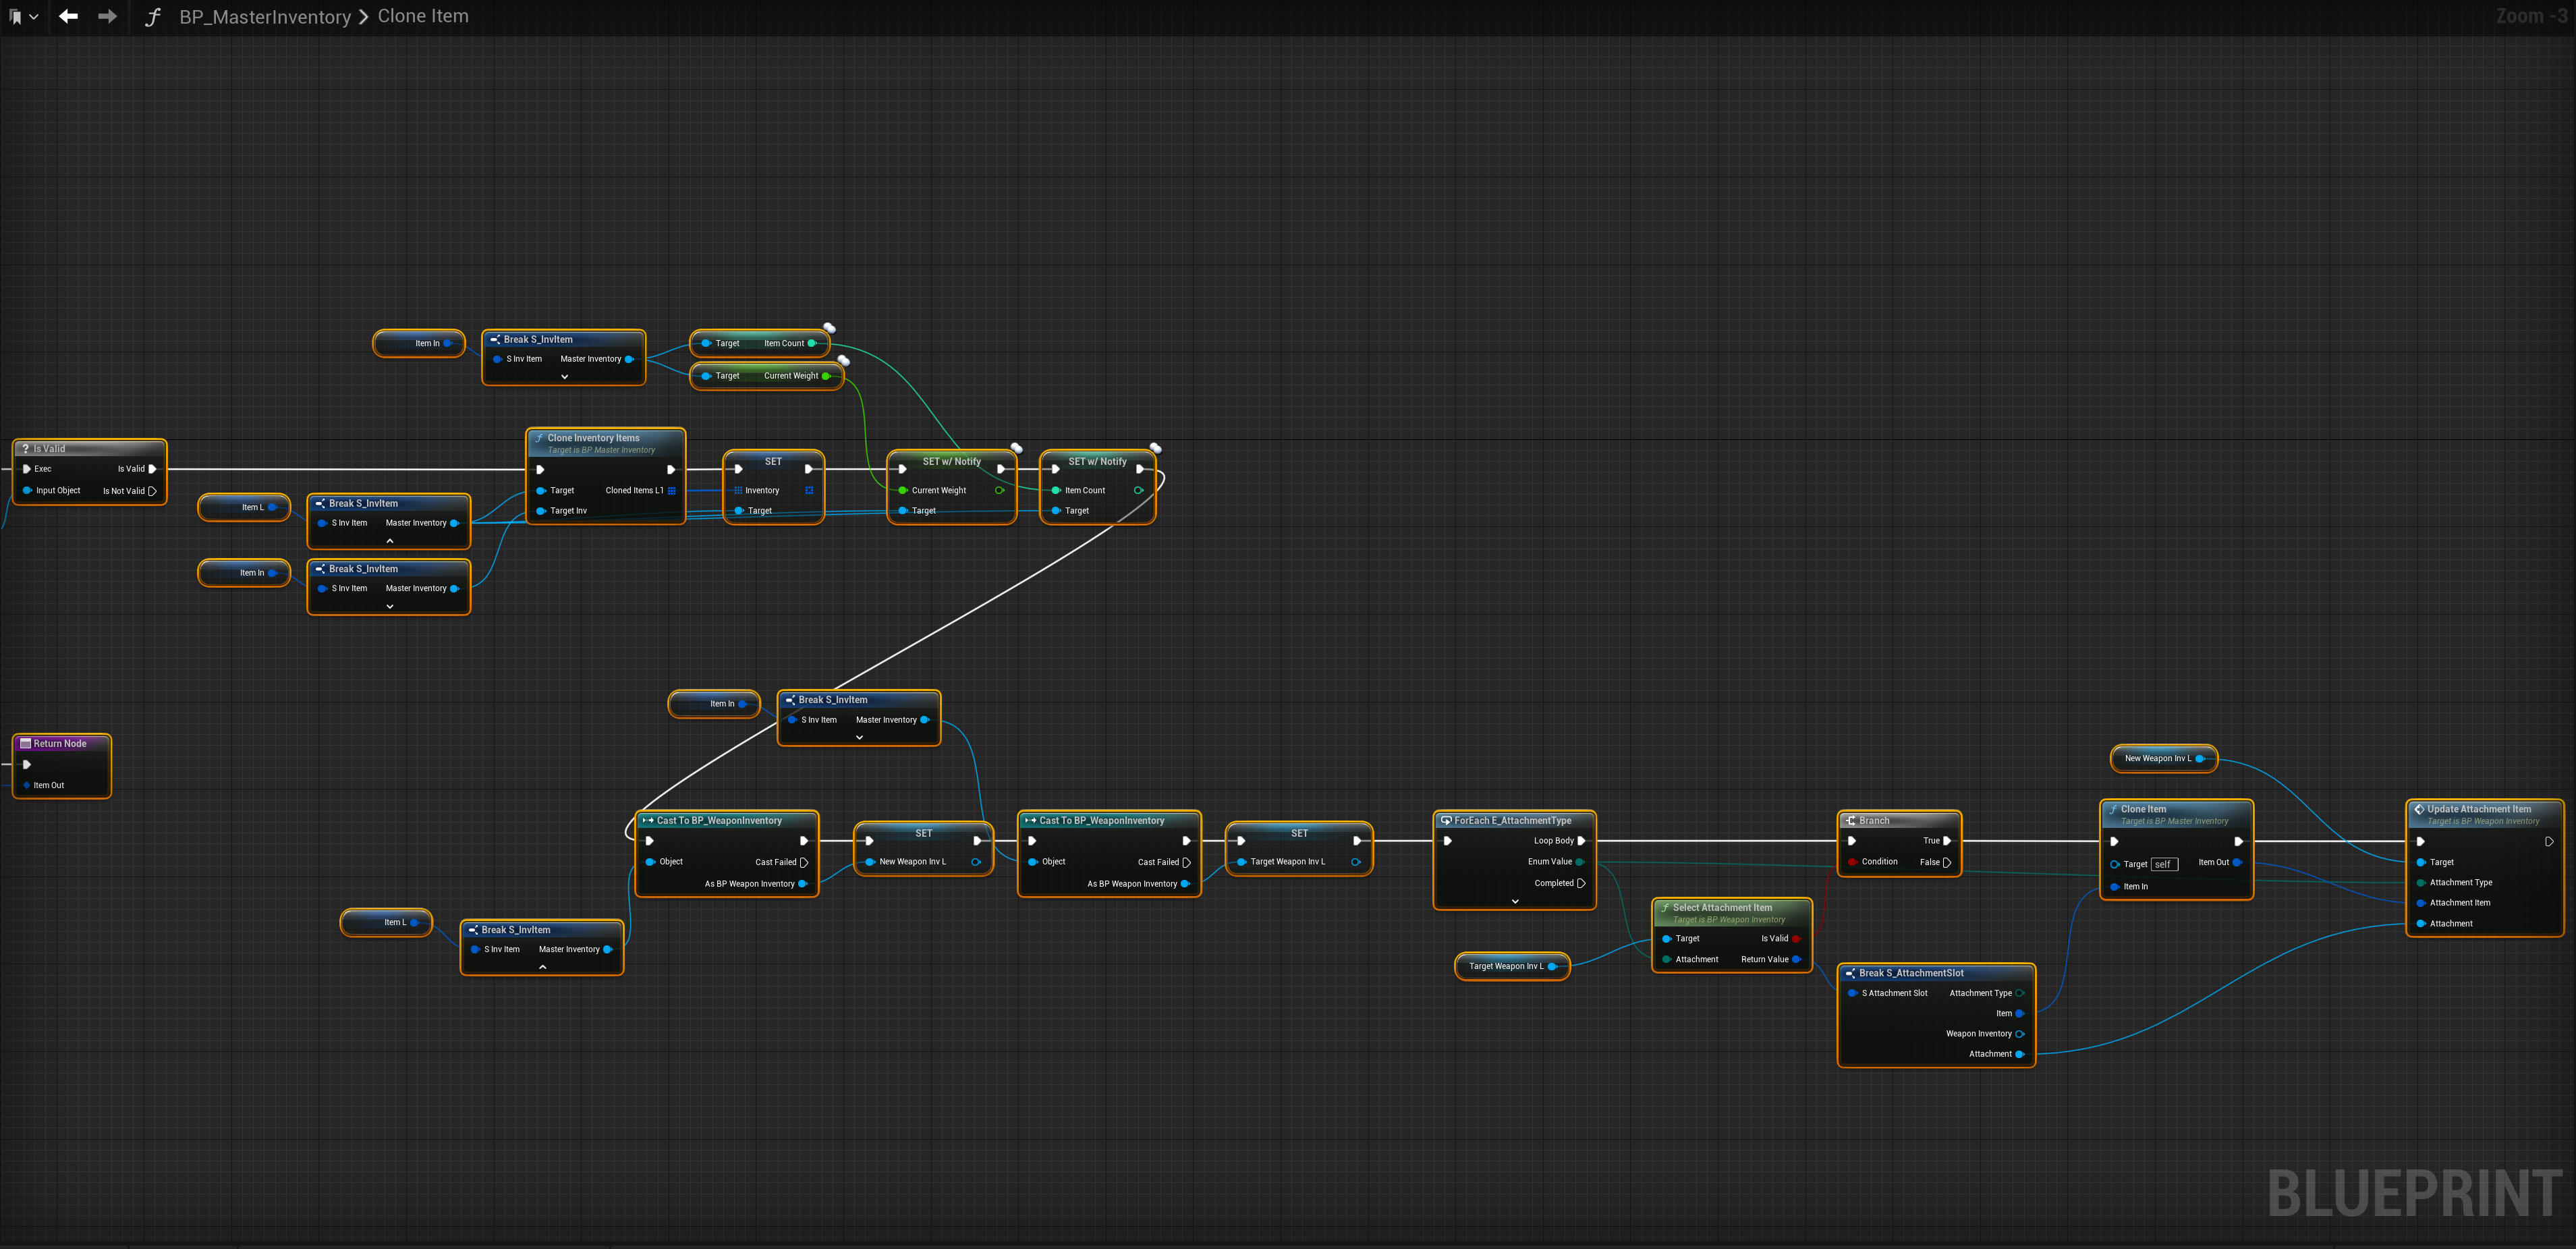
Now in the CloneItem function copy the images below. (For the set members node to add the input pins select the node and in the details panel you can tick on the inputs there)
Next in the CloneInventoryItems function copy the image below. (For the set members node to add the input pins select the node and in the details panel you can tick on the inputs there)

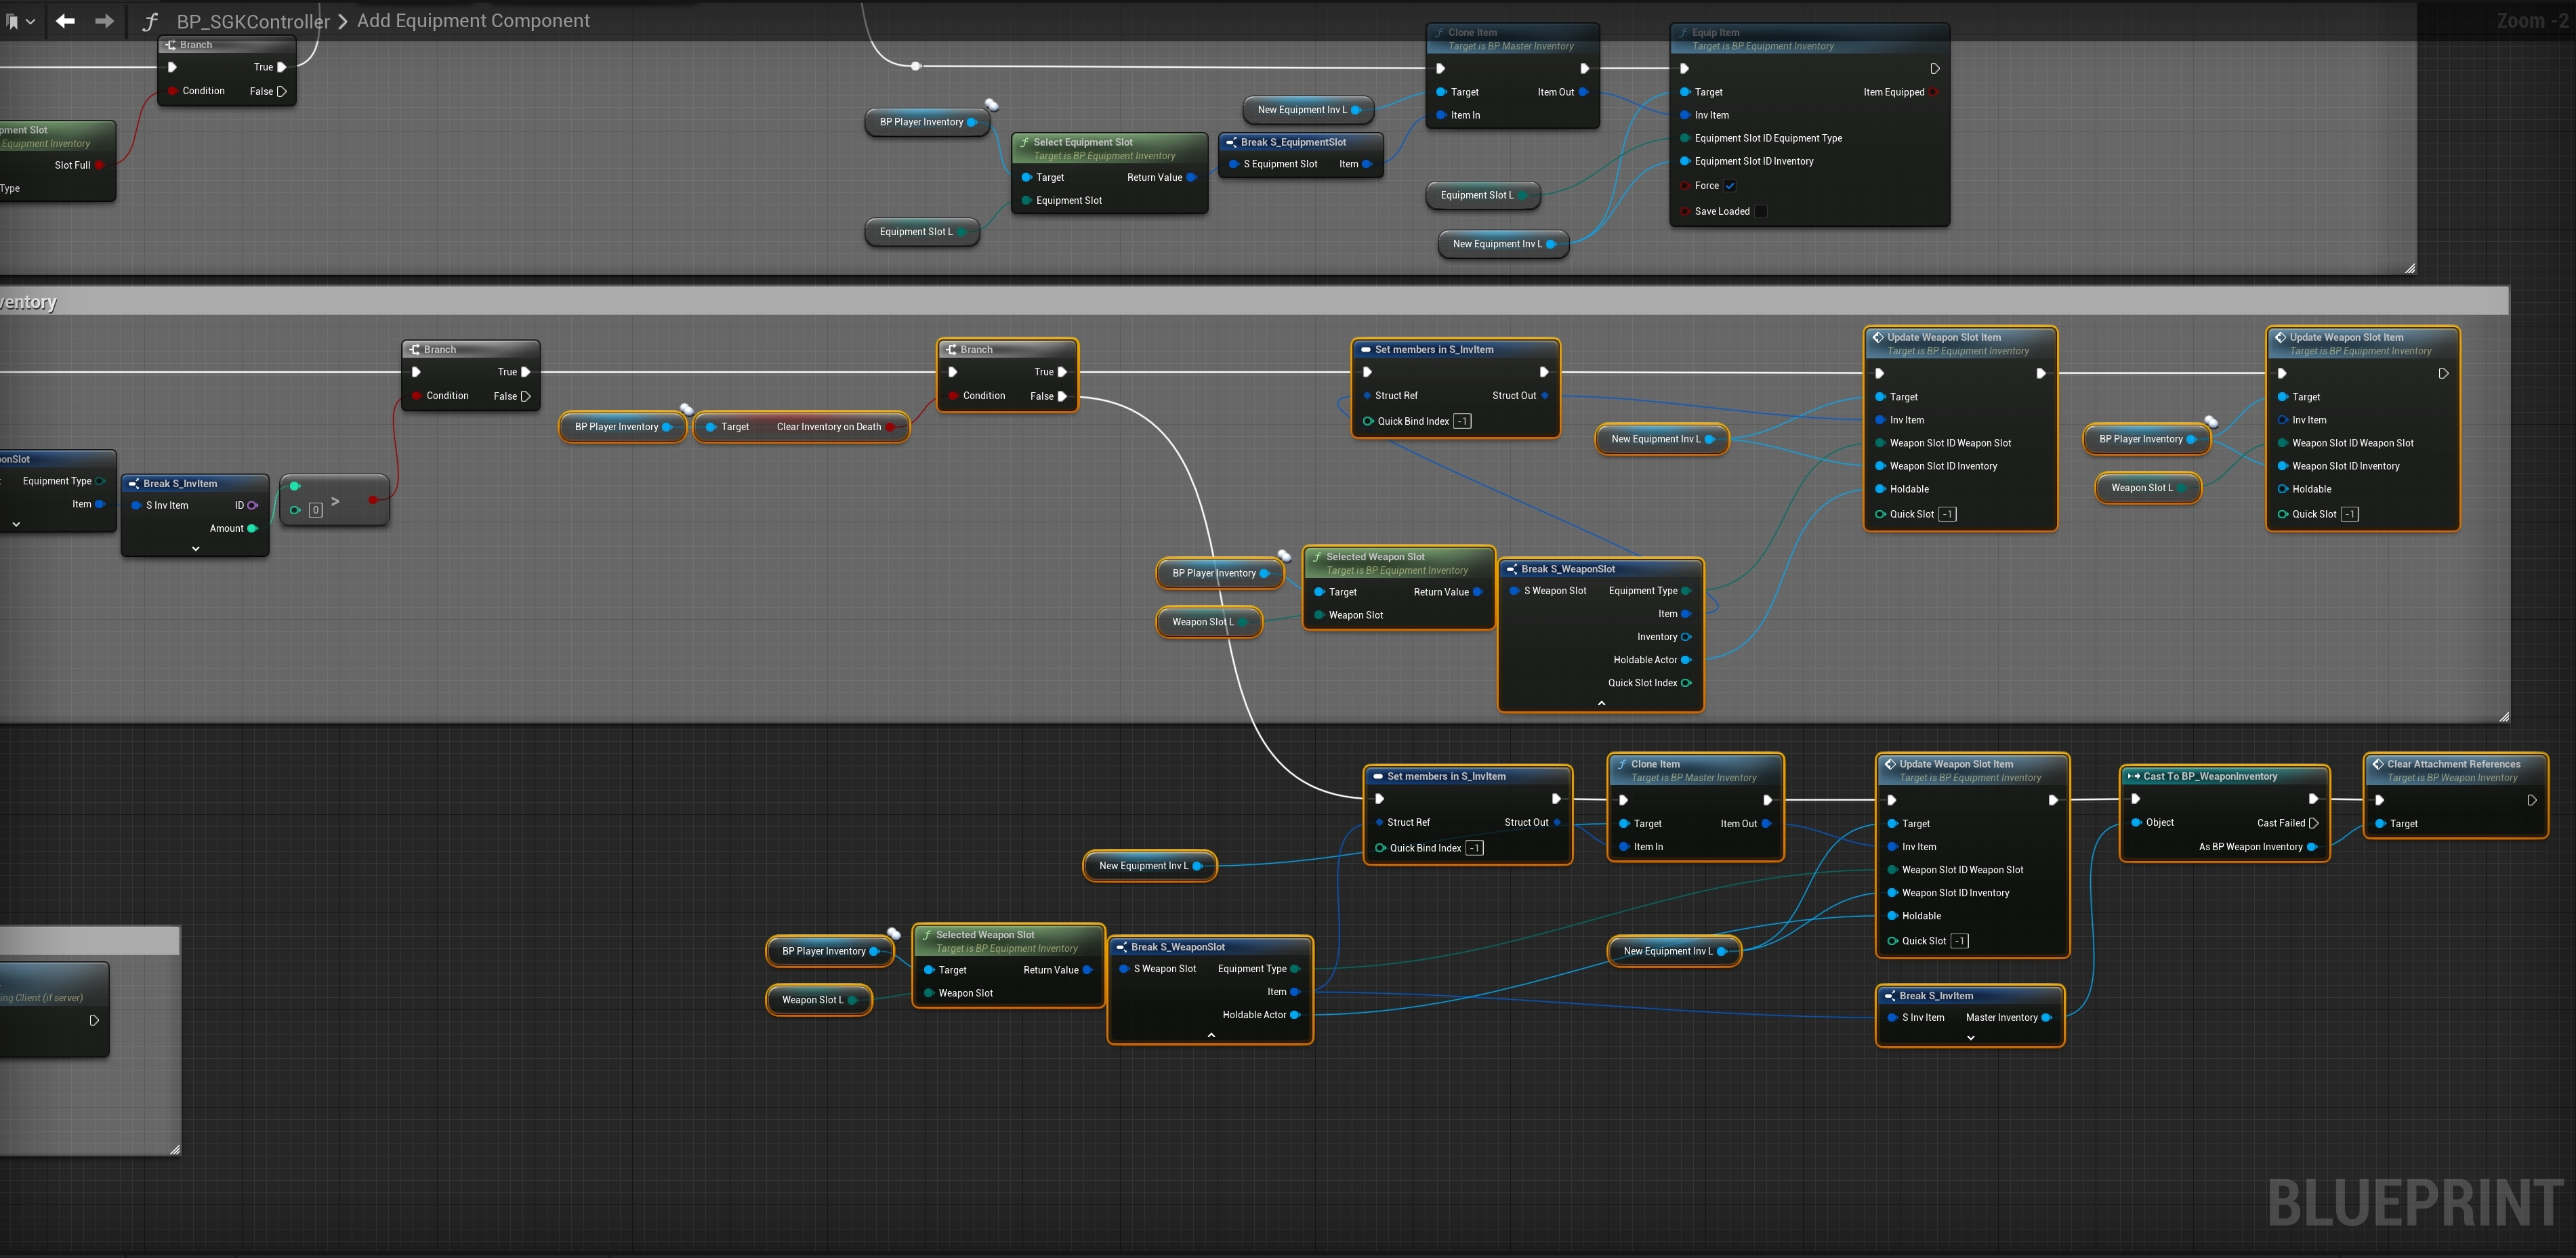
Next in the BP_SGKController go to the AddEquipmentComponent function and copy the image below.

Add the highlighted nodes shown in the images below, locations at the top of the images.

Copy the image below, (for the Update Weapon Slot Item node to get access to the Weapon Slot ID Weapon Slot and Weapon Slot ID Inventory right click the Weapon Slot ID pin on the Update Weapon Slot node and select Split pin)