This guide is for UE5 projects version 2.4 or newer
SGKv2 uses anim notifes to play sounds when the character plays a movement animation, to change the settings and effect all the notifies you can edit the settings used for character foot steps in the BP_FootStep blueprint Class Defaults.
If you want to only change the settings for a spacific animation you can go to that animation and select the notifies, then edit its settings in the Details panel.
Editing/Adding Footstep Notifies
In the animation sequances you can move or delete the footstep notifies by selecting the Foot Step notify in the Notifies timeline like the example below.
To add new notifies you can right click the Notifies timeline and mouse over Add Notify then search for BP_FootStep and select it like the video below, then you can drag it to move it in the timeline to control when its sound is played.
Sound

Using the Sounds option you can assgin sounds for physics material surface types, this allows you to have different sounds play depending on the materials surface type. You can click the + button to create new entrys, then set the surface type and the sound you want to it to play.
If Attach Sound is enabled the sound player component will attach to the character.
Volume multiplier allows you increase or decease the volume of the sounds played.
If an Override Sound is set then this sound will always be played, this is used for animation like the jump land.
Traces
The trace settings controls the channel and length of the trace used to detect the surface that the character is walking on.

The bone settings are used to detemine the name of the bones used for the traces to detect the surface.

Particle Effects
Using the Particle Effects option you can assgin particle effects for physics material surface types, this allows you to have different effects play depending on the materials surface type. You can click the + button to create new entrys, then set the surface type and the effect you want to it to play.
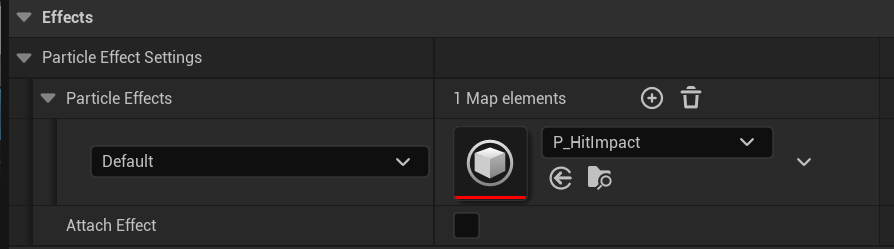
If enabled Attach Effect causes the particle effect to be attached to the character when it plays
Decals
Using the Decals option you can assgin decals for physics material surface types, this allows you to have different decals spawn depending on the materials surface type. You can click the + button to create new entrys, then set the surface type and the decal you want to it to spawn.
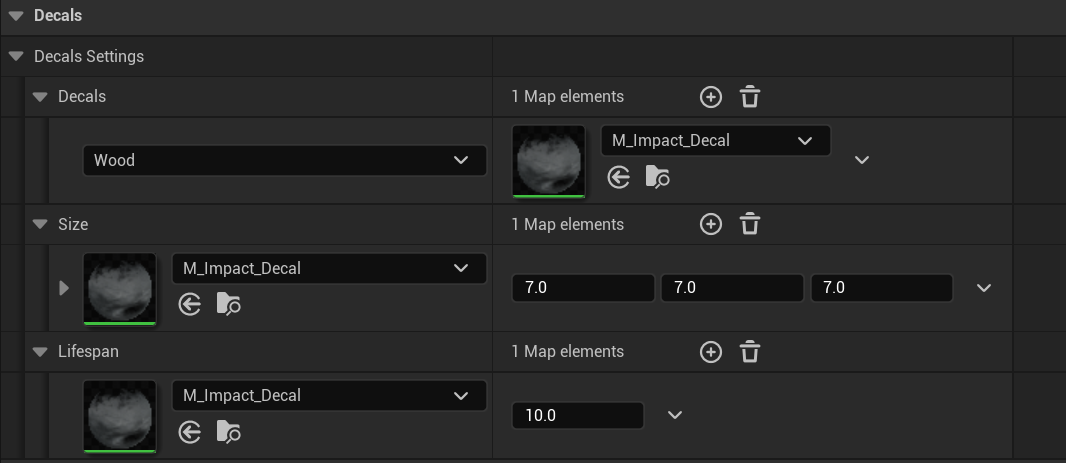
Here you can also set the material’s size and lifespan, click the + button on the Size or Lifespan settings to add a new entry, then set the size or lifespan you want for that material.
Lifespan is the number of seconds the decal will exist before being destroyed. The Size controls how large the decal will be in each axis.
If a material doesnt have an entry in either of the Size or Lifespan settings it will use the default values which are 5 seconds for lifespan and 4,4,4 for Size these are set by the Default Values of the local variables in the SpawnDecal function in the BP_FootStep blueprint.
