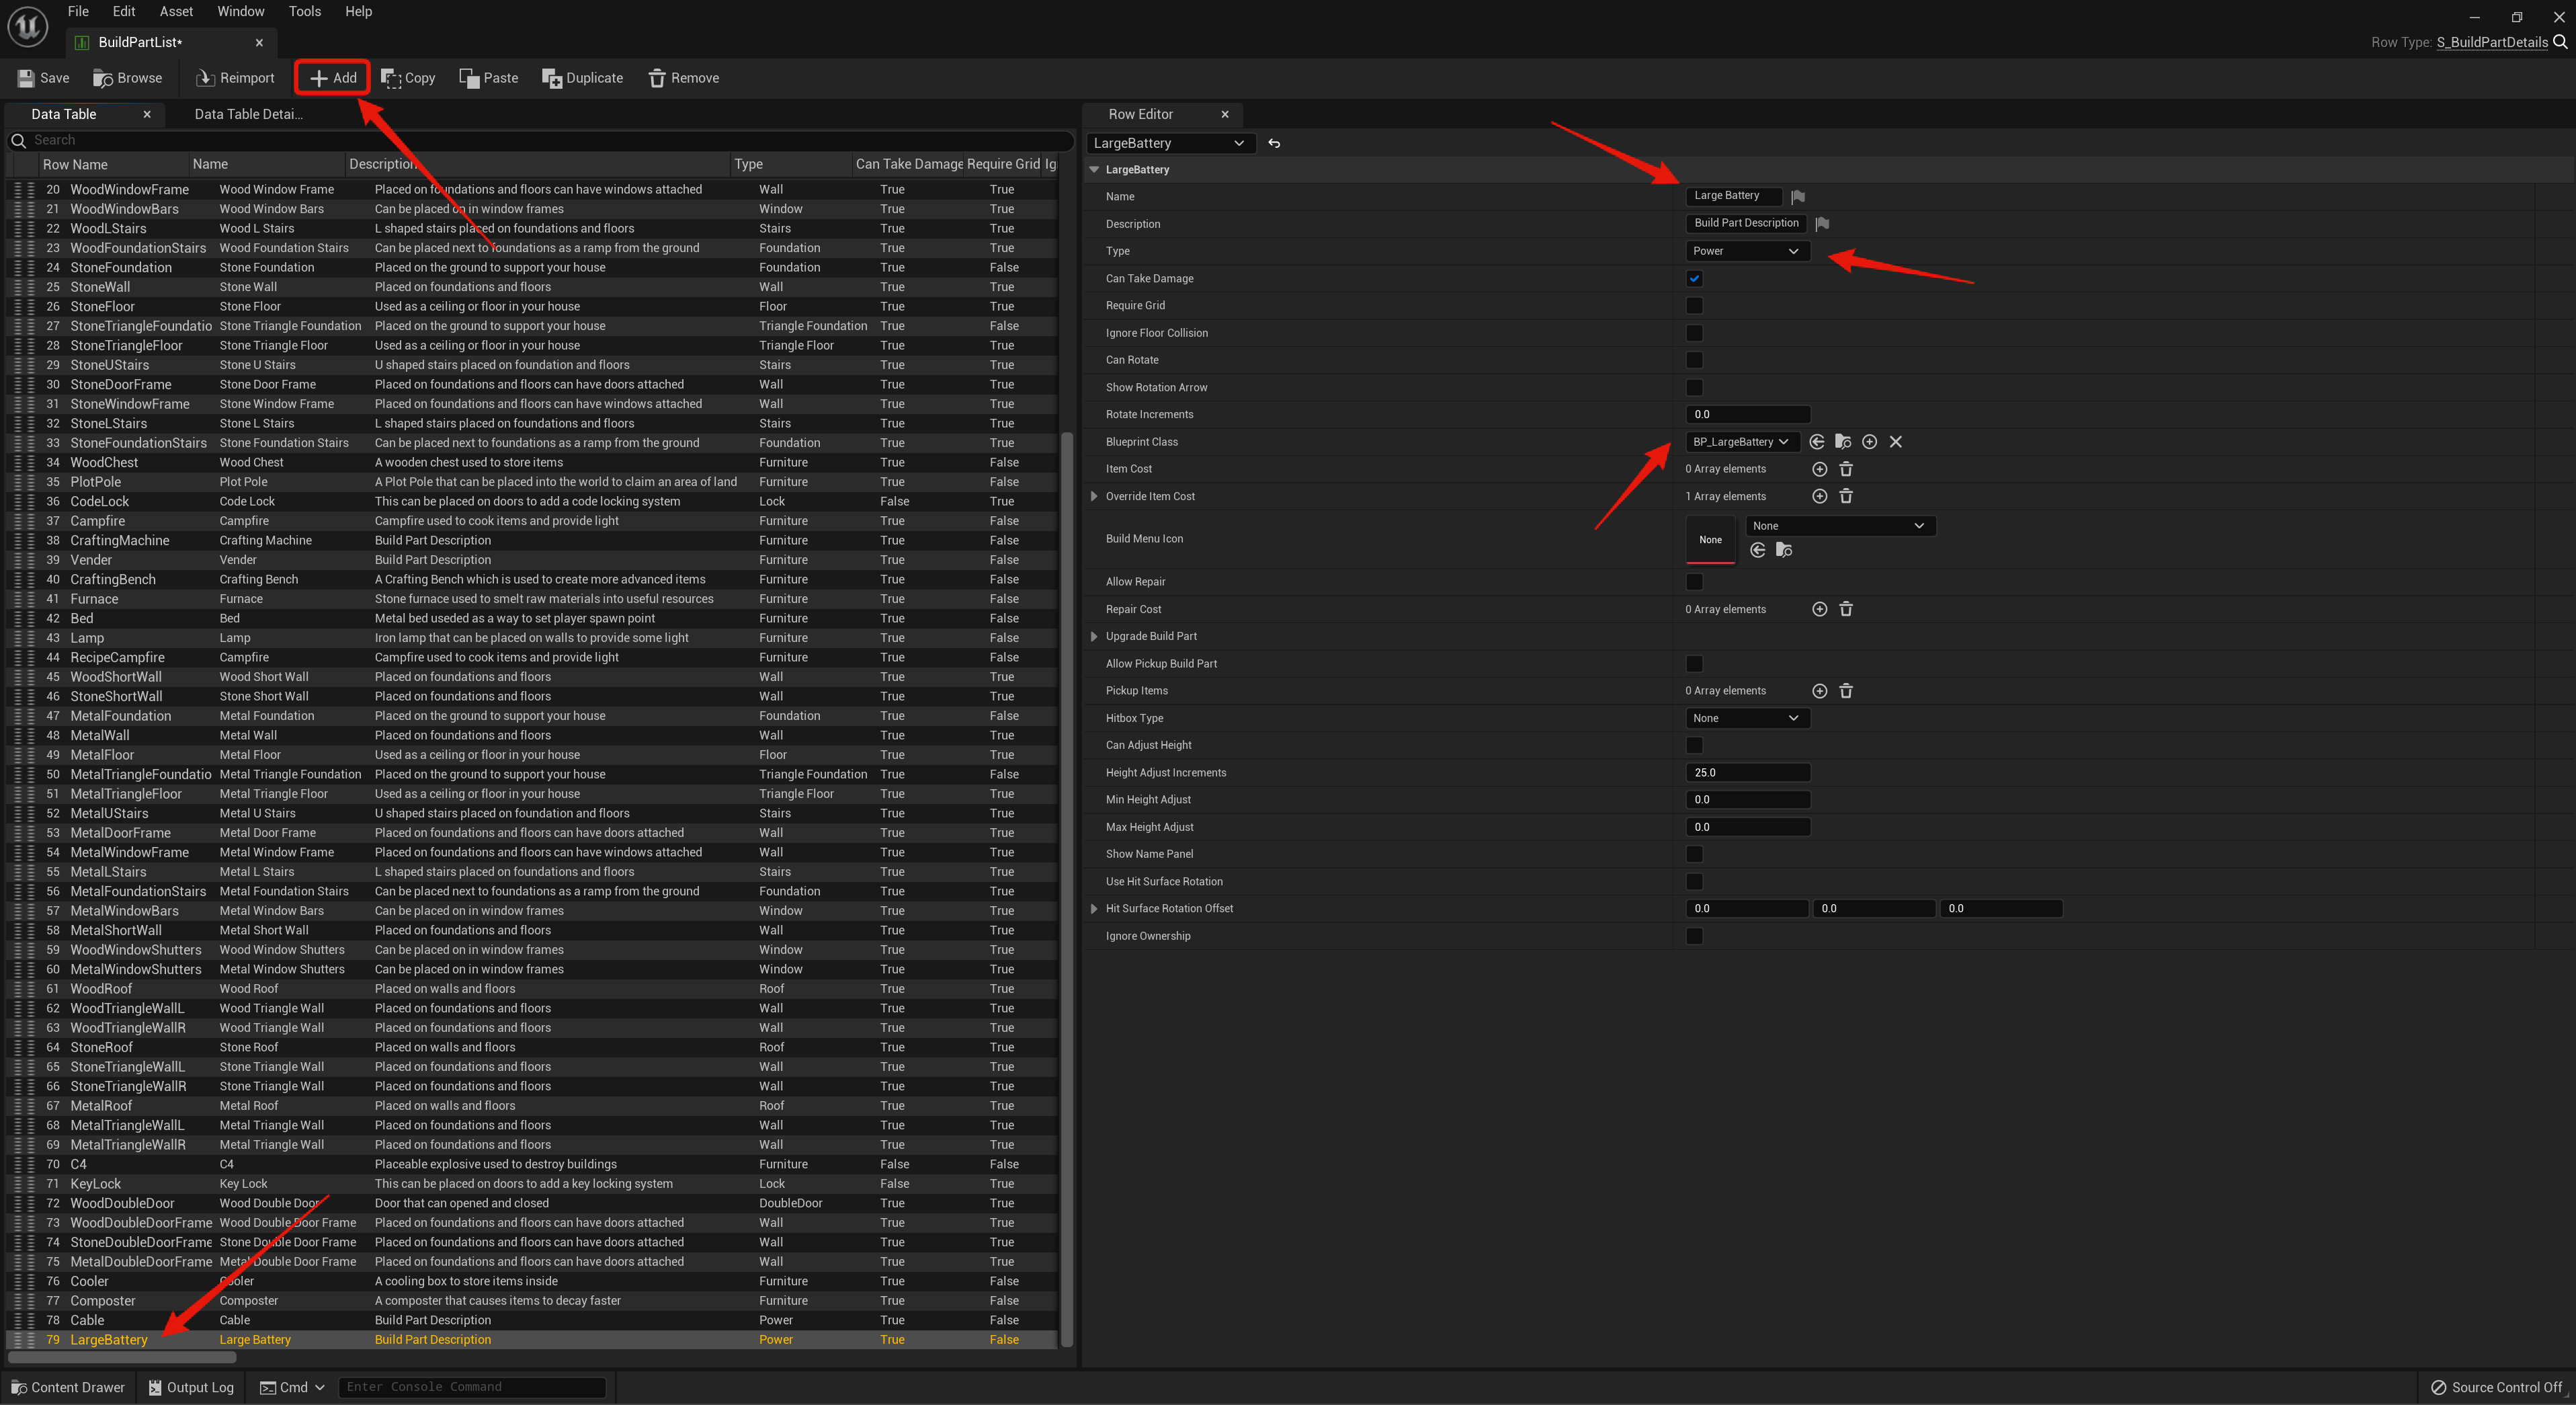
Click the Add button to add a new row to the BuildPartList, then double click the row name in the bottom left corner and set the device name. Then go though and set the build part details, make sure you set the Type to Power and make sure you set the Blueprint Class to the devices blueprint.
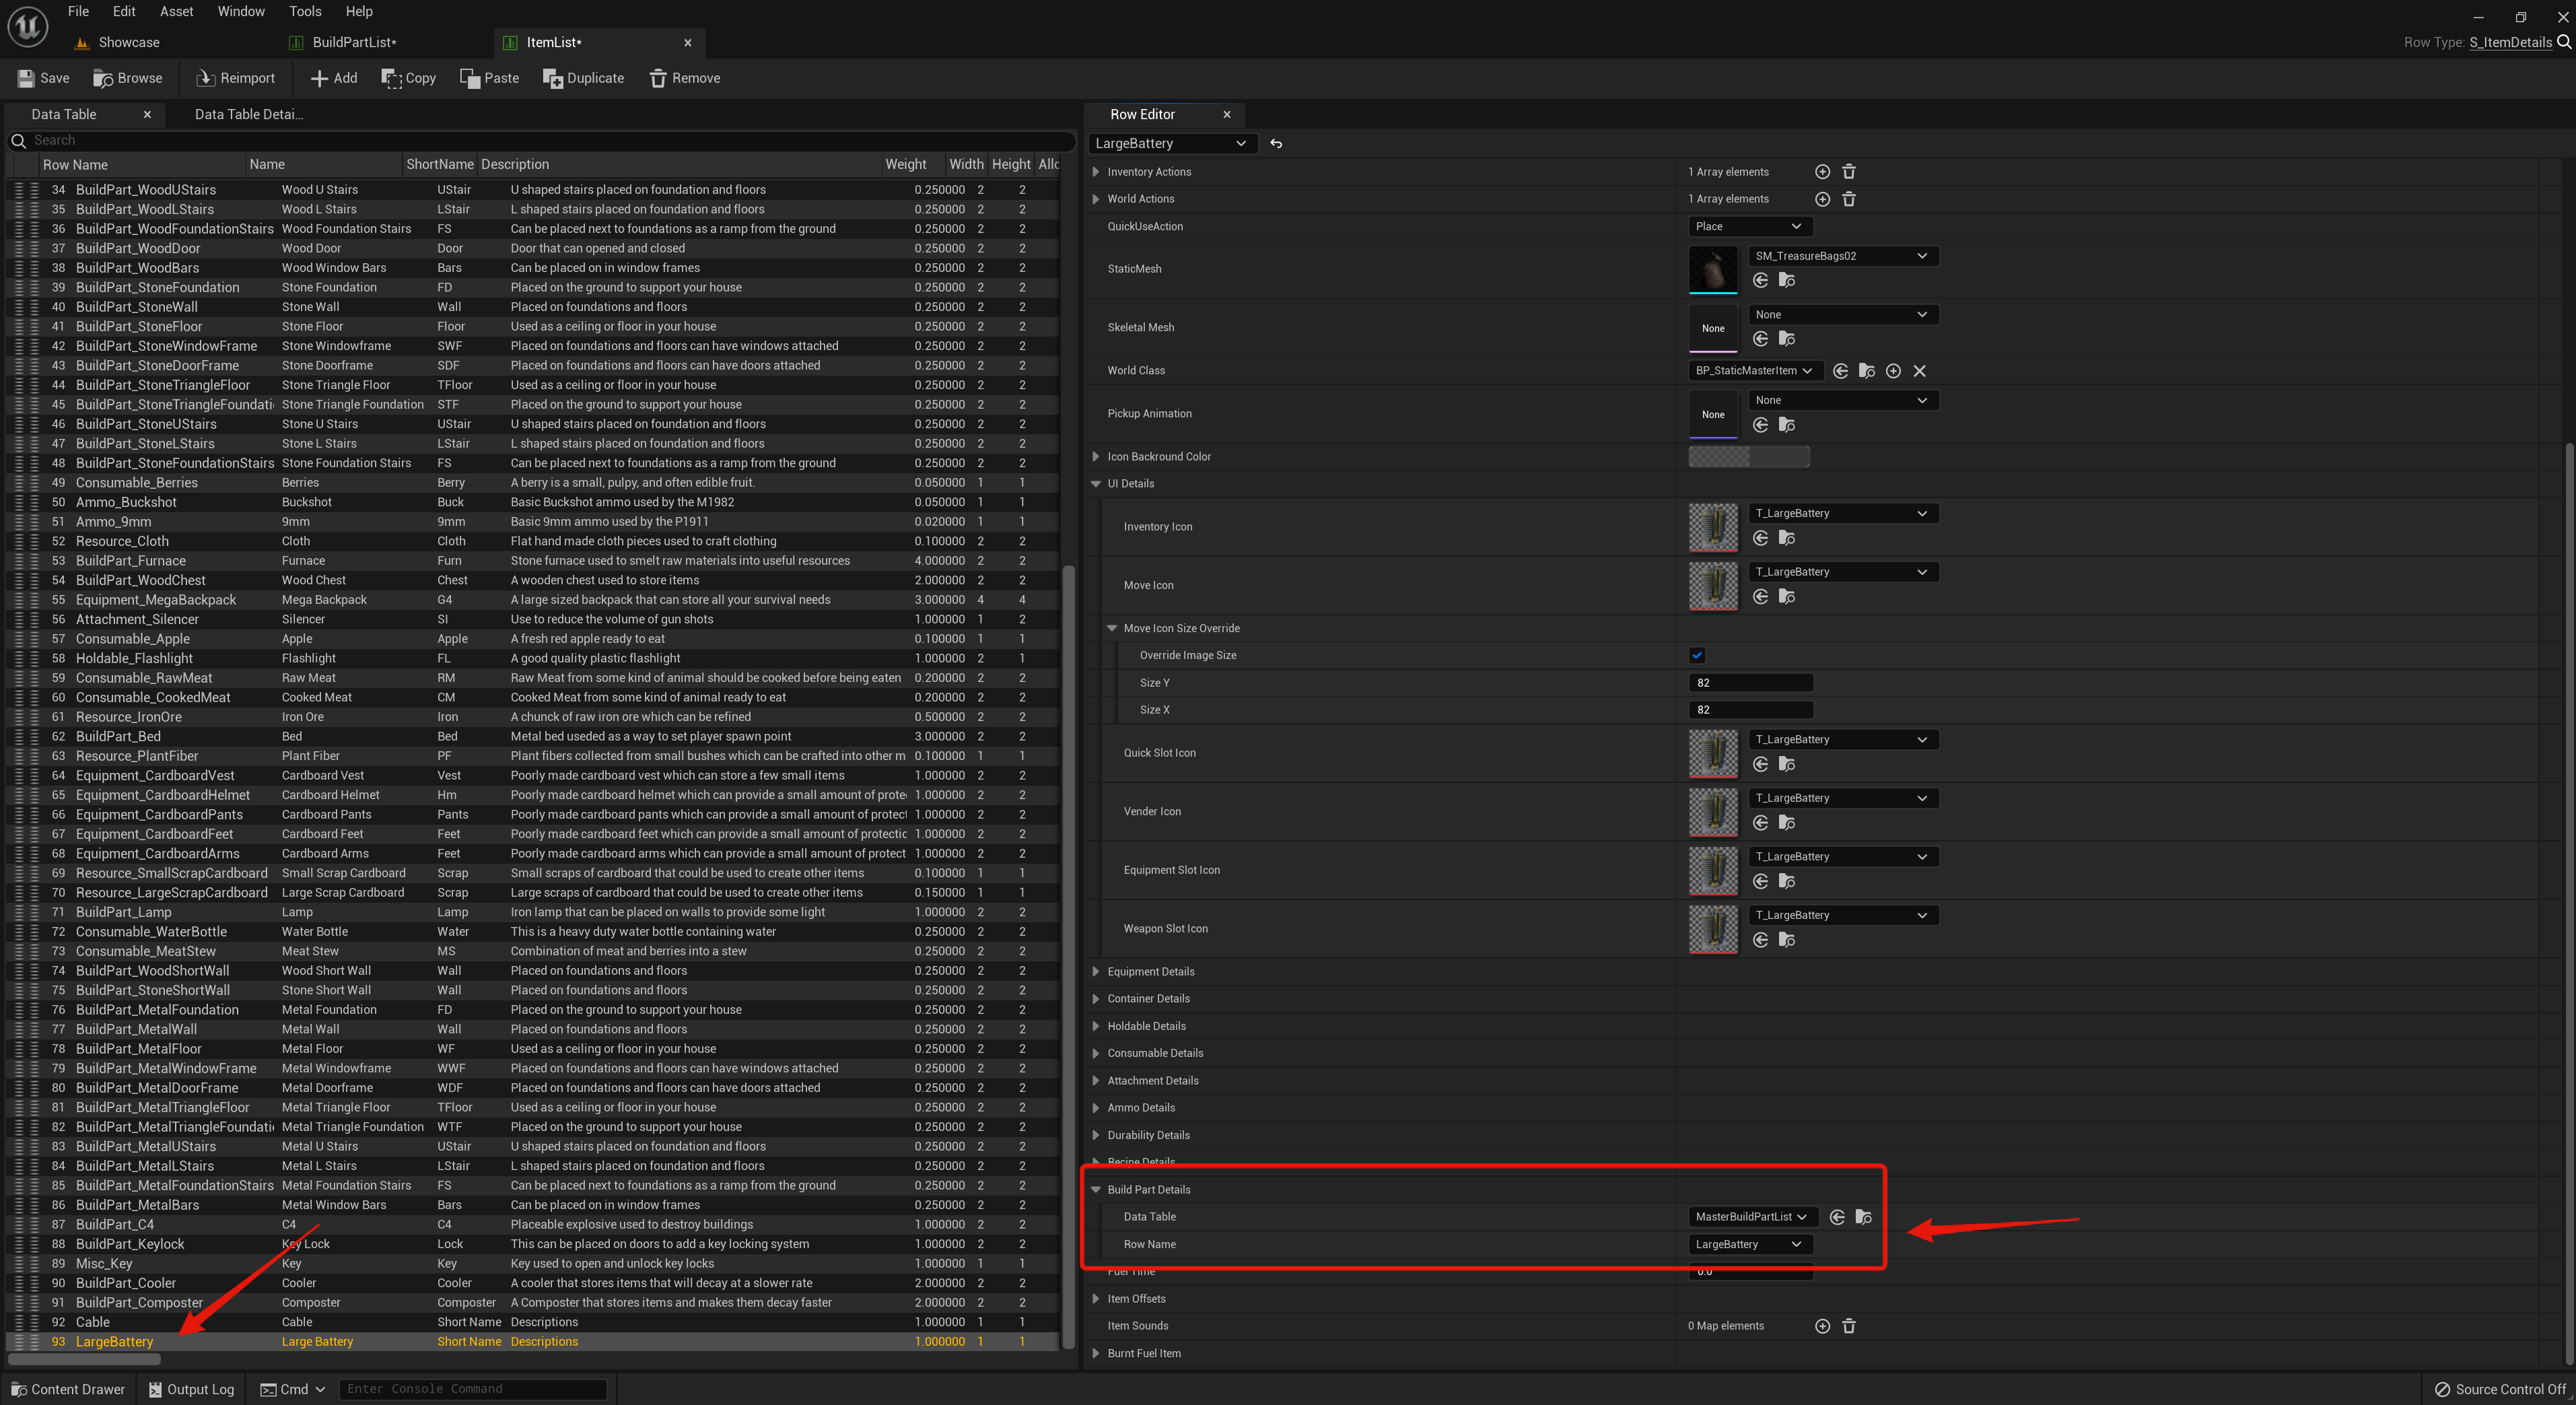
Next go to the ItemList and create a new row by selecting the Add button, then double click the row name in the bottom left corner and rename the row to the device name.
Then go though and set the item details, make sure you add the Place action to the InventoryActions setting. You can set the other item details like UI Details, description, static mesh etc.
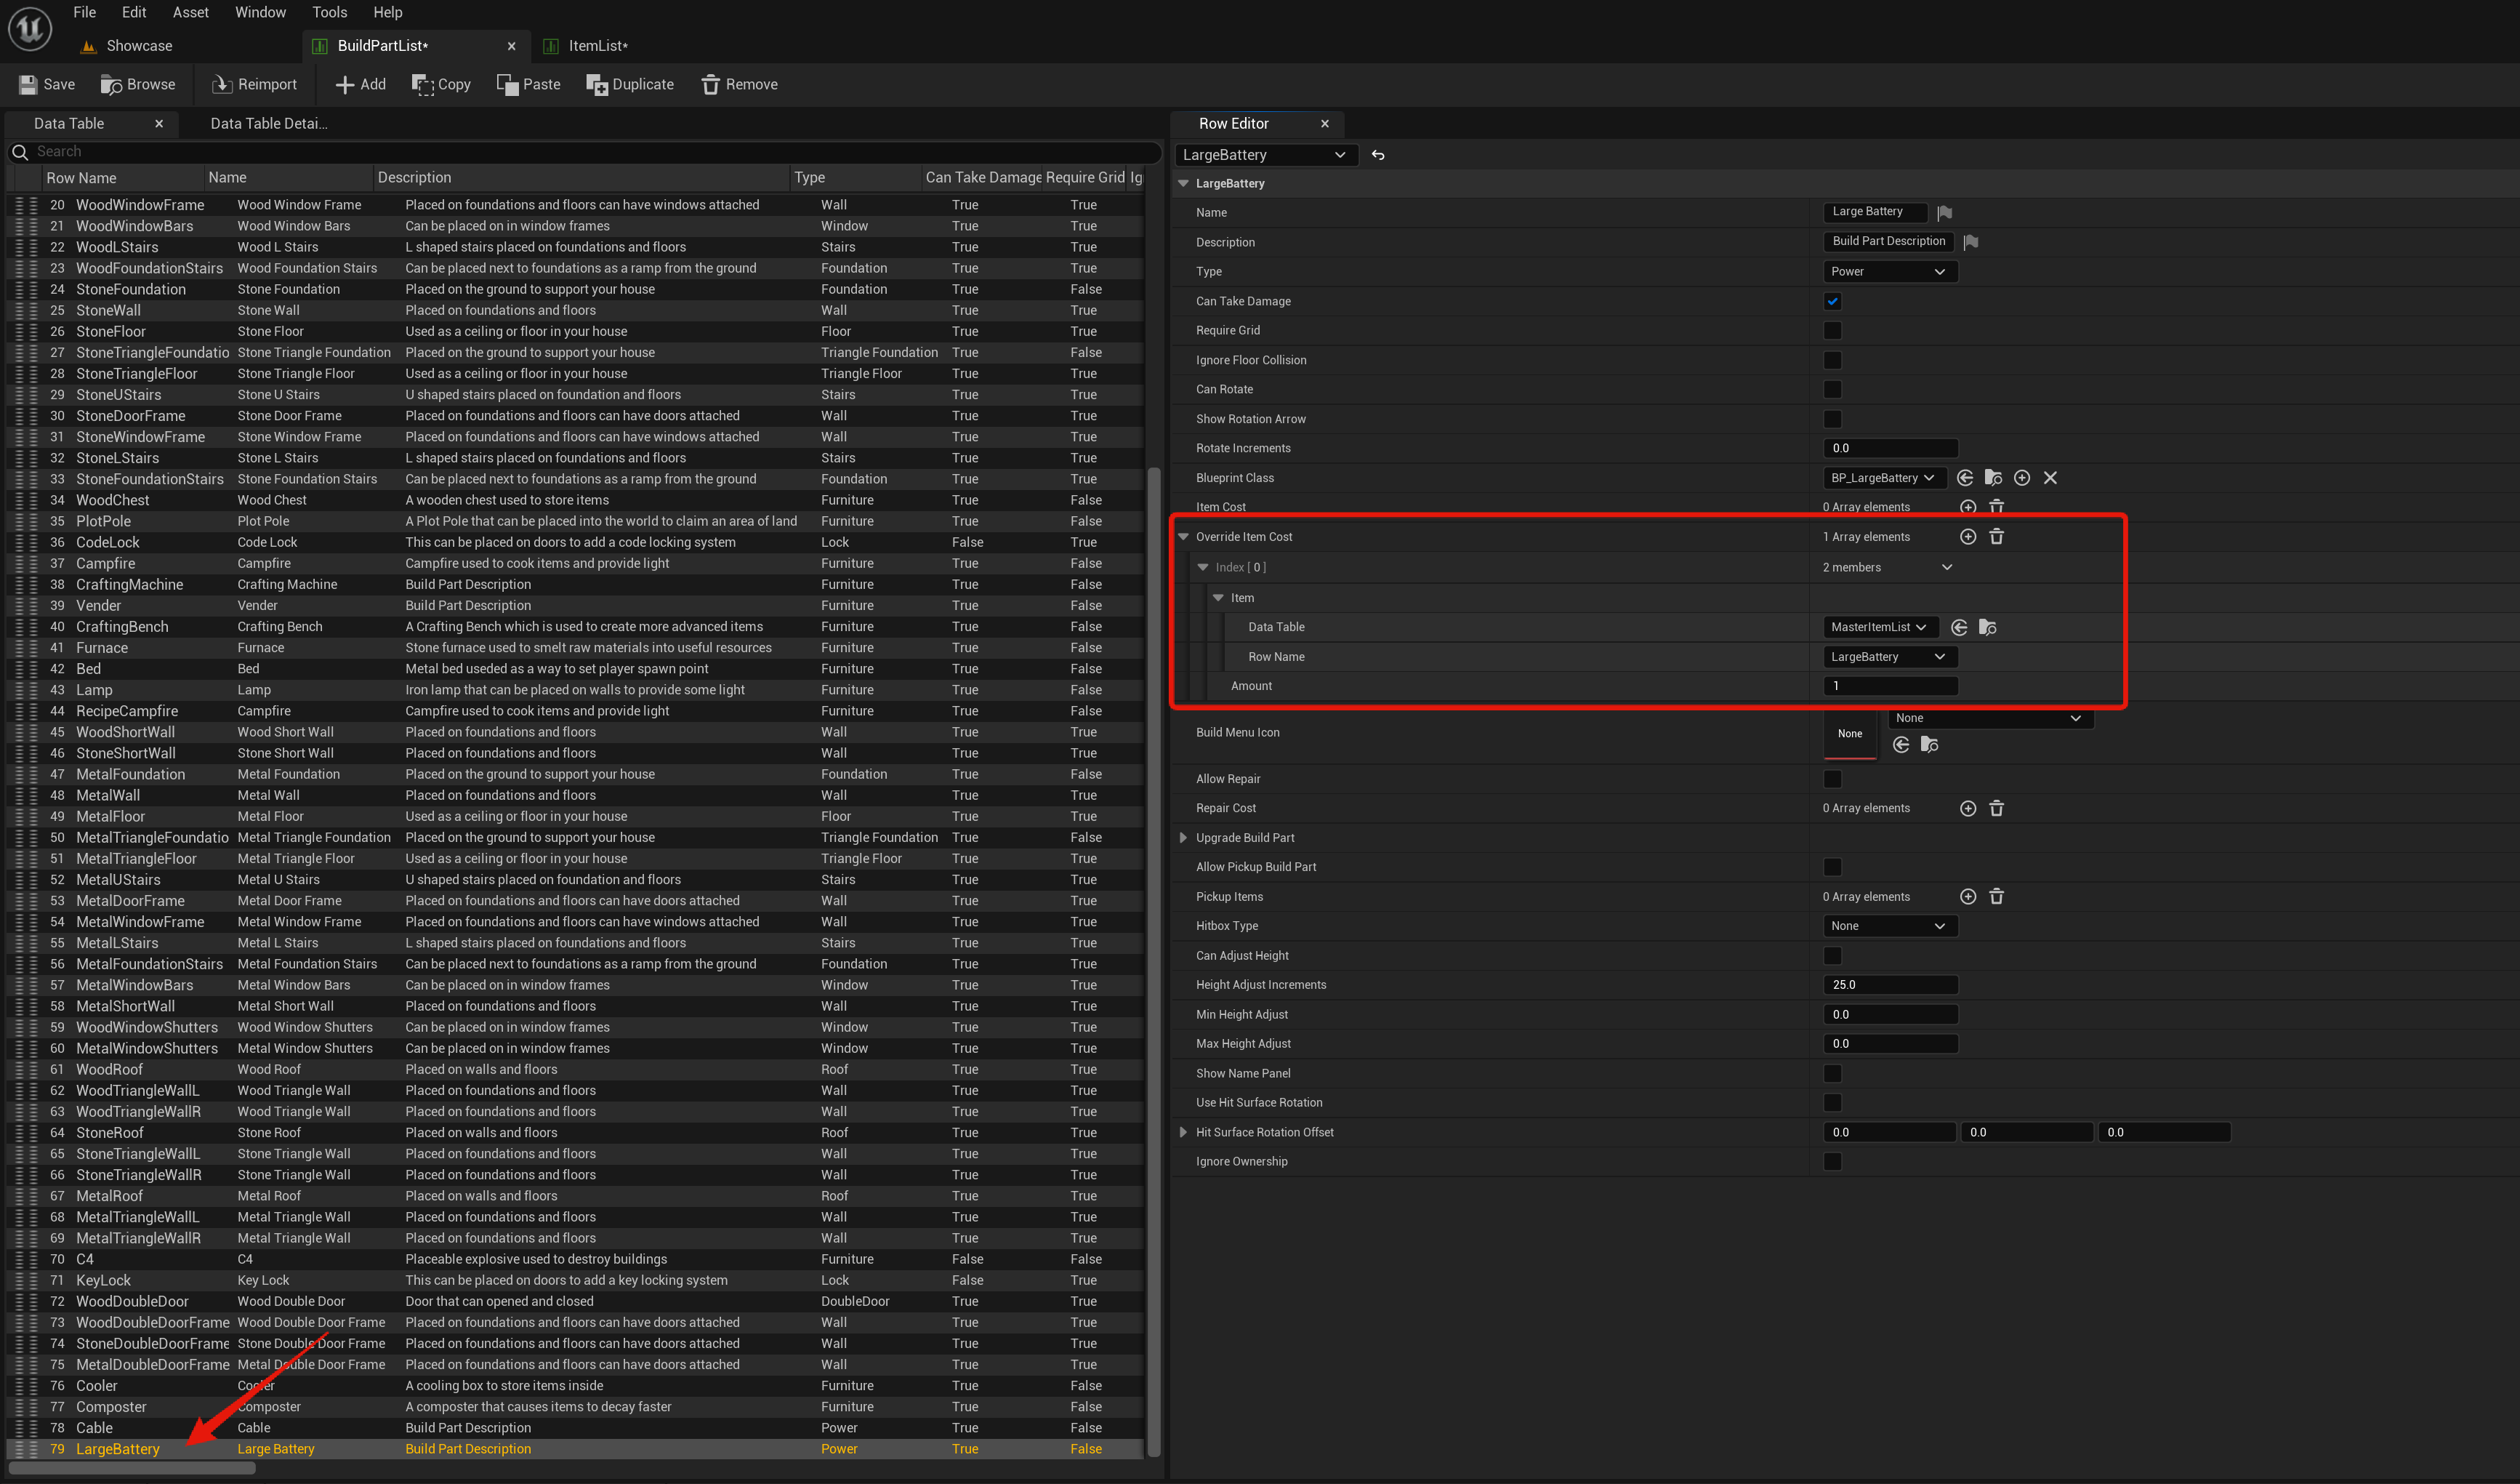
Next return to the Build Part List and select the devices row in the data table, then set its Override Item Cost, this will be the item cost of placing the device.
Add an new entry to the setting and set the Data Table to the MasterItemList then set the Row Name to the entry you just added to the ItemList like the image below. You can also set the Amount of that item required to place the device.
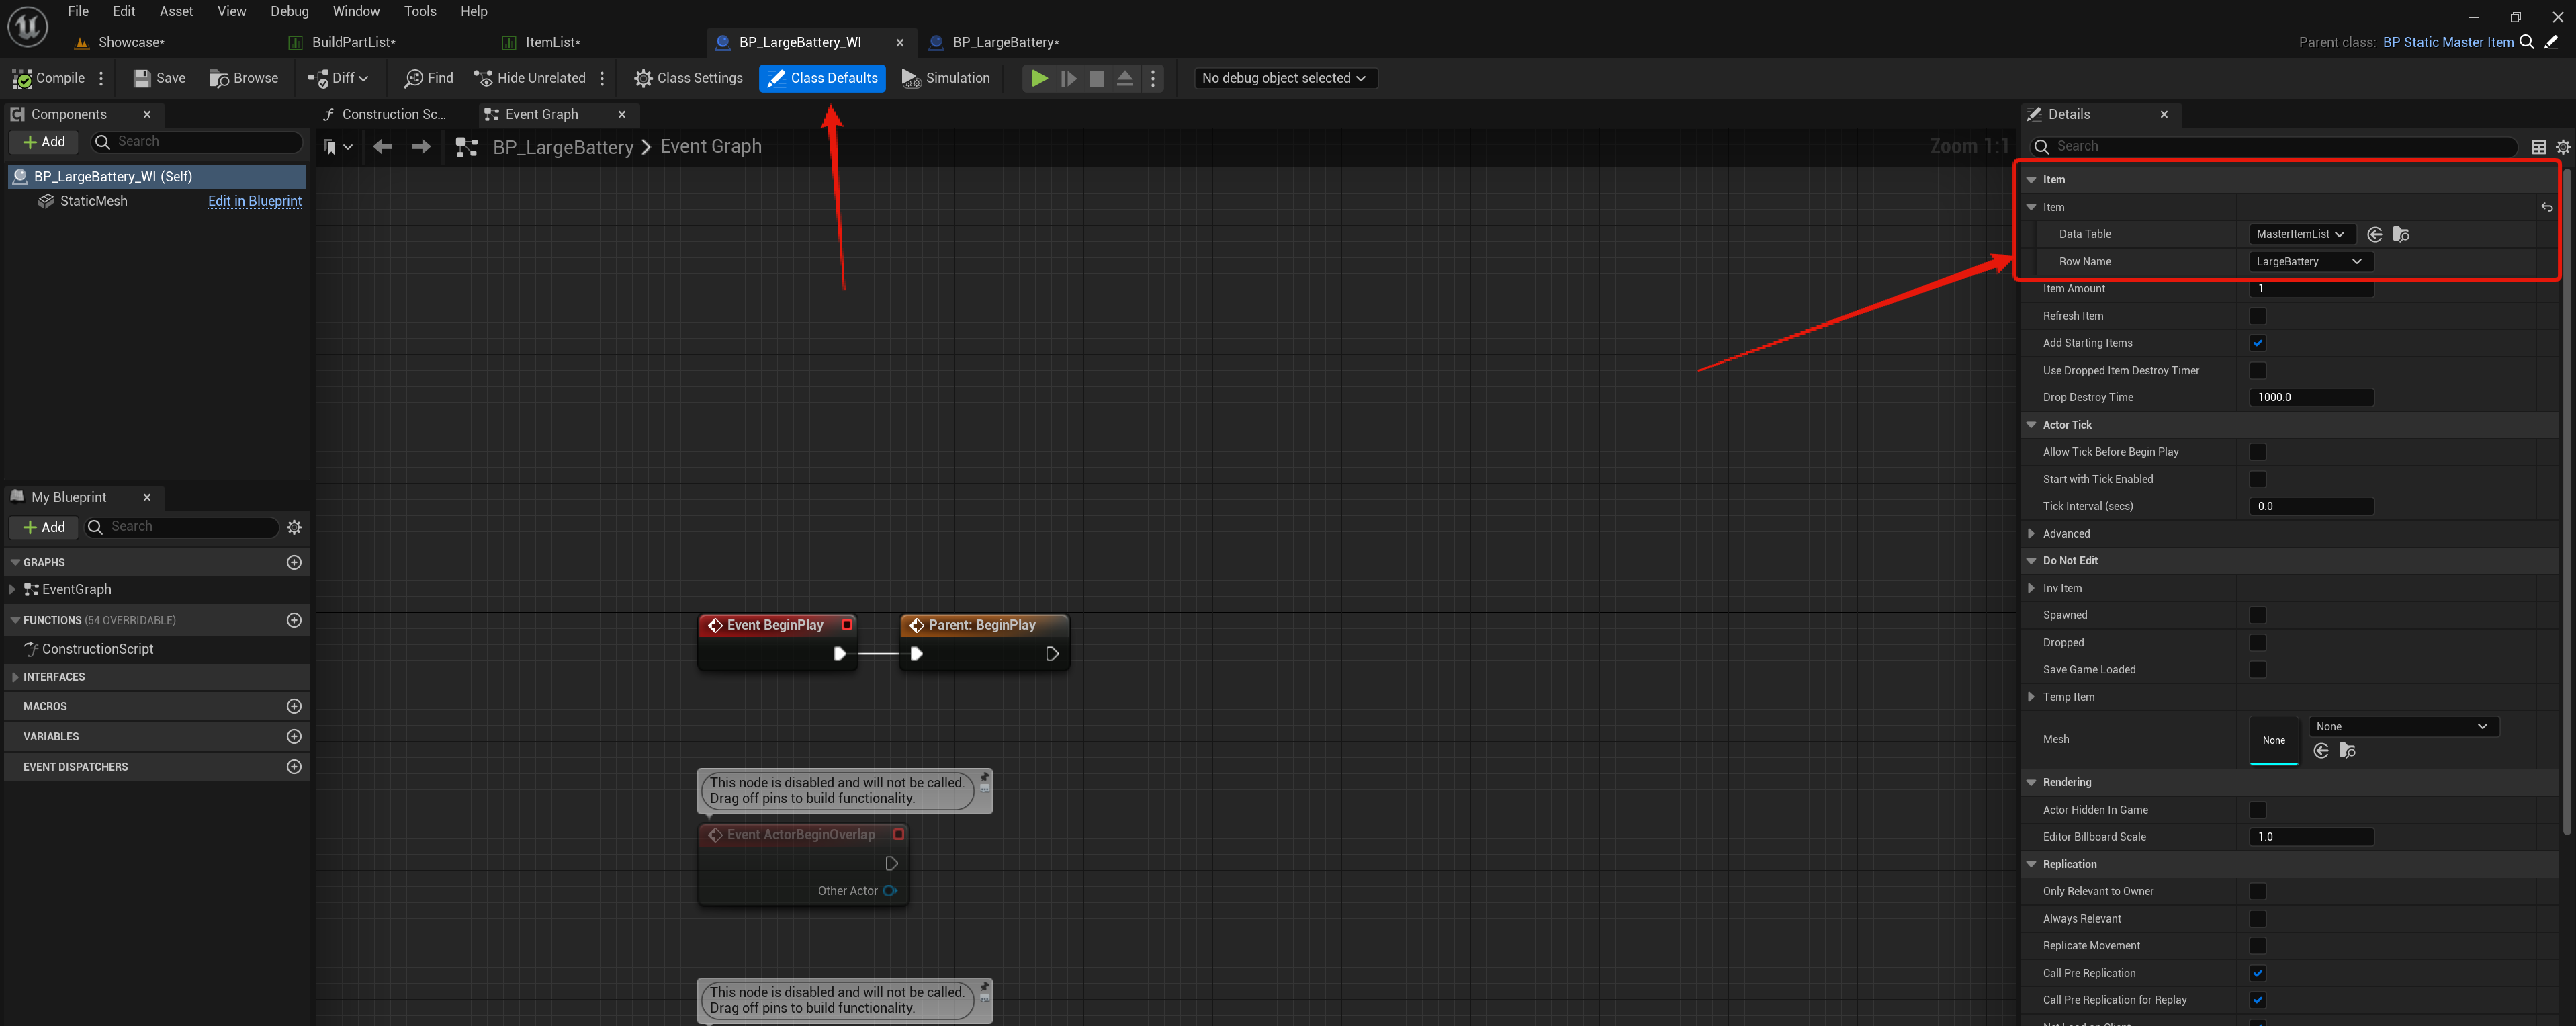
Next in the content browser go to the SurvivalGameKitV2/Blueprints/Items/WorldItems folder, then duplicate BP_9mm_WI blueprint and name it your device name, so for example BP_LargeBattery_WI
Then open that blueprint and go to the Class Defaults and find the Item setting, then change the Row Name to your devices row name in the ItemList like the image below.
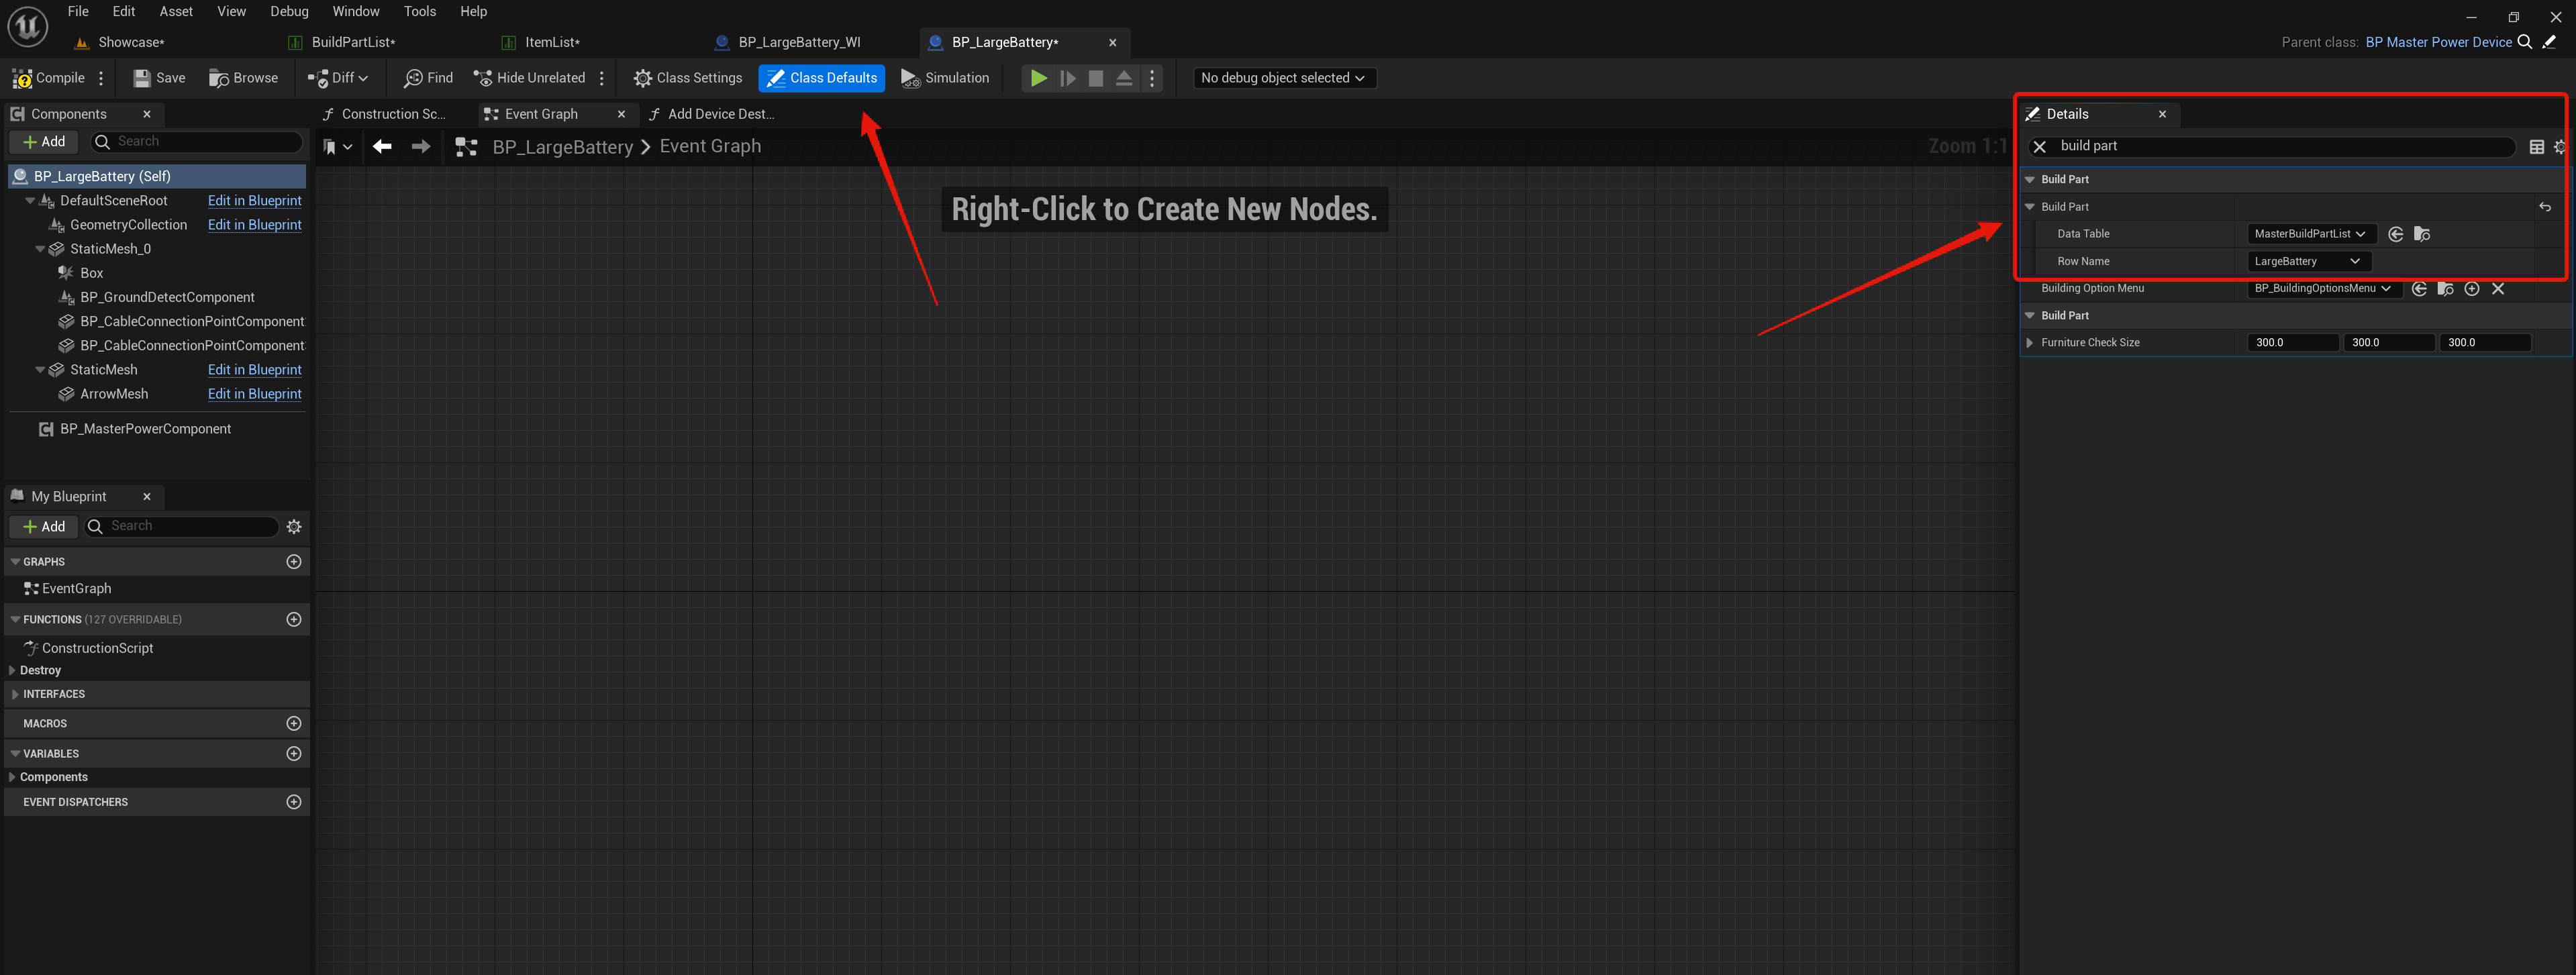
Lastly open the device blueprint in the PlayerElectricitySystem/Blueprints/Devices so for example the BP_LargeBattery then in its Class Defaults search for Build Part then set its Data Table to MasterBuildPartList and set its Row Name to the devices row name from the BuildPartList like the image below.
You can now drag the new device world item into the level from the content browser for the player to pickup in game.
