When migrating Smart AI to another project you may have to create some new collision channels. To do this go to Project Settings then to the Collision category.
Then click the New Object Channel button and set the Name to Projectile and set the Default Response to Block then click the Accept button. It should now look like the image below.

Next if you don’t have the Weapon and Cover trace channels in your project click the New Trace Channel button. If you do have these already then you do not need to do this.

Set the Name to Weapon and the Default Response to Block, then click Accept and click the New Trace Channel button again and set the Name to Cover and set the Default Response to Block and click Accept again. Once done you collision settings should look like the image below.

If you are using a custom player character you may now have to go to its blueprint then select its Mesh (Inherited) component and in the details panel find its collision settings and make sure that Projectile is set to Block and the Weapon trace channel also needs to be set to Block. Then select the CapsuleComponent (Inherited) and again find the collision settings and make sure that the Weapon and Projectile options are set to Ignore.
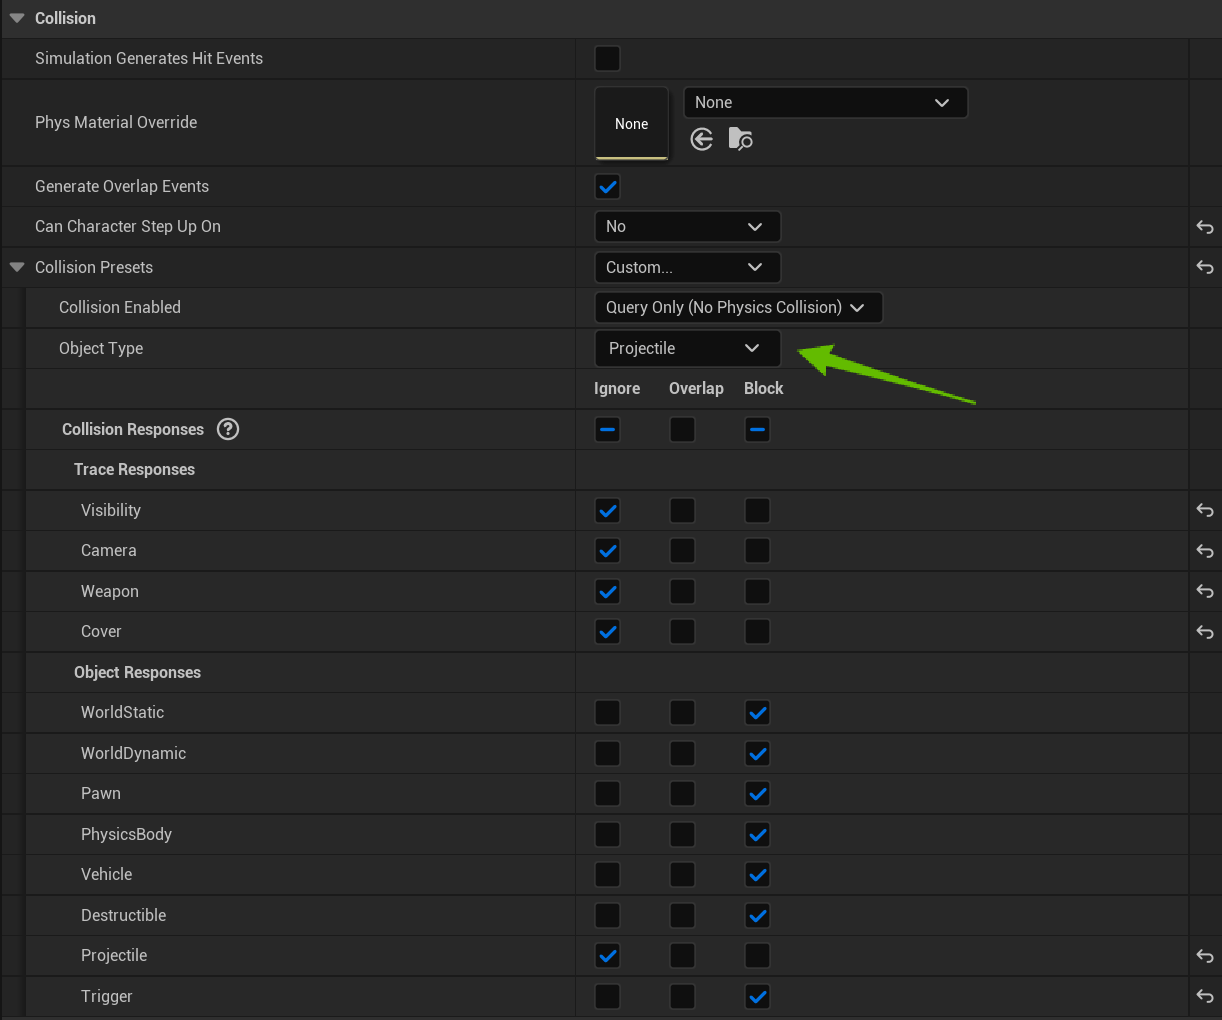
Next go to the BP_MasterProjectile blueprint found in the Projectiles folder. The select the Projectile Collision component in the components panel. Then in the details panel find the collision setting and set the Object Type to Projectile like the image below shows.
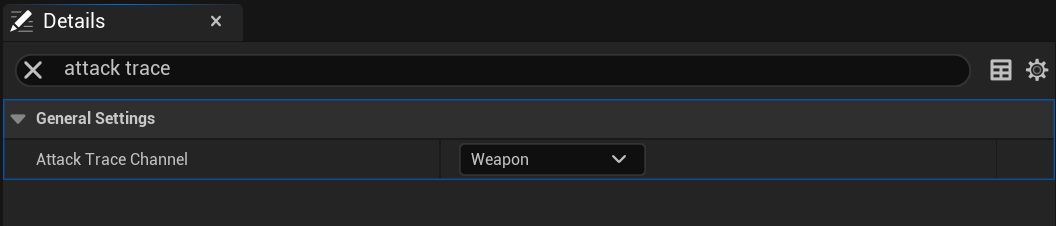
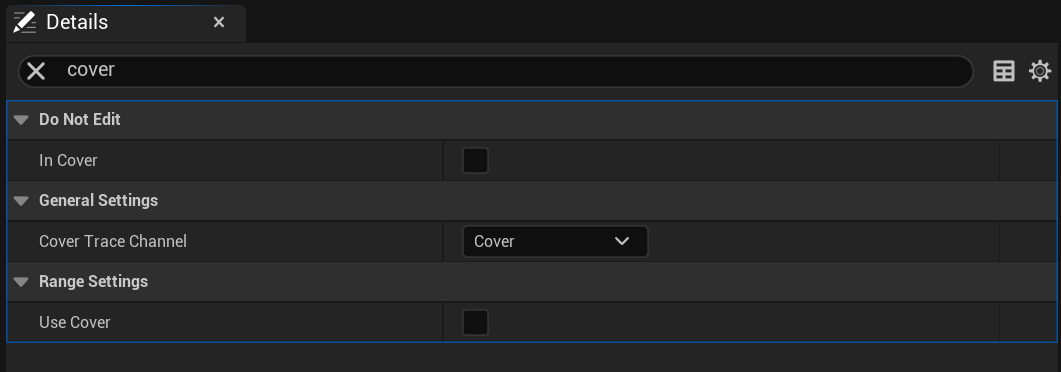
Then go to the BP_SmartAIComponent and select Class Defaults and search for the settings shown in the image below.
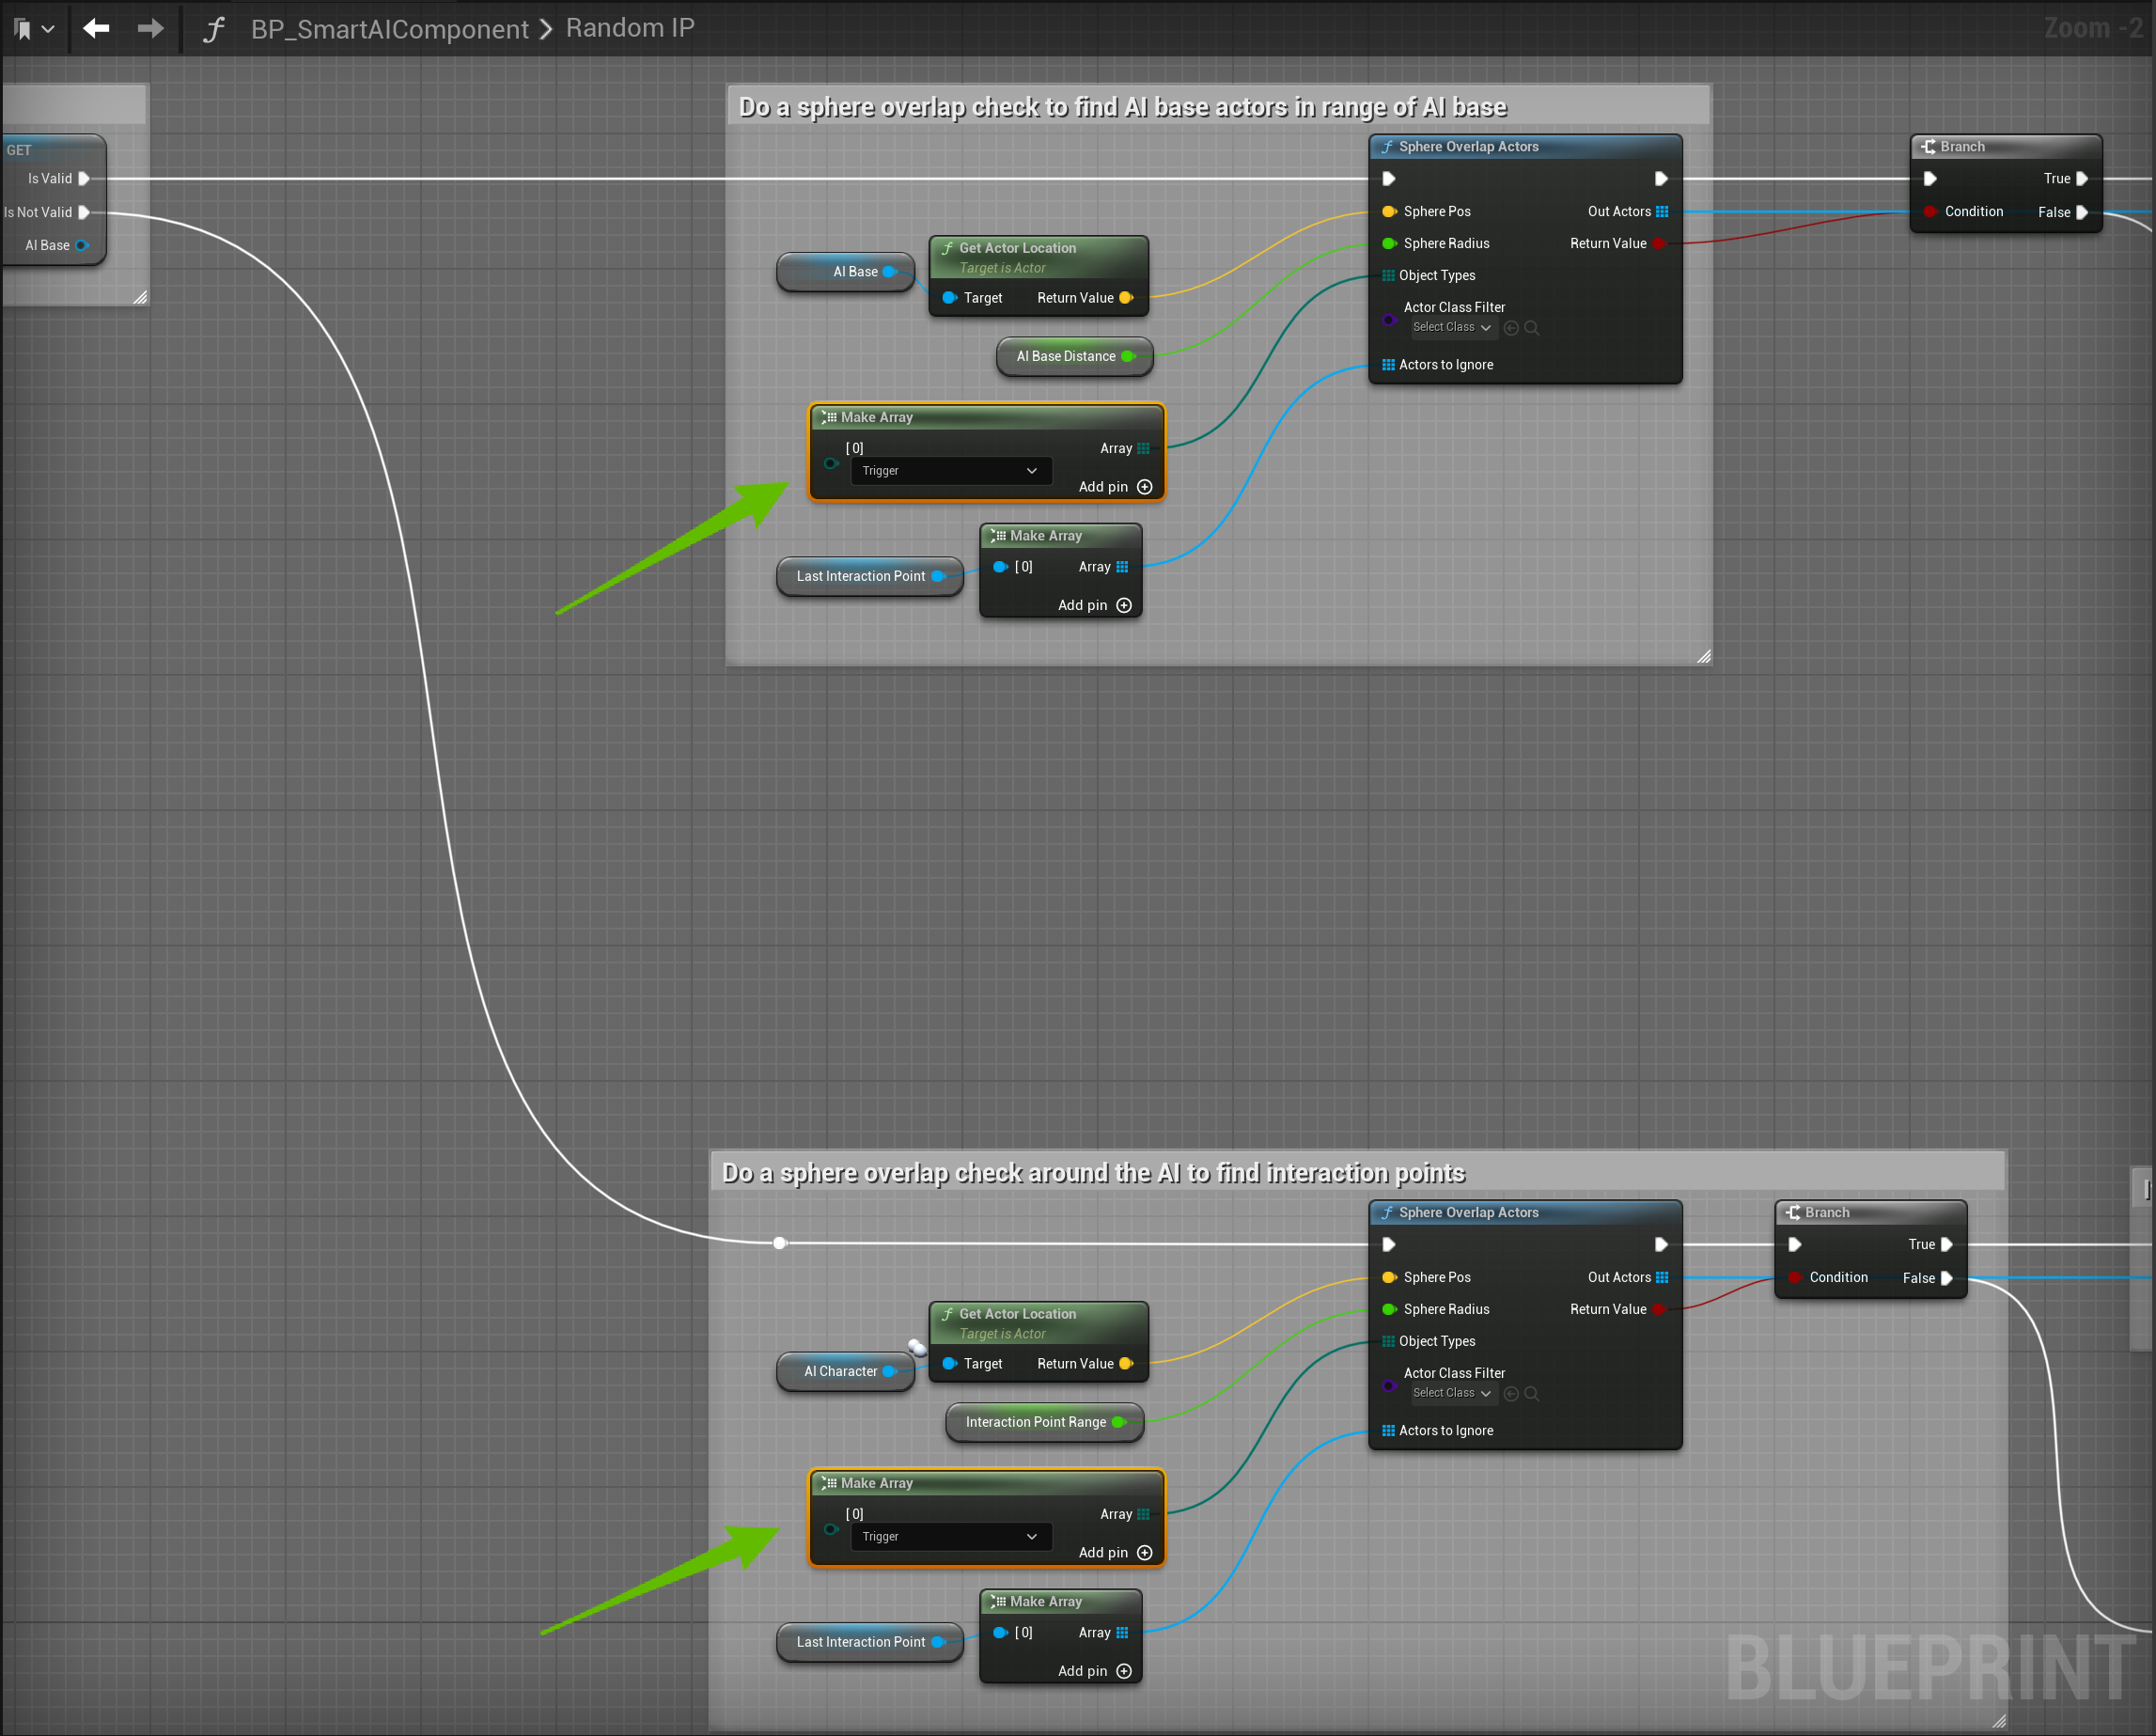
In the BP_SmartAIComponent in the My Blueprint panel search for Random IP and go to that function and set the Make Array nodes like the image below.
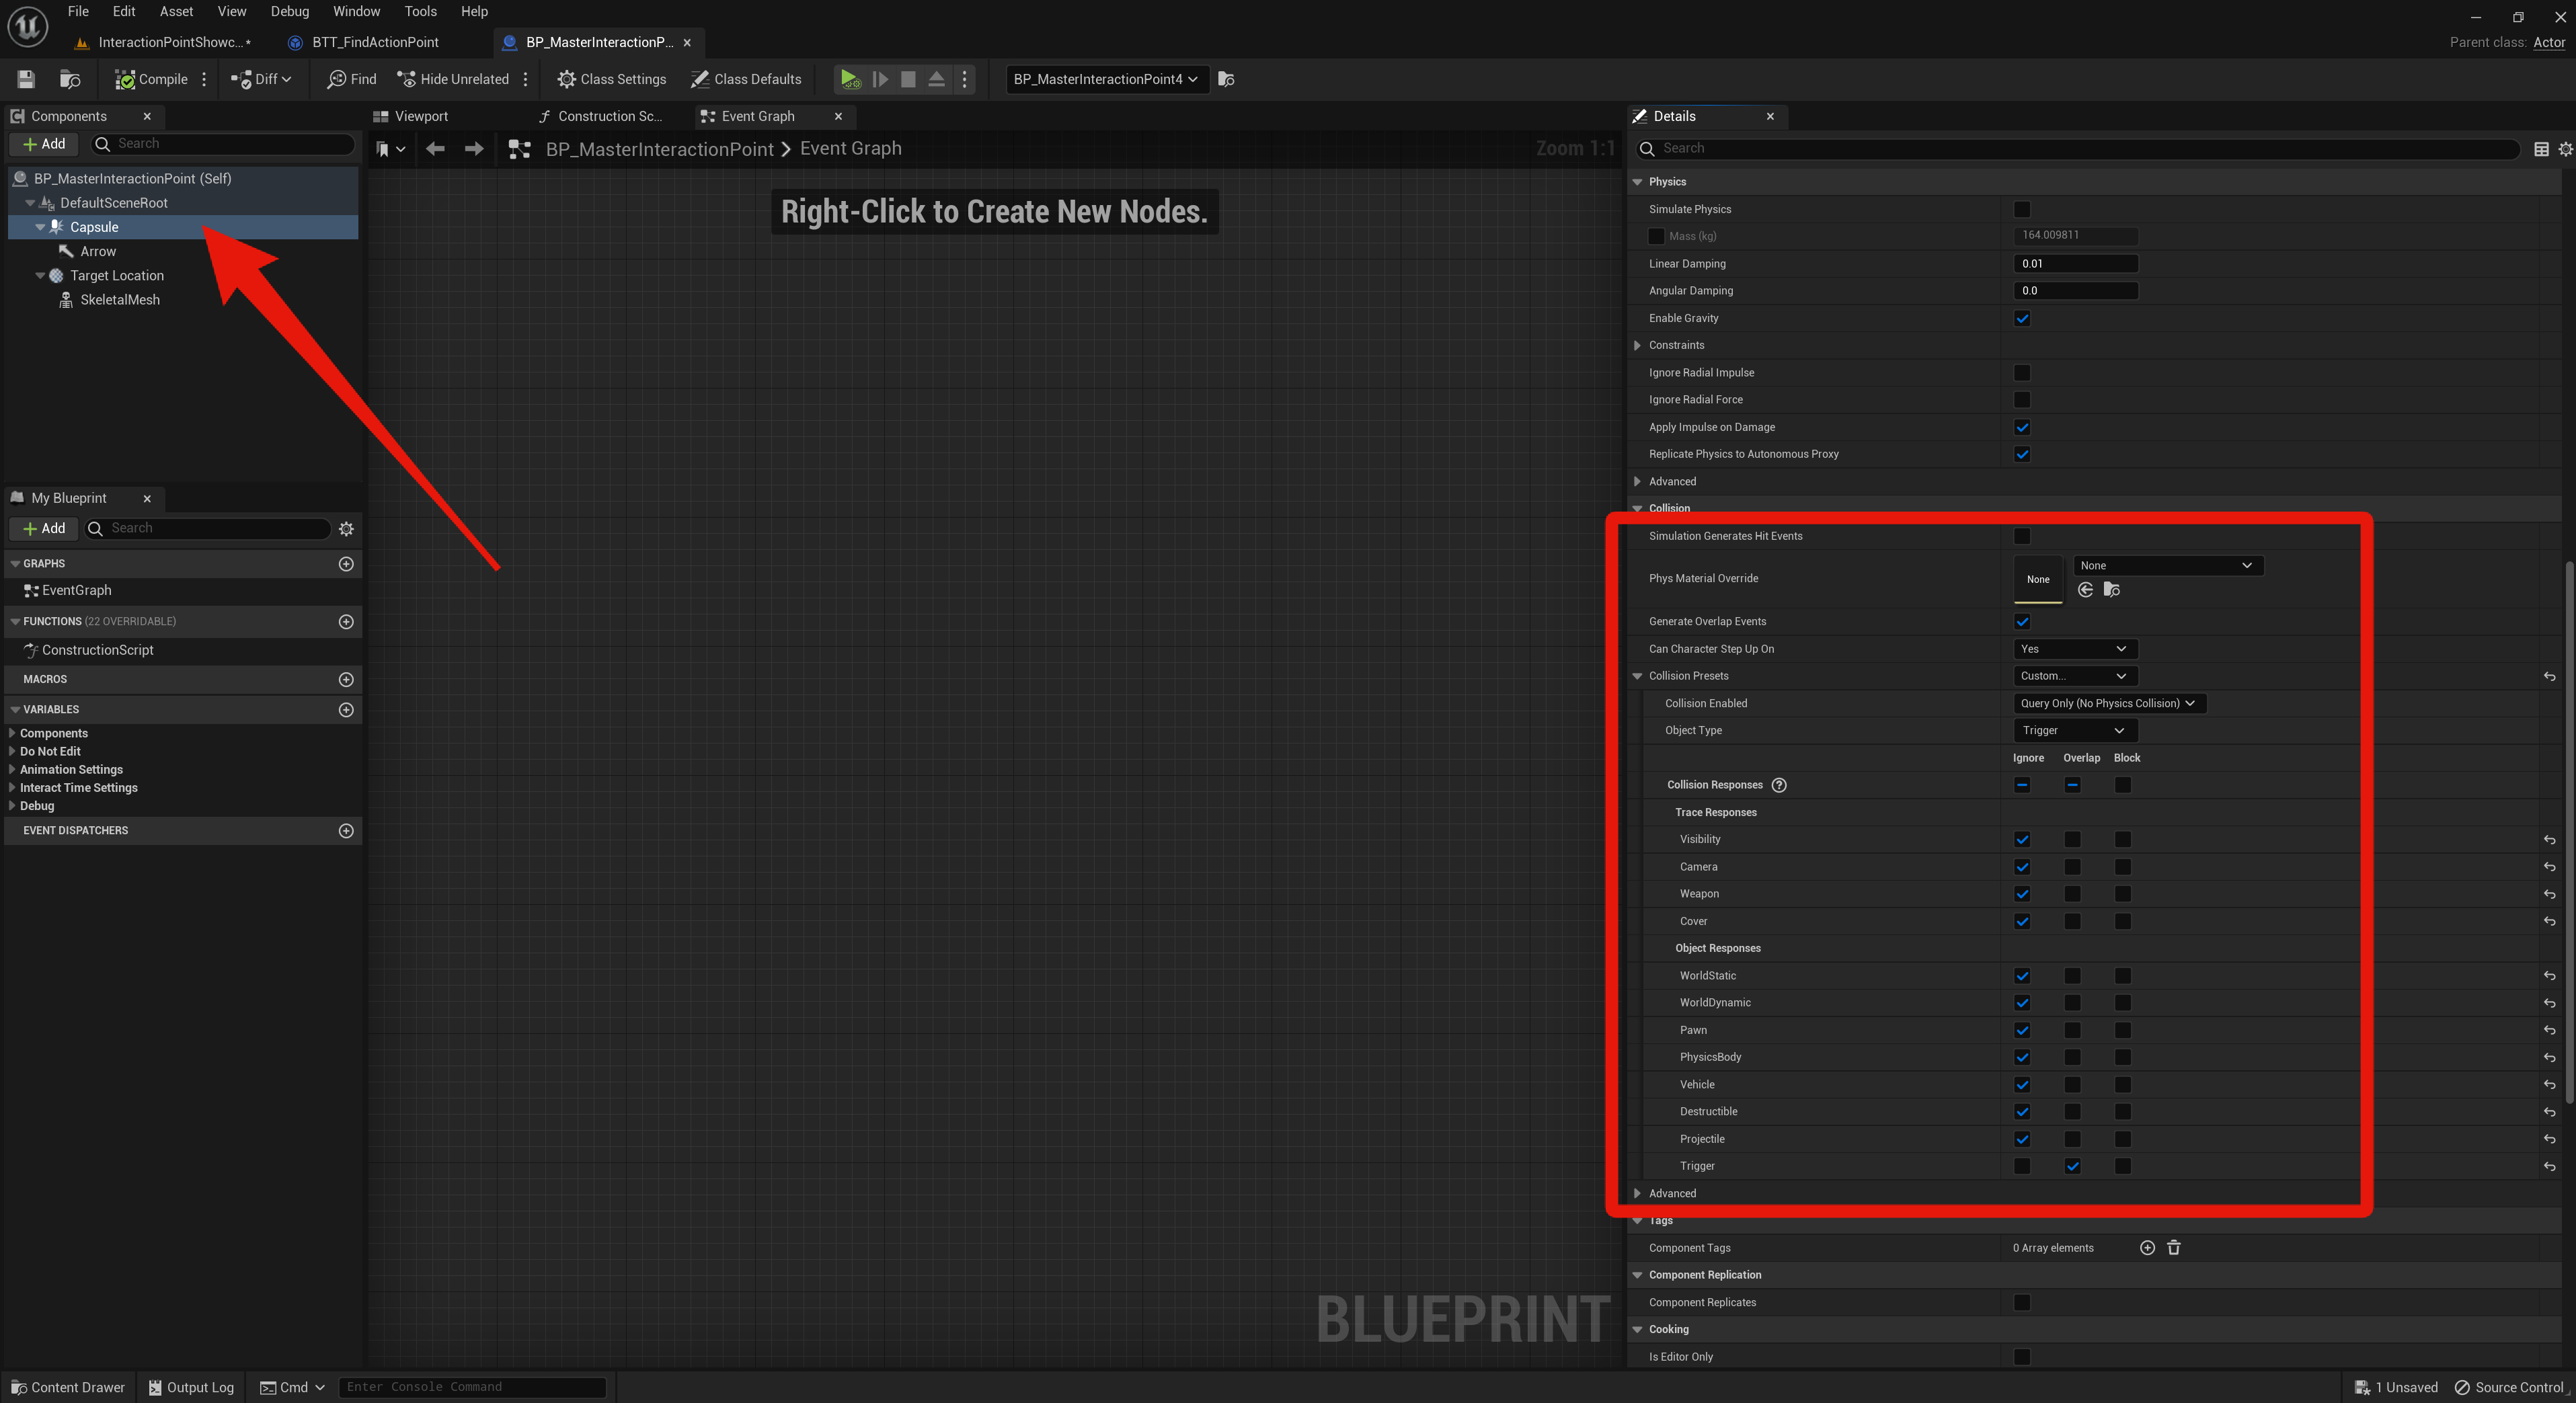
Go to the BP_MasterInteractionPoint blueprint and select the Capsule component and copy the collision settings in the image below.
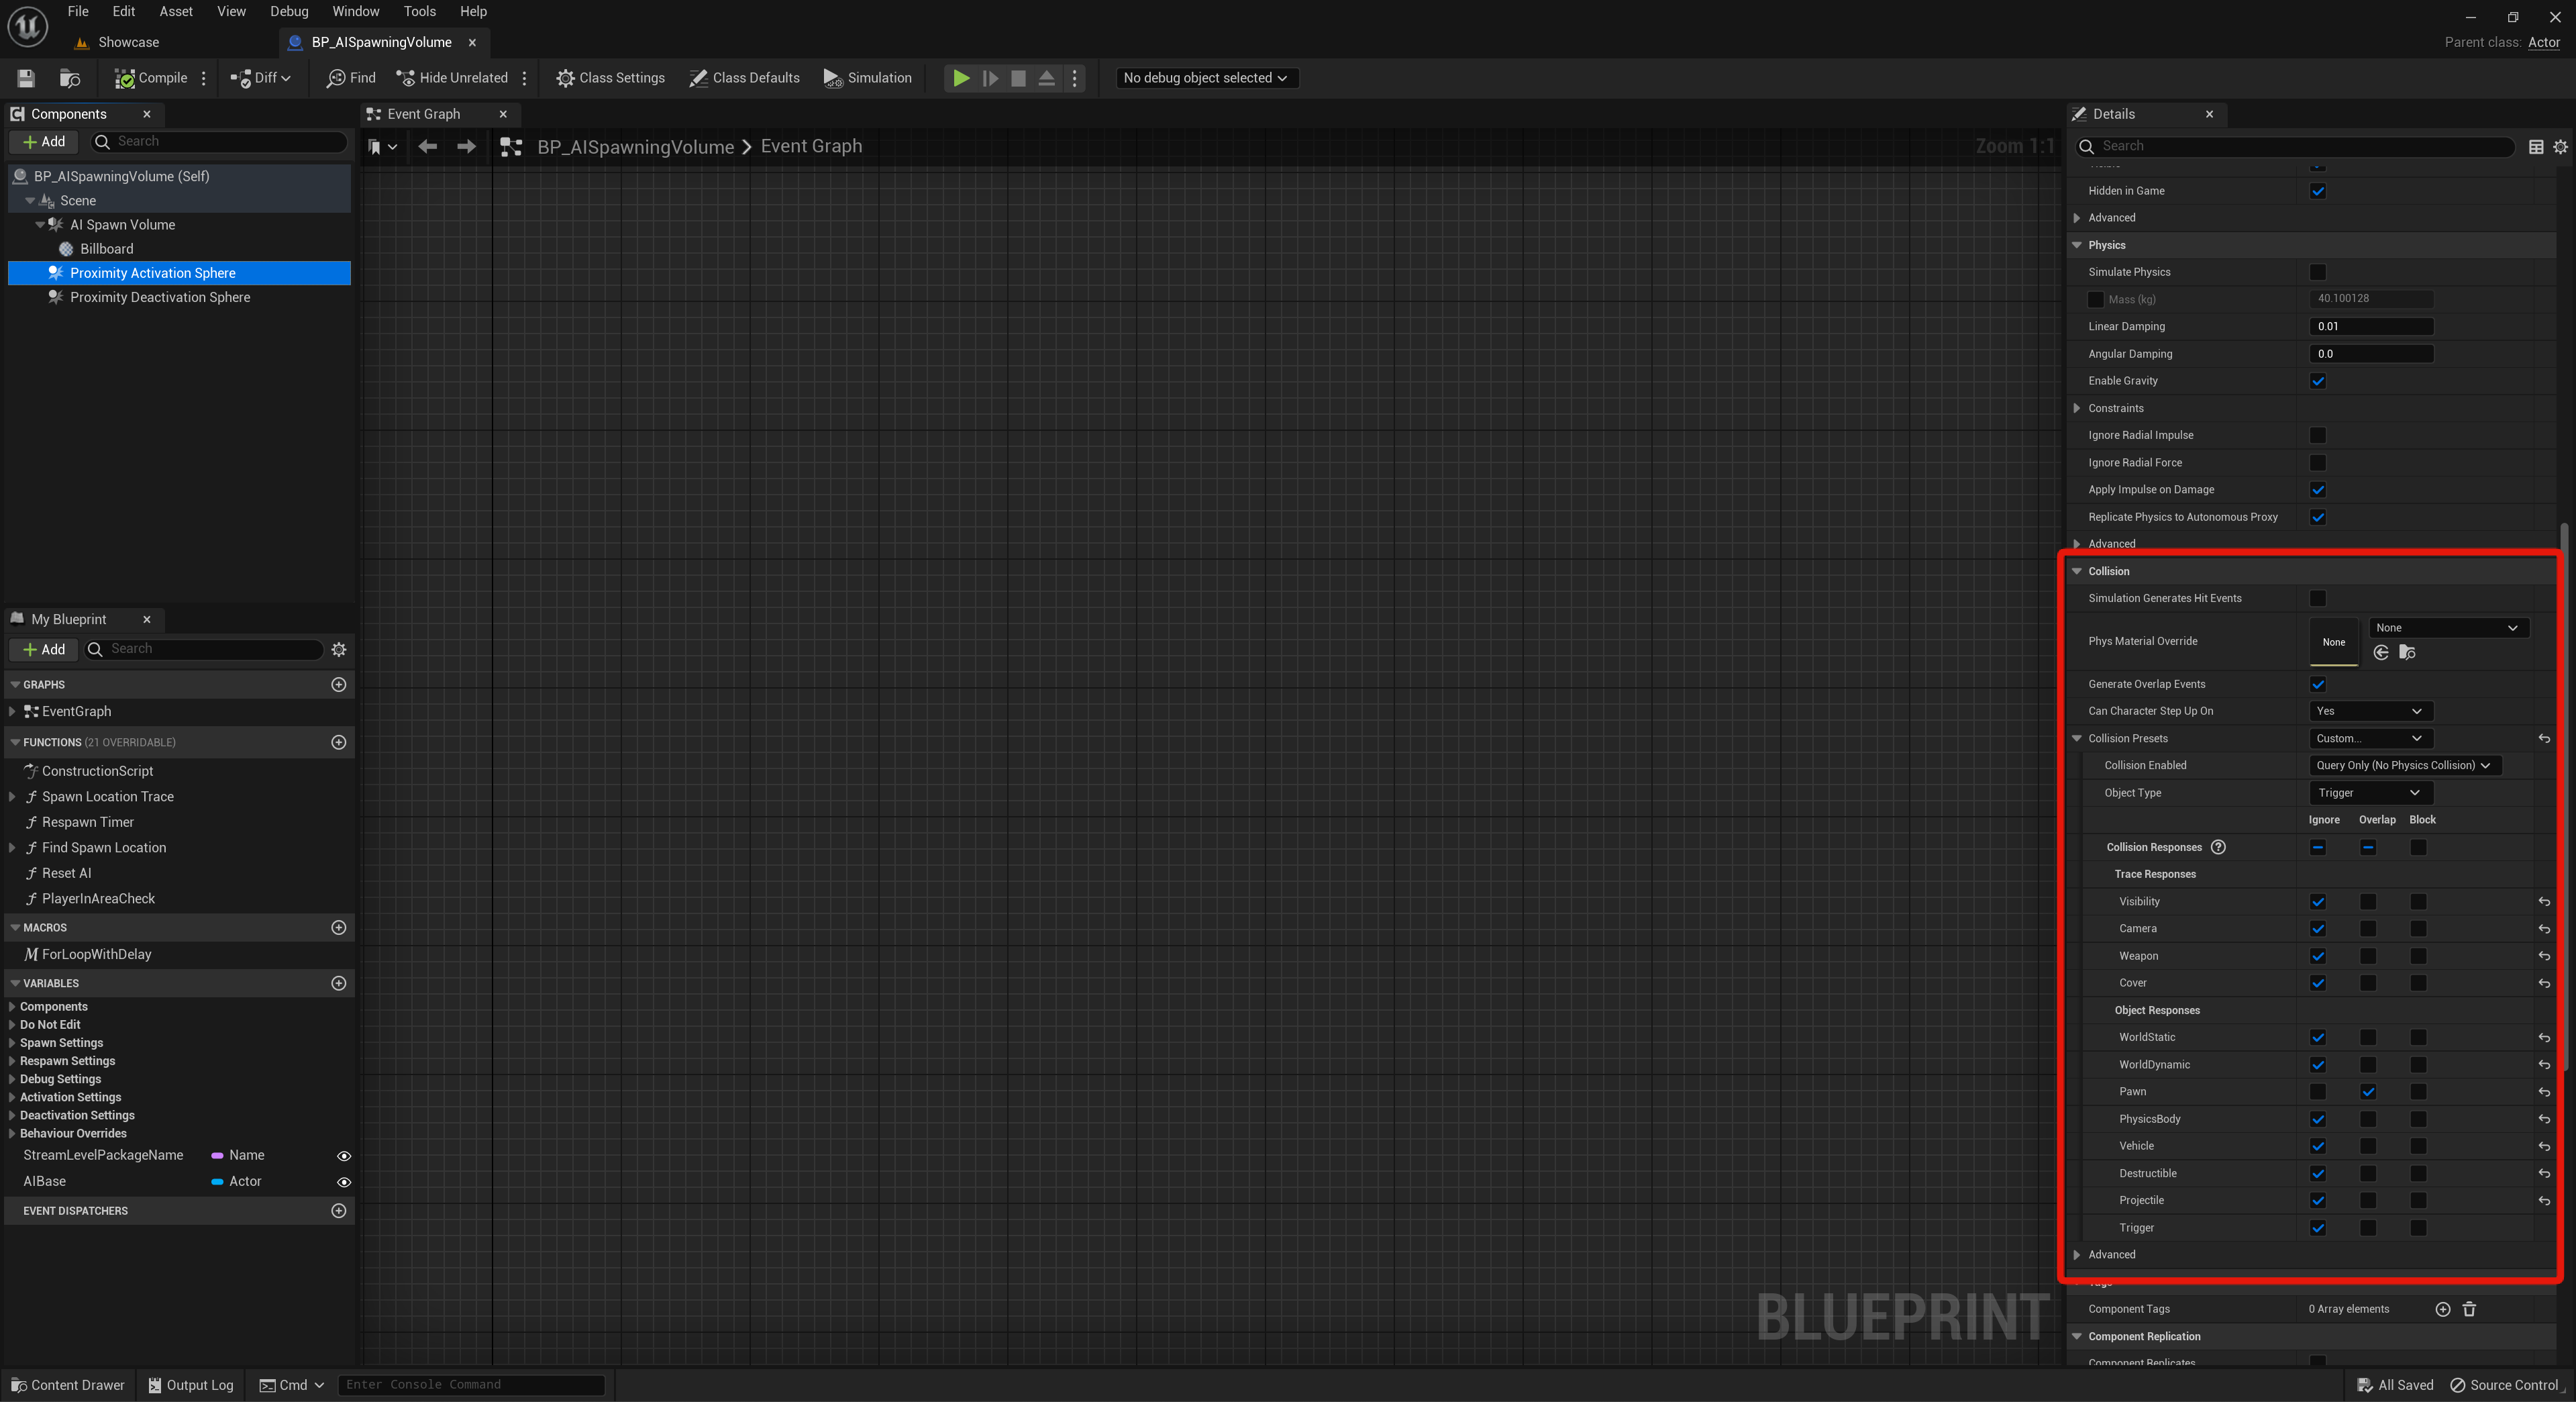
Then open the BP_AISpawningVolume and select the Proximity Activation Sphere Component and in the Details panel set the collision settings like the image below, set everything to Ignore except the Pawn which should be set to Overlap and make sure your set the Object Type to Trigger.
Then repeat the same steps for the Proximity Deactivation Sphere component.
Then repeat the same steps in the BP_AISpawnPoint blueprint with its Proximity Activation Sphere and Proximity Deactivation Sphere components.
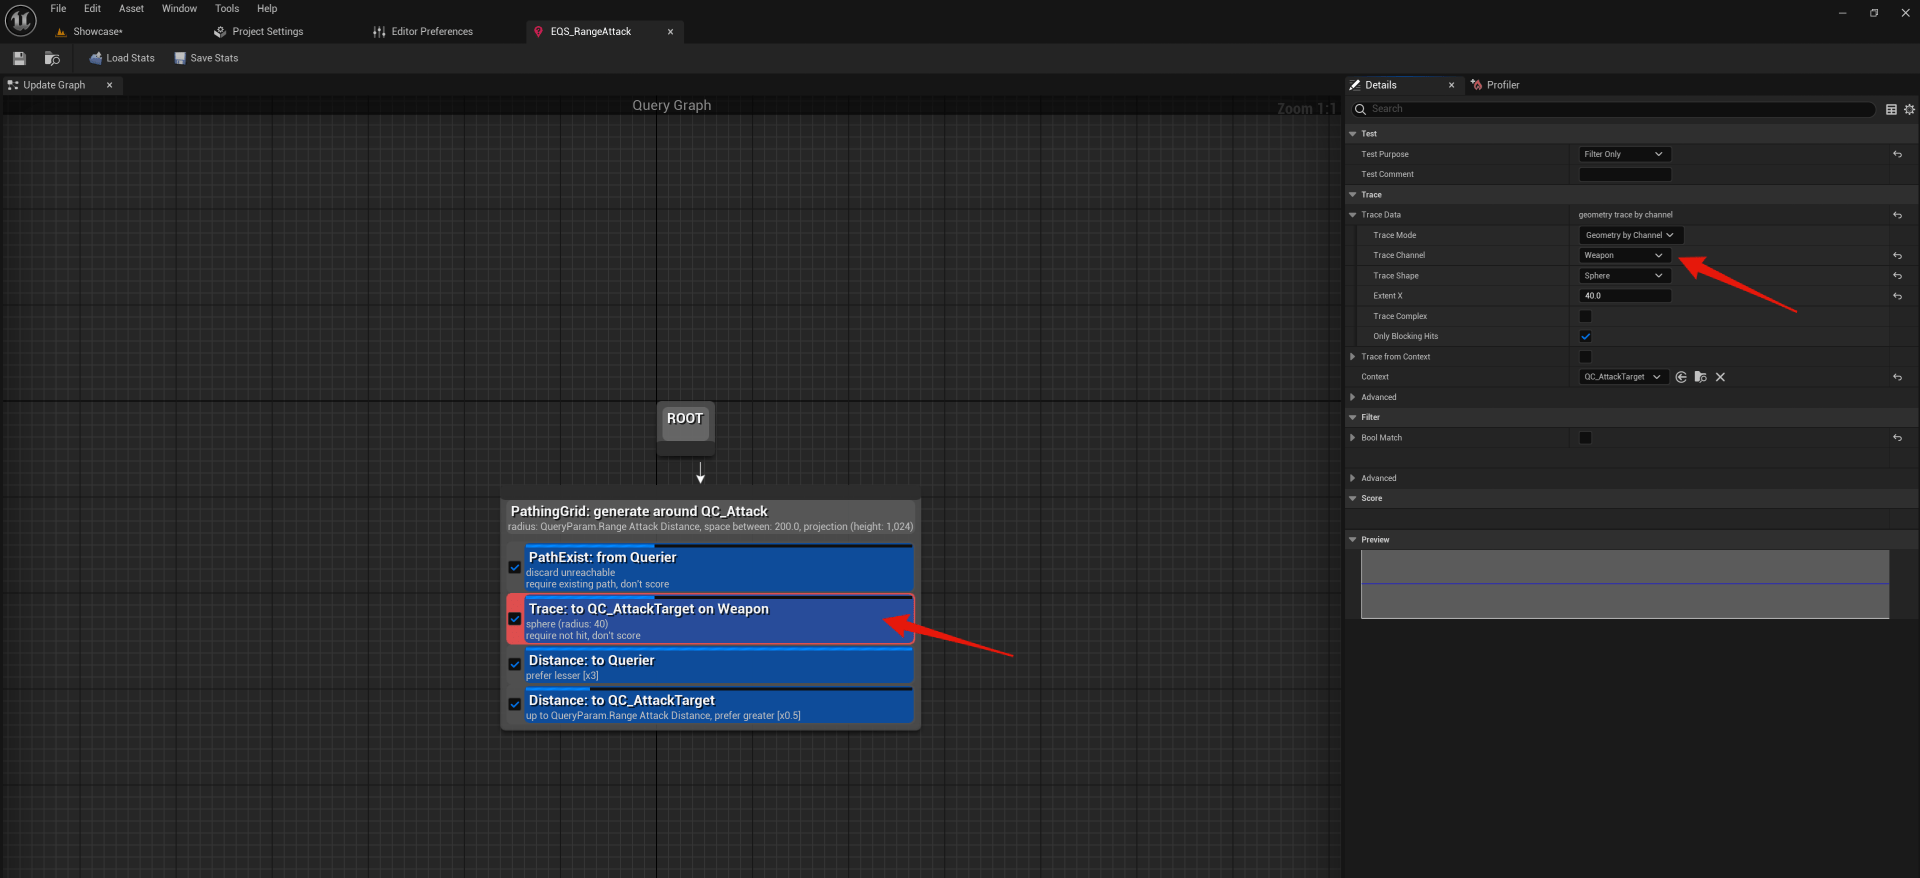
Next open the EQS_RangeAttack blueprint and select the Trace: to QC_AttackTarget on Weapon node, then in the Details set the Trace Channel to Weapon like the image below.
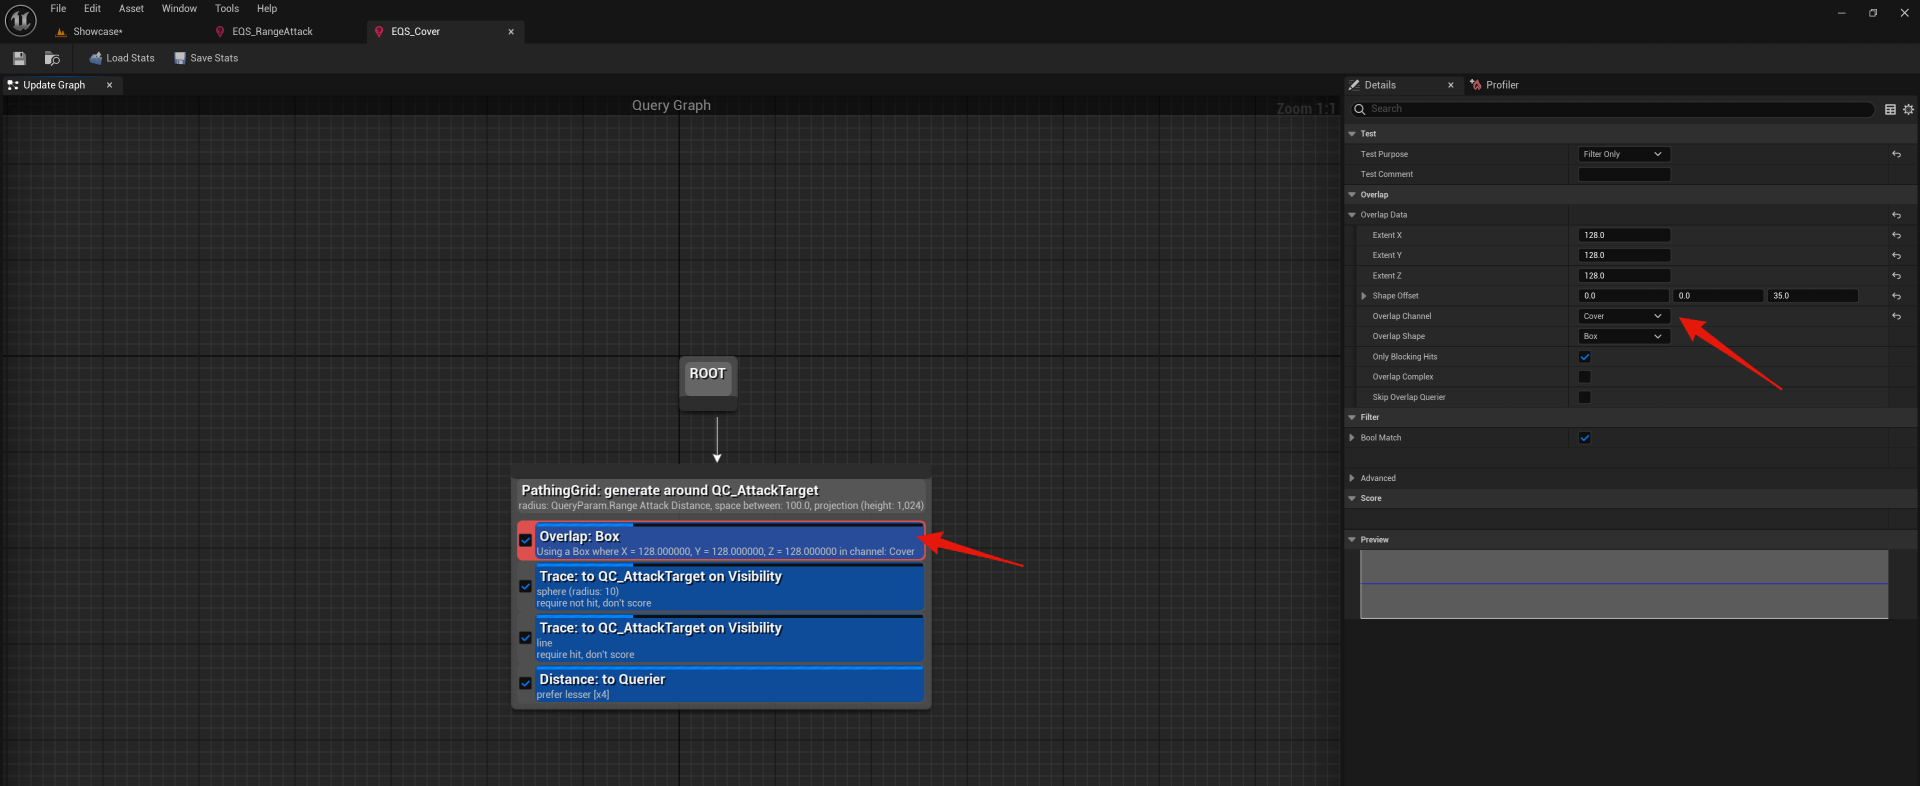
Next open the EQS_Cover blueprint and select the Overlap: Box node, then in the Details set the Overlap Channel to Cover like the image below.